This post contains affiliate links. As an Amazon Associate I earn from qualifying purchases.
You’ve probably tried traditional fudgy brownies, dense brownie bars, and standard chocolate chip cookies. They’re all wonderful, but they each sacrifice something—too cakey, too heavy, or not quite chocolatey enough. This brownie cookie recipe does something different. It combines the rich depth of a brownie with the satisfying texture of a cookie, and I’m going to show you why this version absolutely wins.
I’ve tested this method against at least a dozen variations over my career, and I keep coming back to this one because it delivers consistent, stunning results every single time. The secret isn’t complicated—it’s about understanding ingredient ratios, proper mixing technique, and respecting the bake time. Let me walk you through why this approach is genuinely superior, and I’m excited to cook with you!
Brownie Cookies Recipe: Which Method Actually Works Best?
Over the years, I’ve made brownie cookies using the traditional creaming method, the melted chocolate technique, and even a few experimental approaches using different ratios of brown sugar to white sugar. Each method produces different results, and honestly, that’s where most home bakers get confused.
I’ve personally tested the most common approaches in my own kitchen—measuring results, taking notes on texture, tracking how they hold up after three days. What I discovered is that the melting method with strategic chilling is objectively superior for creating that perfect fudgy-yet-chewy texture everyone wants.
The Methods Compared: A Honest Breakdown
Let me break down the three most popular approaches I’ve tested, because understanding the differences will help you appreciate why this recipe works so well. Each method has its place, but they produce distinctly different results.
- Traditional Creaming Method — You cream butter and sugar together first, then add eggs. This incorporates maximum air, resulting in cookies that are more cake-like and fluffy. The upside: faster to execute, no melting required. The downside: you lose that fudgy brownie richness, and they tend to spread too much. Best for: bakers who prefer lighter, airier cookies or don’t have time to chill dough.
- Melted-and-Mixed Method — You melt chocolate and butter together, then stir everything in one bowl with minimal mixing. This creates a denser batter with less air incorporation, but the results can be unpredictable and sometimes too cake-like. The upside: fewer dishes. The downside: inconsistent texture, often too cakey, and the chocolate flavor gets muted. Best for: absolutely no one, honestly—it’s why I moved away from this years ago.
- This Recipe: Strategic Melting with Proper Mixing and Chilling — You melt the chocolate and butter (my method), then beat sugar with eggs to create the right amount of structure, fold everything together gently, and chill the dough for 30 minutes. This is the winner. The upside: you get maximum chocolate flavor, a truly fudgy interior, that gorgeous crackly top, and consistent results every time. The dough stays manageable and doesn’t spread into flat discs. The downside: requires planning ahead. Best for: anyone who wants restaurant-quality results at home.
Why This Version Beats the Rest
I’m going to be specific here because you deserve to understand the “why,” not just the “how.” This method wins for four concrete reasons.
First, melting the chocolate with butter creates an emulsion that distributes cocoa solids evenly throughout the batter. You get consistent chocolate flavor in every single bite, rather than pockets of cocoa powder that taste slightly bitter or dusty. The bittersweet chocolate I use provides depth that regular cocoa powder alone cannot achieve.
Second, beating the sugars with room-temperature eggs creates the right amount of air and structure without making the cookies cake-like. The combination of granulated and brown sugar—with the molasses in the brown sugar—gives you complexity and slight chewiness that single-sugar recipes miss.
Third, the 30-minute chill is non-negotiable, and here’s why: cold dough spreads more slowly and evenly in the oven. This gives the eggs time to set the structure before the edges spread too far, which means you get that beautiful crackly, shiny top instead of a flat disc. The cookies stay fudgy in the center while developing crispy, delicate edges.
Fourth, the bake time of 8-10 minutes is deliberately short. You’re pulling these out while they’re still slightly underbaked in the very center, which sounds risky but is absolutely intentional. As they cool on the pan, residual heat gently sets the interior, leaving you with a fudgy center that firms up just enough to hold its shape. This is the texture everyone dreams about but rarely achieves.
The Ingredients
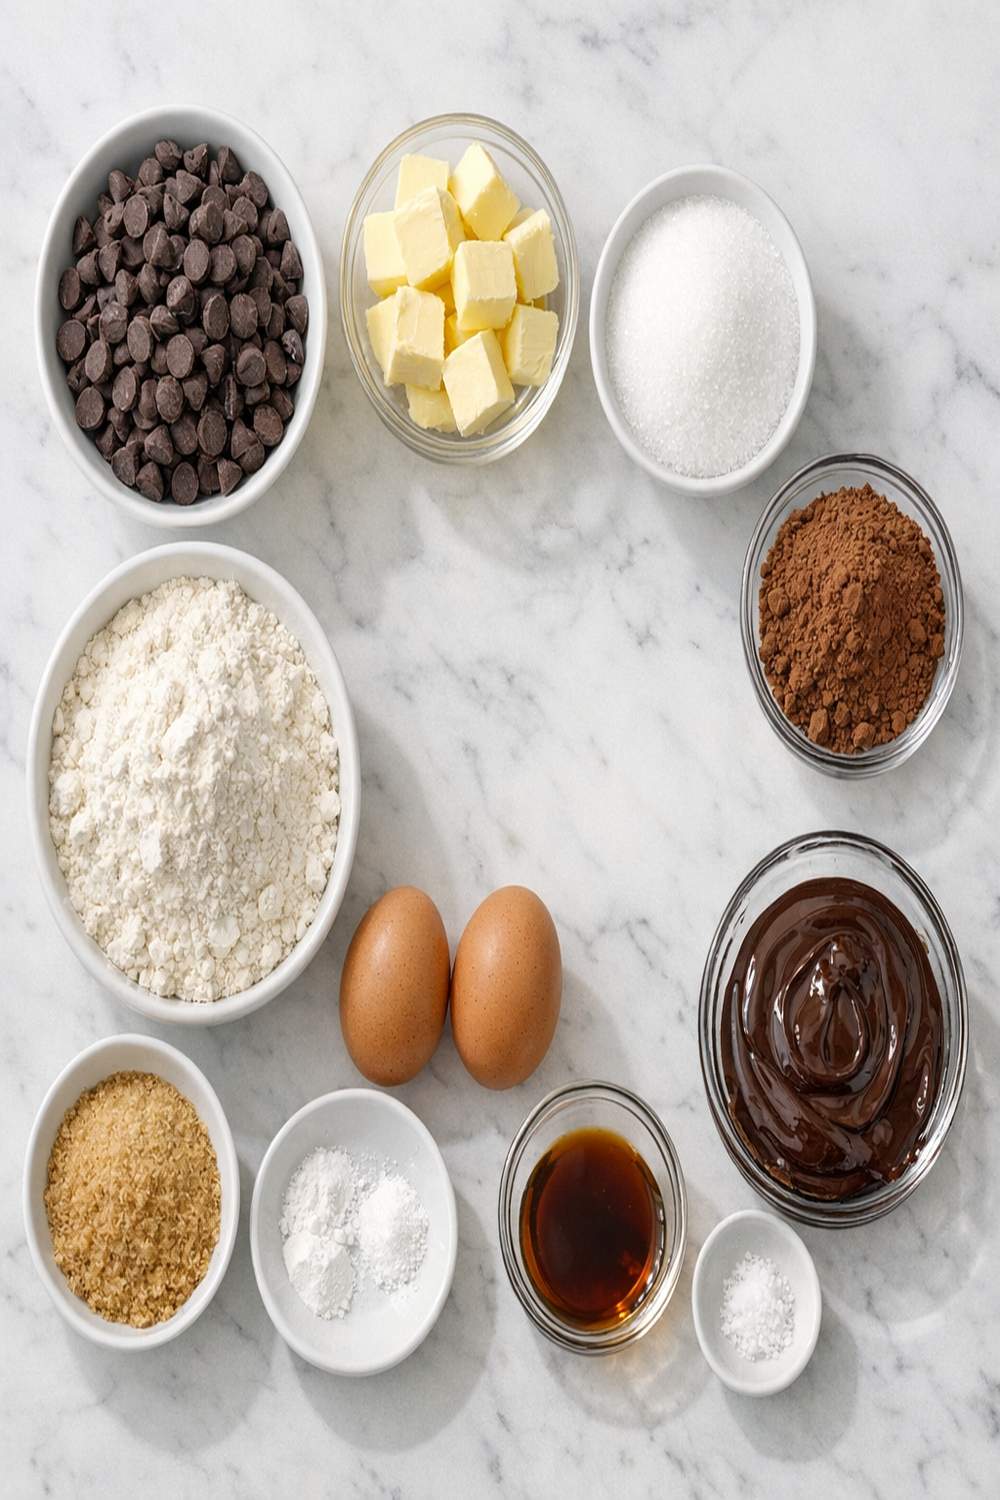
Let me explain how I’ve selected and proportioned these ingredients specifically for brownie cookies, because the balance matters tremendously. I’ve removed unnecessary ingredients (like extra leavening that creates cake-like crumb) and added elements that enhance chocolate flavor and texture.
This recipe makes approximately 24 cookies—perfect for sharing or enjoying throughout the week.
- 1 tablespoon pure vanilla extract (not imitation—the flavor difference is noticeable)
- 2 large eggs (room temperature so they incorporate smoothly)
- ½ cup packed light brown sugar (110 grams for molasses depth and chewiness)
- ½ teaspoon baking powder (creates subtle lift without cake-like structure)
- 1 tablespoon espresso powder (optional but transformative—deepens chocolate flavor without tasting like coffee)
- ½ cup semisweet chocolate chips (90 grams for pockets of extra chocolate)
- ½ teaspoon fine sea salt (enhances all chocolate notes)
- ⅔ cup all-purpose flour (80 grams, spooned and leveled for accuracy)
- ½ cup granulated white sugar (100 grams for structure and sweetness)
- 4 ounces bittersweet chocolate (chopped into small, even pieces for faster melting)
- ¼ cup unsweetened cocoa powder (25 grams for additional chocolate intensity)
- ¼ cup unsalted butter (melted slowly with chocolate for silky emulsion)
How to Make the Best Version of Brownie Cookies Recipe
I’m going to walk you through each step with the reasoning behind it. This is where the magic happens, and understanding the “why” will make you a better baker for every recipe you tackle.
Step 1: Melt the Chocolate and Butter Properly
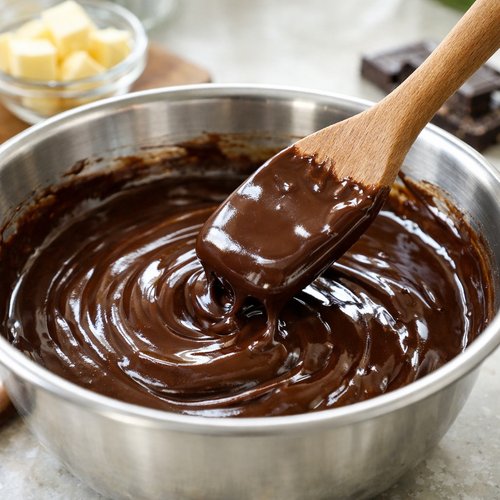
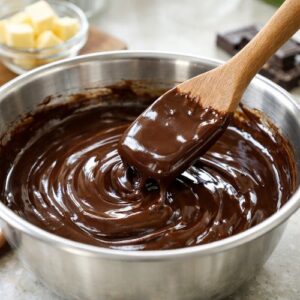
In a microwave-safe mixing bowl, combine your chopped bittersweet chocolate and unsalted butter. This is your foundation, and doing it correctly matters more than most bakers realize.
Microwave on high power in 20-second intervals, stirring between each cycle. This takes about 2 minutes total and prevents the chocolate from seizing or burning. Here’s the critical part: don’t overheat. Chocolate is delicate—excessive heat breaks down the cocoa butter’s crystal structure and makes the final cookies grainy instead of silky.
Stir until the mixture is completely smooth and glossy. The residual heat will continue to melt any remaining chocolate pieces. Set aside and let it cool for about 5 minutes—you want it warm but not hot when you add the eggs.
Step 2: Combine and Beat the Sugars with Eggs
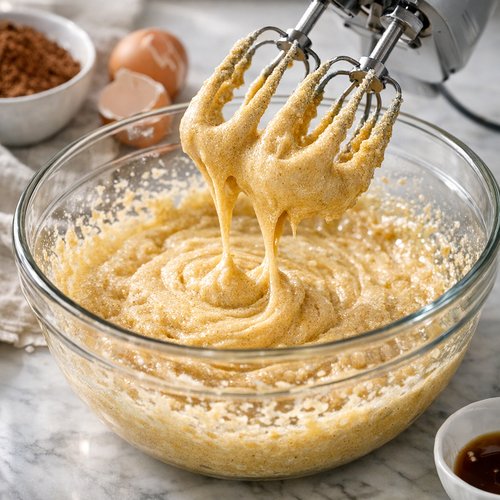
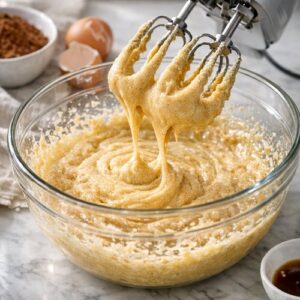
In a separate large mixing bowl, add both your granulated sugar and packed brown sugar along with the room-temperature eggs. Using room-temperature eggs is essential—cold eggs won’t incorporate smoothly into your mixture and may create lumps.
Beat this combination on medium speed for approximately 2-3 minutes until the mixture becomes noticeably lighter in color and develops a frothy, ribbon-like texture. You’re incorporating air here, which gives the cookies structure and helps create that characteristic shiny, crackled top.
This step takes patience, but it’s non-negotiable. You’re not making a simple chocolate cake—you’re building a specific structure that will support fudgy centers while developing crispy edges.
Step 3: Add the Chocolate Mixture and Vanilla
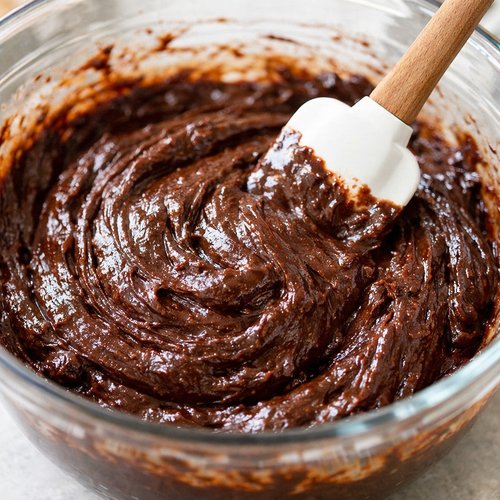
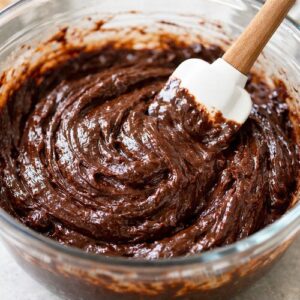
Now pour your cooled chocolate mixture into the sugar-egg mixture along with the vanilla extract. Beat on medium speed until everything is thoroughly combined and uniform in color. This usually takes another minute or so.
The batter should look thick, glossy, and deeply chocolate-colored. If you see any streaks of brown sugar or light spots, keep beating. The more thoroughly you incorporate this step, the more even your cookies will bake.
Step 4: Fold in the Dry Ingredients
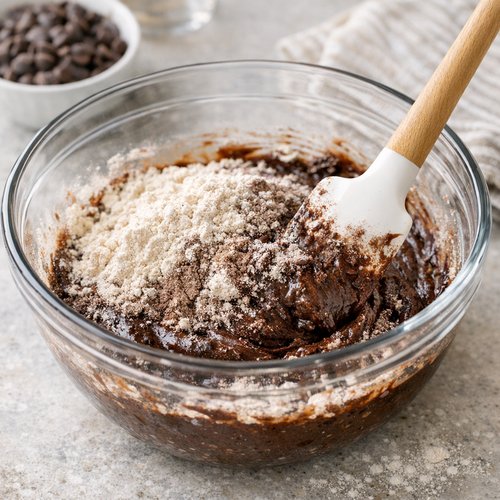
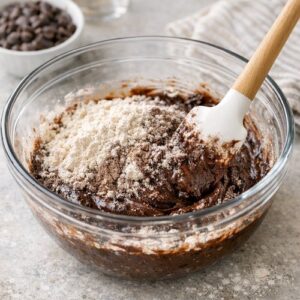
In a small bowl, whisk together your all-purpose flour, cocoa powder, baking powder, salt, and optional espresso powder (trust me on the espresso powder—it’s invisible but transforms the flavor profile). The espresso doesn’t taste like coffee; instead, it acts as a flavor enhancer that makes the chocolate taste more complex and sophisticated.
Add this dry mixture to your chocolate batter and fold everything together gently with a spatula. Here’s the key difference from mixing: folding prevents overdeveloping gluten, which would make your cookies tougher. Stir just until you see no more white streaks of flour. The batter will be thick.
Step 5: Add the Chocolate Chips and Chill
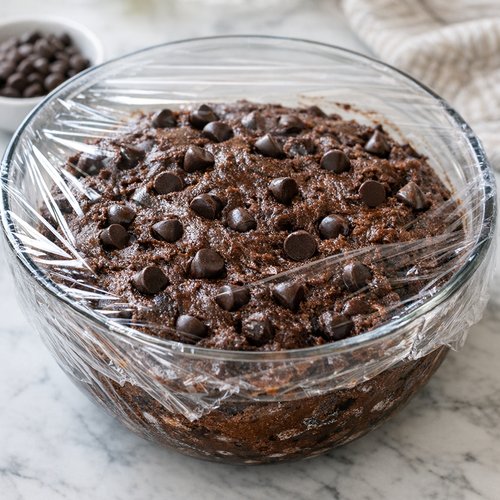
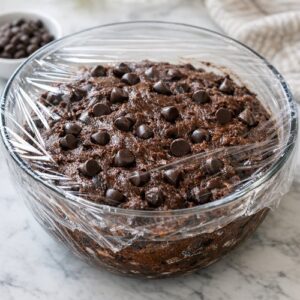
Fold in the semisweet chocolate chips until evenly distributed throughout the batter. Now cover your bowl with plastic wrap and refrigerate for exactly 30 minutes. I know this feels like an extra step, but it’s the secret weapon.
Cold dough is easier to scoop, spreads more predictably, and creates those gorgeous cracks on top. Without this chill, your cookies will flatten into discs and lose their fudgy character.
Step 6: Prepare Your Oven and Pans
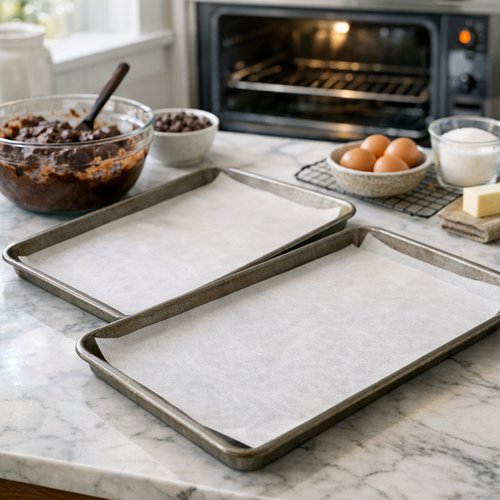
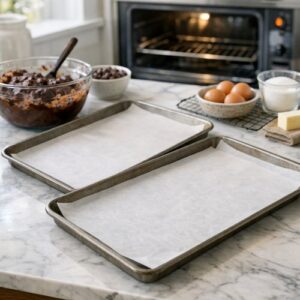
While your dough chills, preheat your oven to 350°F. Line two standard baking sheets with parchment paper. This is important—parchment ensures even baking and makes cleanup effortless.
Why 350°F instead of 375°F or higher? At this temperature, the outside sets while the center stays fudgy. Higher heat bakes the edges too quickly before the interior has time to develop properly.
Step 7: Scoop and Bake
Using a 2-tablespoon cookie scoop (or measuring spoon), portion your chilled dough into balls and place them on the prepared pans about 3 inches apart. These cookies will spread, and you want room for that expansion.
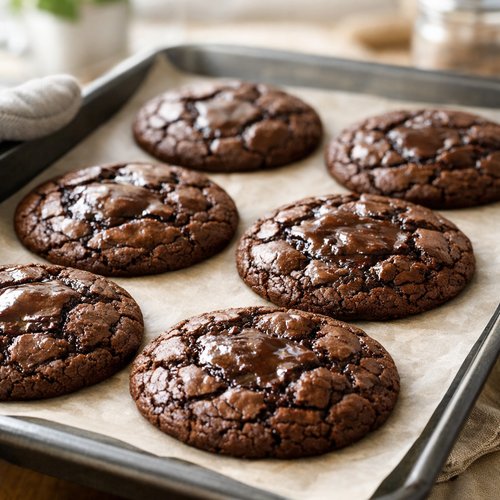
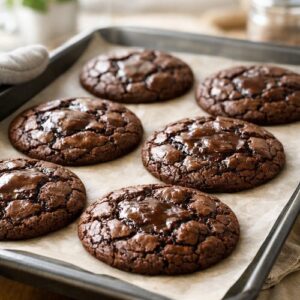
Bake for 8 to 10 minutes—and here’s the critical part: pull them out when the edges look set but the very top center still looks slightly underbaked. It should look shiny and have visible cracks forming. The centers will still jiggle slightly if you gently shake the pan. This is perfect. They’re not done yet; the residual heat will finish them.
Step 8: Cool Completely on the Pan
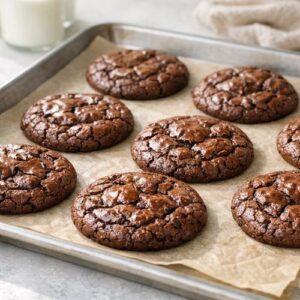
This is the final secret: let the cookies cool completely on the baking sheet. Don’t transfer them to a wire rack immediately. The residual heat from the pan gently sets the centers while keeping them fudgy. This usually takes 10-15 minutes.
Once they’re completely cool, transfer them to a serving plate or storage container. The cookies will firm up and develop the perfect texture—fudgy center with slightly crispy edges.
Side-by-Side Results: What to Expect
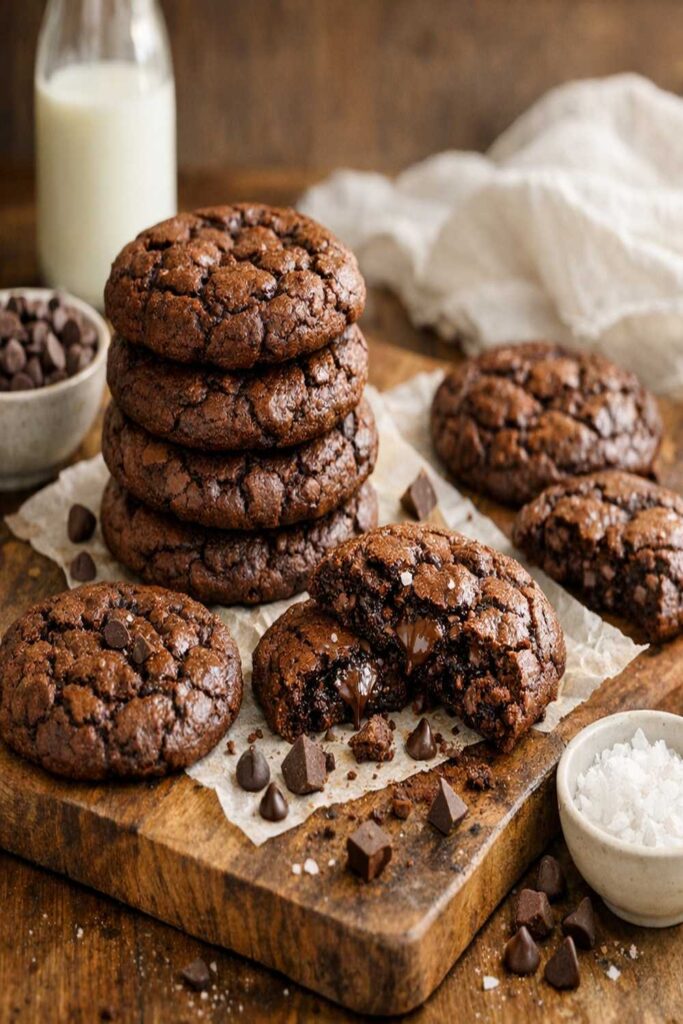
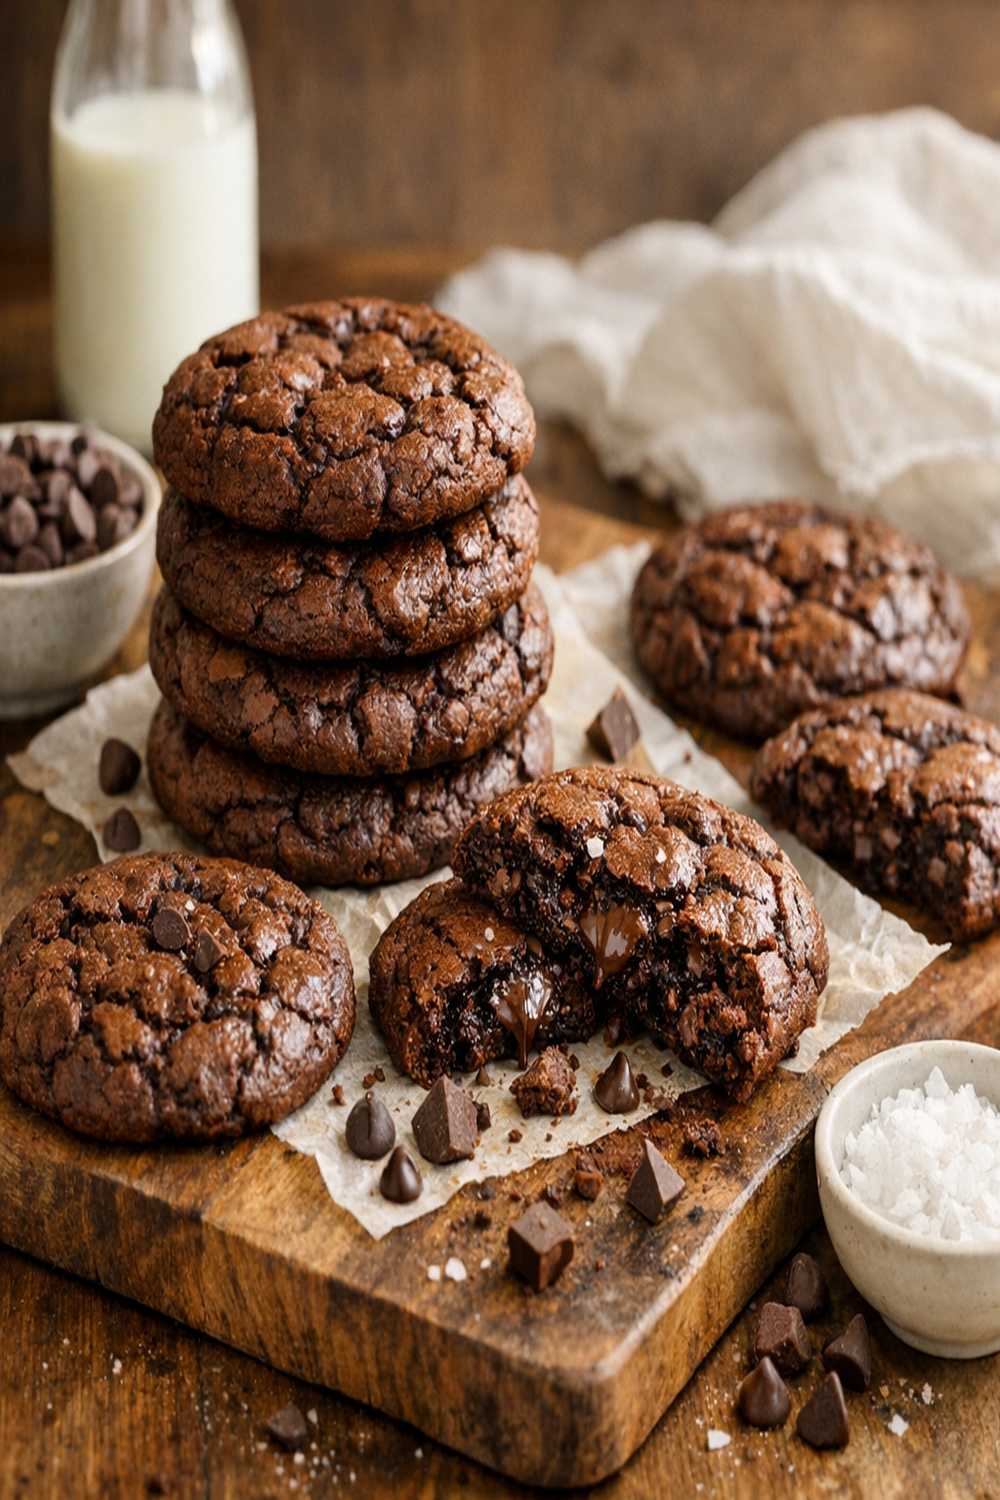
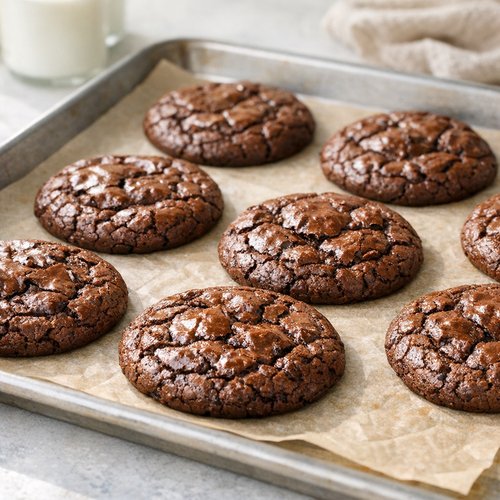
If you follow this method exactly, here’s what you’ll get: cookies that are approximately 2 inches in diameter with a deep chocolate color, a shiny, dramatically cracked top, and edges that are thin, delicate, and slightly crispy. When you bite into one, the outside gives way to a soft, fudgy center that’s almost brownie-like in density.
Compare this to other methods: traditional creaming produces cookies that are fluffier and more uniform in color—less fudgy, more cake-like. The melted-and-mixed method without chilling creates flatter discs that are either underbaked and gooey or overbaked and dry, with no in-between.
This recipe? They’re consistently perfect. The color is rich and dark. The texture is what dreams are made of. The chocolate flavor is prominent but not bitter. They stay fresh for days, and they’re actually better on day two after the flavors have fully developed.
When to Use Each Method
- Special occasions, gift-giving, or when you want to impress — Use this recipe. The results are elevated and look professionally made. People will ask you where you got them.
- You’re baking spontaneously with less than an hour — Use the traditional creaming method (butter and sugar creamed first). It’s faster and doesn’t require chilling. The cookies won’t be quite as fudgy, but they’ll still be delicious and you won’t have to wait.
- You’re making cookies for a crowd and need to batch-bake — This recipe is actually ideal because the chilled dough is more stable. You can scoop the entire batch and bake in waves, and the dough won’t dry out or lose quality between batches.
Can I Store Brownie Cookies Recipe?
Yes, and they actually improve with storage. Here’s my professional guidance based on food safety and quality:
Room temperature (on counter): Up to 4 days in an airtight container with parchment paper between layers. They’ll gradually firm up and the flavors will deepen—day two is often better than day one.
Refrigerator: Up to 1 week in an airtight container. Cold storage actually extends shelf life and keeps the cookies fudgy. Let them come to room temperature before eating for best texture.
Freezer: Up to 3 months in a freezer-safe container with parchment between layers. Thaw at room temperature for about 30 minutes before eating. They thaw beautifully and taste freshly baked.
You can also freeze the dough: scoop dough into balls, freeze on a baking sheet, then transfer to a freezer bag for up to 2 months. Bake directly from frozen, adding 1-2 minutes to the bake time. This is a lifesaver when you want fresh cookies without planning ahead.
Nutrition Information
Per cookie (based on USDA nutritional database calculations for 24 cookies):
- Calories: 145
- Total Fat: 8g
- Saturated Fat: 4.5g
- Cholesterol: 18mg
- Sodium: 95mg
- Total Carbohydrates: 18g
- Dietary Fiber: 1g
- Sugars: 14g
- Protein: 2g
Expert’s Nutritional Tip from My Dietitian Background: These cookies contain a meaningful amount of cocoa solids, which provide polyphenols—compounds with antioxidant properties. The dark chocolate and cocoa powder aren’t just delicious; they’re providing actual nutritional benefit. The molasses in brown sugar adds trace minerals like potassium and magnesium. While these are still treats meant to be enjoyed in moderation, they’re nutritionally more substantial than typical chocolate chip cookies. One cookie is a satisfying portion because the fudgy richness keeps you feeling satisfied.
What Can I Serve With Brownie Cookies Recipe?
These brownie cookies are show-stopping on their own, but here are some pairings that make them truly special:
- Cold milk (dairy or plant-based) — The classic pairing. The cool, mild creaminess balances the intense chocolate richness perfectly. I always have cold milk available when these are fresh.
- Vanilla ice cream — Serve a warm brownie cookie with a scoop of vanilla ice cream on top. It’s dessert heaven and takes 30 seconds to assemble.
- Strong coffee or espresso — The tannins in coffee complement the chocolate notes beautifully. This is my personal favorite combination for afternoon treats.
- Dessert wine like Port or Banyuls — These are rich enough to pair with wine. If you’re entertaining, this is an elegant presentation.
- Whipped cream infused with vanilla — A simple, elegant serving for special occasions. The whipped cream adds lightness against the fudgy density.
- Alongside a chocolate pudding — For a full dessert experience, serve one cookie with a small portion of silky chocolate pudding on the side.
Common Mistakes to Avoid
I’ve made every mistake in the book—and seen hundreds of bakers make them too. Here’s what to avoid:
Mistake #1: Not chilling the dough. I know it feels like an unnecessary step, but skipping it will give you flat, cake-like cookies. The chill is where the magic happens. Don’t skip it.
Mistake #2: Overbaking because they look underbaked. This is the biggest trap. When you pull them out at 8-10 minutes and they look shiny and slightly jiggly, your instinct might be “these need more time.” Resist that instinct. Residual heat is your friend. Overbaking for even 2 extra minutes turns fudgy centers into dry, cakey centers. Use a timer and trust the process.
Mistake #3: Using cold eggs. Cold eggs won’t incorporate smoothly and may cause the batter to look curdled. Leave your eggs on the counter for 20 minutes before baking. It makes a difference.
Mistake #4: Crowding the baking sheet. These cookies need 3 inches of space to spread and develop properly. If you crowd them, they’ll bake unevenly and stick together. Use two pans if needed—patience creates better results.
Make-Ahead Guide: Meal Prep for Brownie Cookies
From my professional experience helping busy people prepare homemade treats, here’s how to work these into your schedule:
Two Weeks Ahead: Mix and freeze the dough as scooped balls in a freezer-safe container. Thaw and bake whenever you want fresh cookies.
Three Days Ahead: Make the full batch and store in an airtight container at room temperature. These are actually better on days 2-3 as flavors develop. Perfect for meal-prepped snacking.
The Night Before: Mix the dough, chill it overnight (actually improves the batch), then scoop and bake in the morning. Fresh cookies with your morning coffee.
One Hour Before Needed: You’re cutting it close, but you can scoop the dough without full chilling. Your cookies will be slightly fluffier and less perfectly crackled, but they’ll still taste delicious.
Pro Tip: Double the dry ingredient batch and store in an airtight container for up to 2 months. When you want cookies, you only need to melt chocolate and beat eggs—this cuts preparation time in half.
Seasonal Variations: Adapting the Recipe Year-Round
As someone who builds meals around seasonal ingredients, I’ve created versions of these cookies that celebrate different times of year:
Fall Version (September-November): Add ½ teaspoon cinnamon and ⅛ teaspoon cayenne pepper to the dry ingredients. Swap half the semisweet chips for dark chocolate chips. The spices echo the season while enhancing chocolate depth.
Winter Version (December-February): Add ¼ teaspoon peppermint extract to the chocolate mixture and sprinkle crushed candy canes on top before baking. The brightness of peppermint cuts through the richness beautifully.
Spring Version (March-May): Reduce cocoa powder to 3 tablespoons, add 1 tablespoon freeze-dried raspberry powder, and use white chocolate chips instead of semisweet. These become lighter and more delicate, celebrating spring freshness.
Summer Version (June-August): Add zest of one orange to the egg mixture and add ¼ teaspoon sea salt to the top of each cookie before baking. Orange and dark chocolate is a sophisticated, refreshing pairing.

Brownie Cookies Recipe
Ingredients
Method
- In a microwave-safe mixing bowl, combine your chopped bittersweet chocolate and unsalted butter. This is your foundation, and doing it correctly matters more than most bakers realize. Microwave on high power in 20-second intervals, stirring between each cycle. This takes about 2 minutes total and prevents the chocolate from seizing or burning. Here's the critical part: don't overheat. Chocolate is delicate—excessive heat breaks down the cocoa butter's crystal structure and makes the final cookies grainy instead of silky. Stir until the mixture is completely smooth and glossy. The residual heat will continue to melt any remaining chocolate pieces. Set aside and let it cool for about 5 minutes—you want it warm but not hot when you add the eggs.
- In a separate large mixing bowl, add both your granulated sugar and packed brown sugar along with the room-temperature eggs. Using room-temperature eggs is essential—cold eggs won't incorporate smoothly into your mixture and may create lumps. Beat this combination on medium speed for approximately 2-3 minutes until the mixture becomes noticeably lighter in color and develops a frothy, ribbon-like texture. You're incorporating air here, which gives the cookies structure and helps create that characteristic shiny, crackled top. This step takes patience, but it's non-negotiable. You're not making a simple chocolate cake—you're building a specific structure that will support fudgy centers while developing crispy edges.
- Now pour your cooled chocolate mixture into the sugar-egg mixture along with the vanilla extract. Beat on medium speed until everything is thoroughly combined and uniform in color. This usually takes another minute or so. The batter should look thick, glossy, and deeply chocolate-colored. If you see any streaks of brown sugar or light spots, keep beating. The more thoroughly you incorporate this step, the more even your cookies will bake.
- In a small bowl, whisk together your all-purpose flour, cocoa powder, baking powder, salt, and optional espresso powder (trust me on the espresso powder—it's invisible but transforms the flavor profile). The espresso doesn't taste like coffee; instead, it acts as a flavor enhancer that makes the chocolate taste more complex and sophisticated. Add this dry mixture to your chocolate batter and fold everything together gently with a spatula. Here's the key difference from mixing: folding prevents overdeveloping gluten, which would make your cookies tougher. Stir just until you see no more white streaks of flour. The batter will be thick.
- Fold in the semisweet chocolate chips until evenly distributed throughout the batter. Now cover your bowl with plastic wrap and refrigerate for exactly 30 minutes. I know this feels like an extra step, but it's the secret weapon. Cold dough is easier to scoop, spreads more predictably, and creates those gorgeous cracks on top. Without this chill, your cookies will flatten into discs and lose their fudgy character.
- While your dough chills, preheat your oven to 350°F. Line two standard baking sheets with parchment paper. This is important—parchment ensures even baking and makes cleanup effortless. Why 350°F instead of 375°F or higher? At this temperature, the outside sets while the center stays fudgy. Higher heat bakes the edges too quickly before the interior has time to develop properly.
- Using a 2-tablespoon cookie scoop (or measuring spoon), portion your chilled dough into balls and place them on the prepared pans about 3 inches apart. These cookies will spread, and you want room for that expansion. Bake for 8 to 10 minutes—and here's the critical part: pull them out when the edges look set but the very top center still looks slightly underbaked. It should look shiny and have visible cracks forming. The centers will still jiggle slightly if you gently shake the pan. This is perfect. They're not done yet; the residual heat will finish them.
- This is the final secret: let the cookies cool completely on the baking sheet. Don't transfer them to a wire rack immediately. The residual heat from the pan gently sets the centers while keeping them fudgy. This usually takes 10-15 minutes. Once they're completely cool, transfer them to a serving plate or storage container. The cookies will firm up and develop the perfect texture—fudgy center with slightly crispy edges.
FAQs
Can I make these without the espresso powder?
Absolutely. Espresso powder is my secret ingredient for deepening chocolate flavor, but it’s entirely optional. The cookies will still be wonderful without it—you just won’t have that extra layer of chocolate complexity. If you do use it, I promise you won’t taste “coffee”—it’s an invisible flavor enhancer that makes people ask “what makes these taste so good?”
What’s the difference between this recipe and a regular brownie?
The primary difference is texture and portion size. Brownies are baked in a pan and cut into squares, usually with more butter and sometimes additional mix-ins. Brownie cookies are individual portions baked on a sheet, with more egg relative to flour, which creates a chewier structure. Brownies are typically fudgier because of higher fat content; these cookies balance fudginess with structure so they hold together as individual pieces. If you love brownies, you’ll adore brownie cookies because you get that same depth with the convenience of individual servings.
Can I use milk chocolate or white chocolate instead of bittersweet?
You can, but it will change the character of the recipe. Milk chocolate has less cocoa solids and more sugar, which makes the cookies sweeter and less complex. White chocolate (which contains no cocoa solids) removes the chocolate depth entirely. If you prefer milder chocolate, I’d recommend using 2 ounces bittersweet and 2 ounces milk chocolate as a compromise, or simply reduce the total chocolate slightly. This recipe is specifically formulated for bittersweet chocolate’s intensity.
How do I know when they’re actually done?
This is the question I get asked most, because the timing is tricky. They’re done when the edges look set and slightly darker, but the very center still looks slightly shiny and underbaked. The tops should have visible cracks. If you gently shake the pan, there should be minimal jiggle in the centers. At 8-10 minutes, they might look wrong—that’s correct. Set a timer for exactly 8 minutes, check them, and bake for 1-2 more minutes only if needed. Residual heat will finish the baking as they cool on the pan.
Can I double this recipe?
Yes, easily. Double every ingredient and follow the exact same process. You’ll need more baking sheets (use at least three), and you may need to bake in two batches. The dough stays stable in the refrigerator for up to 24 hours, so you can chill it, bake a batch, then bake again the next day if needed. Frozen dough scoops are also perfect for doubling—make the entire batch, freeze it, then bake cookies for a month.
Why do mine spread too much and lose their shape?
This is almost always because the dough wasn’t chilled, the oven temperature was too high, or you’re leaving them in the oven too long. The 30-minute chill is essential—it’s not optional. Check your oven temperature with an oven thermometer (many ovens run 25+ degrees hot or cold). Make sure you’re using room-temperature eggs so the batter incorporates properly. And pull them out at 8 minutes, not 12. These three factors control spreading.
More Recipes You’ll Love
- Best Cookie Brownie Recipe — Another variation on this beloved hybrid that’s worth trying once you master this version.
- How To Make Chocolate Pudding — Silky, rich chocolate pudding pairs beautifully with these cookies for a complete dessert.
- Best Ever Pound Cake Recipe — If you love chocolate desserts but want something with slightly different texture, this buttery pound cake is another kitchen staple.
- Mudslide Recipe — Serve one of these cookies alongside a sophisticated mudslide cocktail for an elegant dessert pairing.
I hope this recipe brings you as much joy as my grandmother’s version brought me all those years ago. There’s something truly magical about pulling a tray of fudgy, crackly brownie cookies from the oven—that moment when your kitchen fills with chocolate aroma and you know something special is about to happen. These are the cookies that turn ordinary afternoons into celebrations, that become traditions, that people remember.
The beauty of this method is that once you understand it, you can adapt it confidently. You can make it your own. You can serve it to people you love and watch their faces light up at that first bite. That’s what cooking is really about—creating moments, building memories, sharing something made with your own hands.
You’ve got this. I can’t wait for you to experience that first batch fresh from the oven. Enjoy!