

This post contains affiliate links. As an Amazon Associate I earn from qualifying purchases.
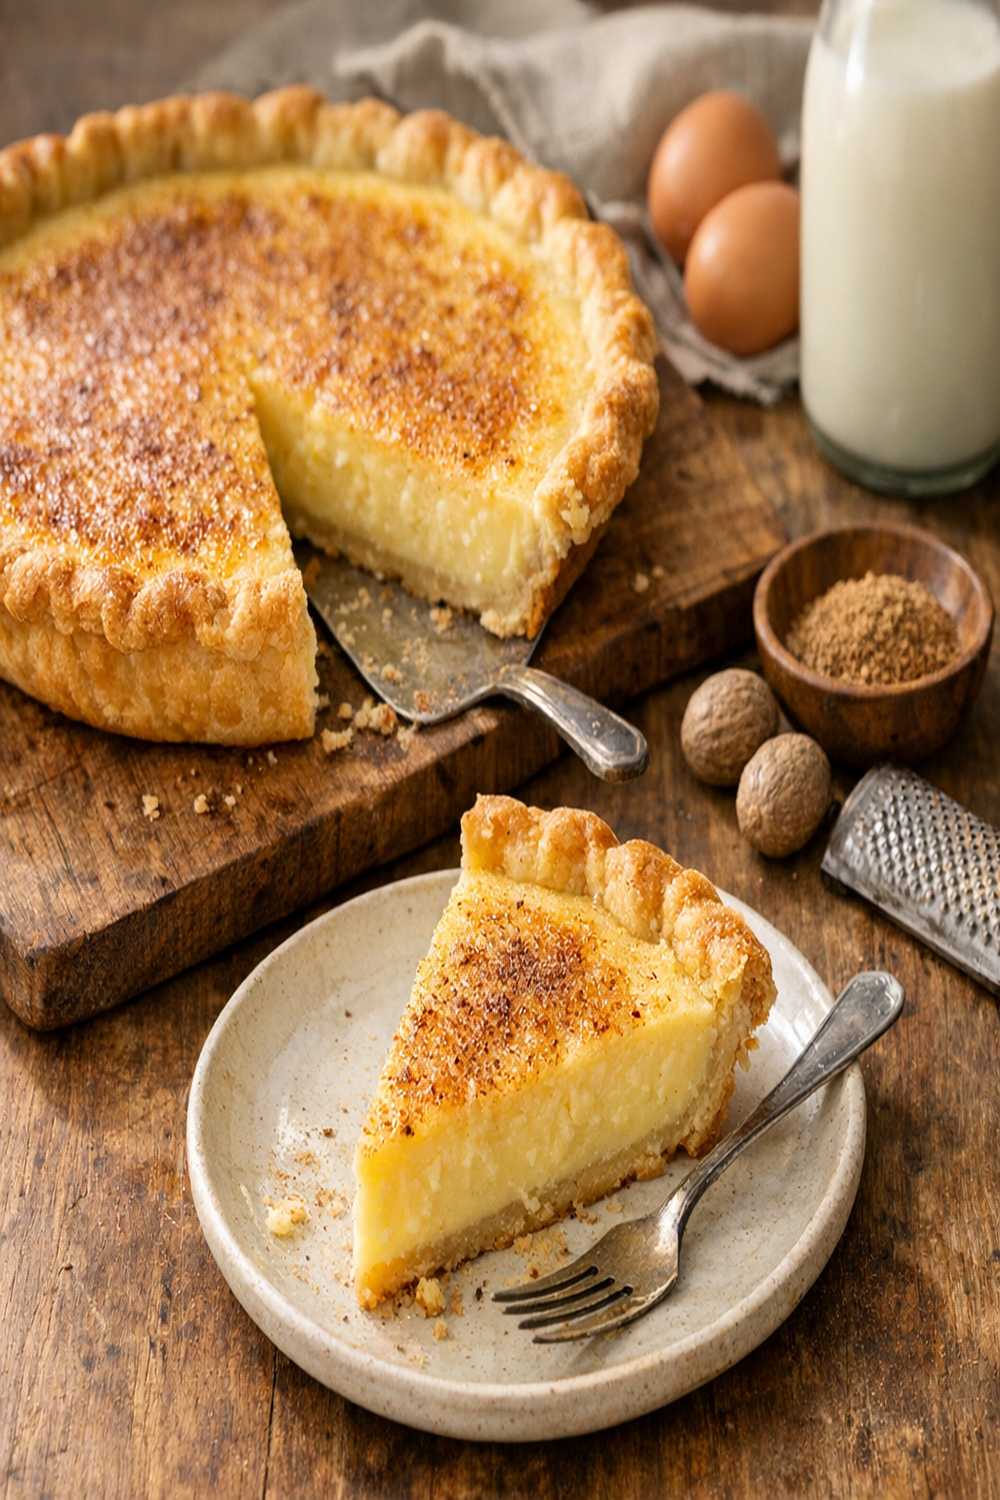
This pie looks and tastes like it costs $40 at a fine bakery—creamy, silky custard with that perfect caramelized edge and subtle tang that makes people ask for seconds. Here’s the secret: I make it for under $10 total, using ingredients I almost always have on hand. If you’ve never made a custard pie before, this one is incredibly forgiving, and it’s one of my go-to desserts when I want to impress without spending hours in the kitchen. This recipe delivers restaurant-quality results with grocery store ingredients and about an hour of your time.

Restaurant-Quality Buttermilk Custard Pie Recipe for Under $10 (No Shortcuts on Flavor)
I still remember watching my grandmother pull a buttermilk custard pie from her old oven on Sunday afternoons. The kitchen would fill with this warm, vanilla-scented steam, and my cousins and I would gather around, practically vibrating with anticipation. She’d let it cool just enough to slice, and that first bite—creamy, tangy, with that paper-thin crust—felt like luxury. Years later, as a registered dietitian, I understand why this pie kept showing up at every family gathering. It’s affordable. It’s elegant. And it makes people feel cared for.
When I started my career in nutrition, I realized that eating well shouldn’t require spending a fortune. That buttermilk custard pie taught me that simple, humble ingredients—when treated with respect and a little technique—become something genuinely special. This is the recipe I turn to when I want to prove that you don’t need exotic ingredients or expensive equipment to create something that tastes handmade and loved.
The Real Cost Breakdown
Let me walk you through exactly what you’re spending on this pie, ingredient by ingredient. I’ve shopped this recipe at my local grocery store and compared prices at budget-friendly chains. Costs will vary slightly by region and season, but you’re looking at roughly $8 to $10 total for a nine-inch pie that serves eight generous slices.
- Frozen pie crust (9-inch) – $1.50 to $2.00 (store brand at any supermarket; skip the fancy, pre-made refrigerated crusts)
- Unsalted butter (½ cup) – $0.75 (buy the store brand in bulk when it’s on sale)
- Granulated sugar (1¼ cups) – $0.30 (buy the largest bag available; it keeps forever)
- All-purpose flour (3 tablespoons) – $0.05 (you have this already; cost per use is negligible)
- Sea salt or table salt (¼ teaspoon) – $0.02 (pennies per pie)
- Large eggs (3) – $0.90 to $1.20 (buy the dozen when they’re on sale; freeze extras in an ice cube tray if you won’t use them)
- Buttermilk (1 cup) – $2.00 to $2.50 (this is your main expense; buy it fresh, and use the rest in baked french toast or pancakes)
- Fresh lemon juice (1 tablespoon) – $0.40 (squeeze one lemon; saves money versus bottled)
- Pure vanilla extract (1 teaspoon) – $0.15 (pure vanilla is worth the splurge; imitation has a chemical aftertaste)
Total cost per pie: $8.07 to $9.62
Cost per slice (8 servings): $1.01 to $1.20
At most restaurants, a slice of custard pie runs $5 to $7. You’re saving 75% per serving by making this at home. If you serve this at a dinner party, you’re feeding eight people dessert for under ten dollars while looking like a culinary genius.
Smart Shopping Tips for This Recipe
- Buy frozen pie crusts in bulk when they’re on sale. Most grocery stores put them on sale during holiday seasons (Thanksgiving through New Year’s, Easter). I buy six at a time and stack them in my freezer. They last up to three months, so you’ll always have one ready when inspiration strikes. Store brands like Great Value or Kirkland are identical in quality to name brands—save your money.
- Purchase buttermilk strategically. Buttermilk is the ingredient that will determine your total cost. Buy it right before you plan to bake. If you’re making multiple pies, buy multiple cartons—the cost per ounce stays the same, and you can freeze buttermilk for up to three months (it separates slightly when thawed, but works beautifully for baking and cooking). Pro tip: If you only need buttermilk occasionally, make your own by adding one tablespoon of lemon juice or white vinegar to one cup of regular milk and letting it sit for five minutes.
- Splurge on pure vanilla extract; save everywhere else. Imitation vanilla is where I draw the line on budget substitutions. This pie is subtle and delicate—artificial vanilla will make it taste, well, artificial. Pure vanilla is worth the extra dollar. However, buy the store brand bottle. Splitting hairs between Madagascar and Tahitian vanilla beans gets unnecessarily expensive. Store brand pure vanilla extract tastes nearly identical and costs half the price.
- Use what you have for eggs and butter. If you keep eggs and butter in your kitchen regularly (and most of us do), your actual out-of-pocket cost drops to about $6. These are pantry staples that earn their place in your budget across dozens of recipes, not just this pie.
The Ingredients
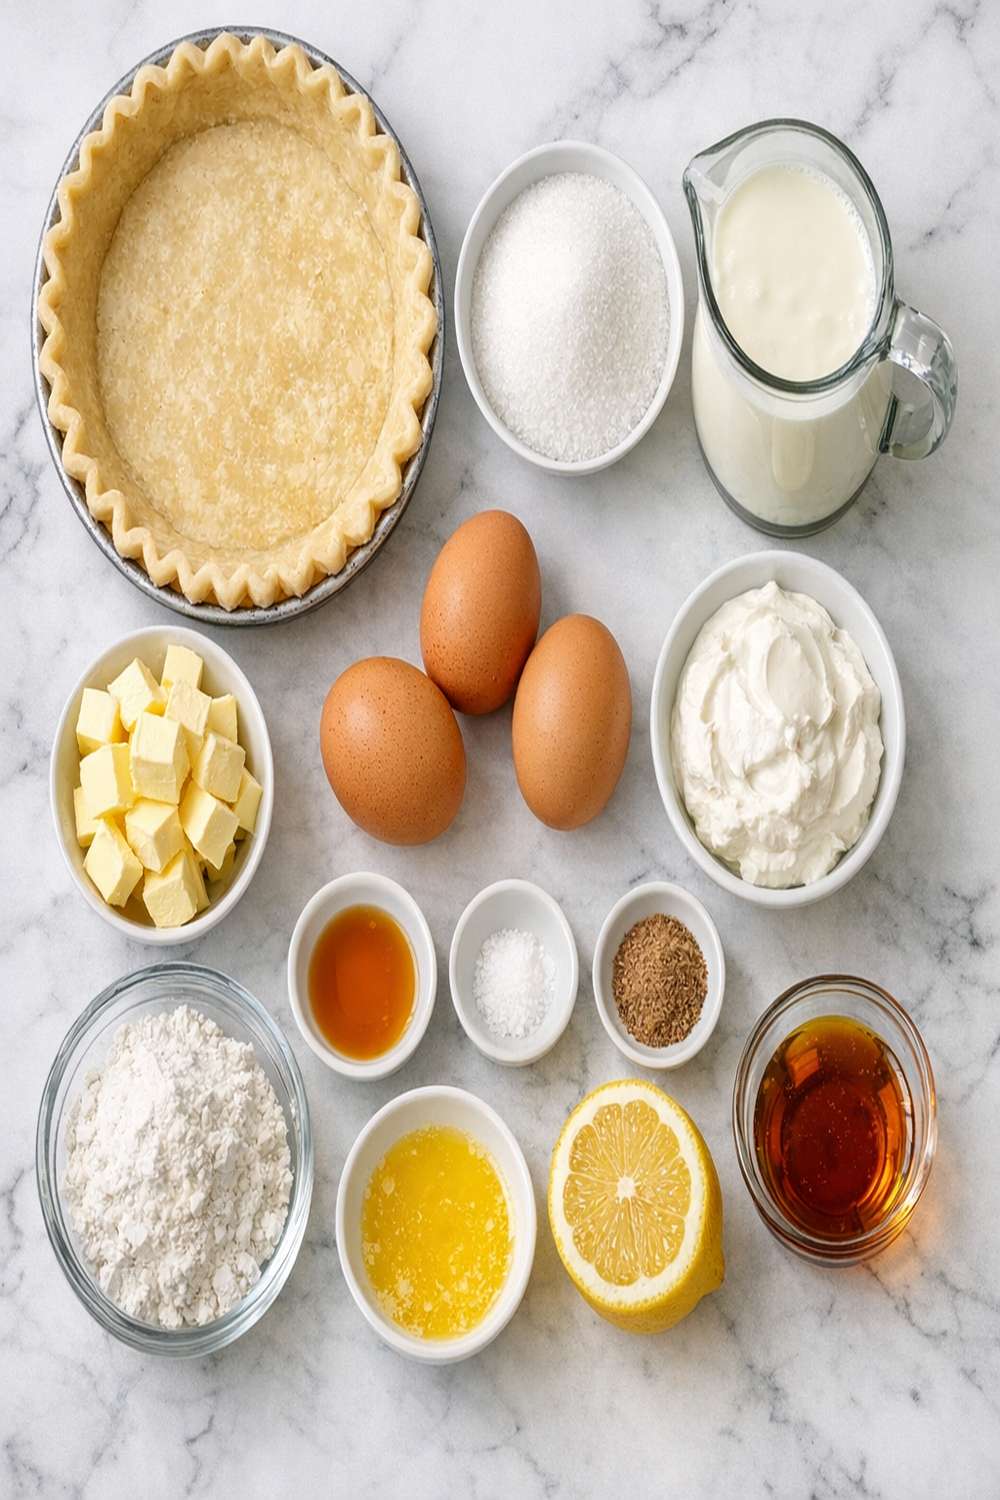
Every ingredient in this recipe earns its place and its cost. There’s no filler, no unnecessary additions—just the essentials that create that signature silky custard with subtle tang. This is comfort baking at its finest, and I love how straightforward the ingredient list is.
- 1 cup whole buttermilk (the backbone of this pie’s tangy flavor)
- 1 tablespoon fresh lemon juice (brightens the custard and adds subtle complexity)
- 1 tablespoon unsalted butter (for dotting the top before baking, optional but lovely)
- ½ cup unsalted butter (softened to room temperature, about 30 minutes on the counter)
- 1 teaspoon pure vanilla extract (not imitation)
- 3 tablespoons all-purpose flour (helps stabilize the custard and prevents excessive curdling)
- 1¼ cups granulated sugar (divided evenly throughout the batter)
- ¼ teaspoon fine sea salt (enhances all other flavors)
- 3 large eggs (room temperature for smoothest blending)
- 1 (9-inch) frozen pie crust (thawed according to package directions, or use fresh if you have time to make one)
Serves: 8 people | Prep time: 15 minutes | Bake time: 50-55 minutes | Total time: 1 hour 10 minutes
How to Make Buttermilk Custard Pie Recipe Without Breaking the Bank
I’m going to walk you through this pie step by step. The beauty of this recipe is that it’s forgiving—the filling comes together quickly, and the oven does most of the work. Smart cooking means understanding why each step matters, not just following directions blindly. That’s how you become confident in the kitchen and start adapting recipes to what you have on hand.
Step 1: Prepare Your Workspace and Crust
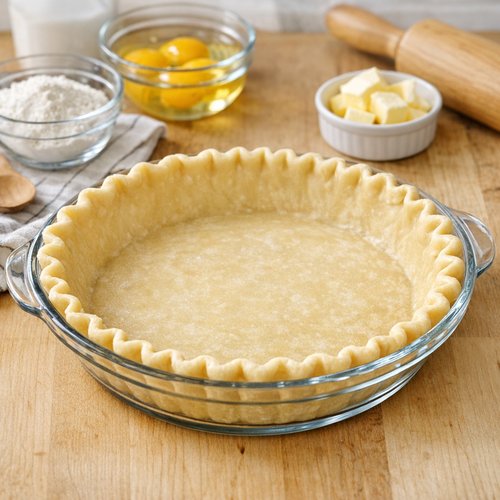
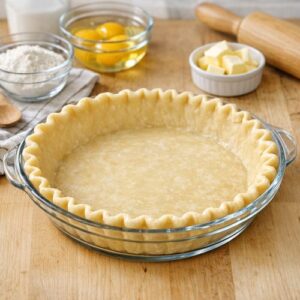
Remove your pie crust from the freezer and let it thaw at room temperature for about 10 minutes—just long enough that it’s pliable but still cold. If you’re using a homemade crust, that’s wonderful, but buy frozen to save $3 to $5 and 30 minutes of your time. Place the crust in a 9-inch pie pan. If it has a rim, you can crimp it with your fingers for a decorative edge, or leave it flat. Set the prepared crust aside at room temperature while you make the filling.
Step 2: Cream the Butter and Sugar
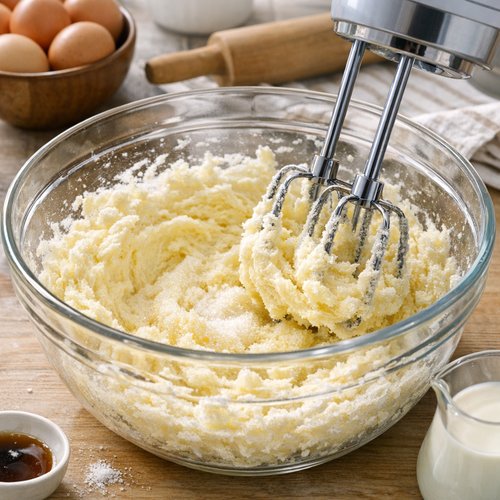
In a large mixing bowl, combine your softened butter and sugar. Using an electric mixer on medium speed, beat for about 2 to 3 minutes until the mixture is pale, fluffy, and noticeably lighter than when you started. This step is crucial—you’re incorporating air into the batter, which creates a lighter, more delicate custard. Don’t skip this step or rush it. If your butter is cold, let it sit out longer. Cold butter won’t cream properly, and you’ll end up with a denser pie.
Pro tip: If you don’t have an electric mixer, use a wooden spoon and some elbow grease for about 5 minutes. Your arm will get a workout, but you’ll achieve the same fluffy texture.
Step 3: Add Flour, Salt, and Eggs
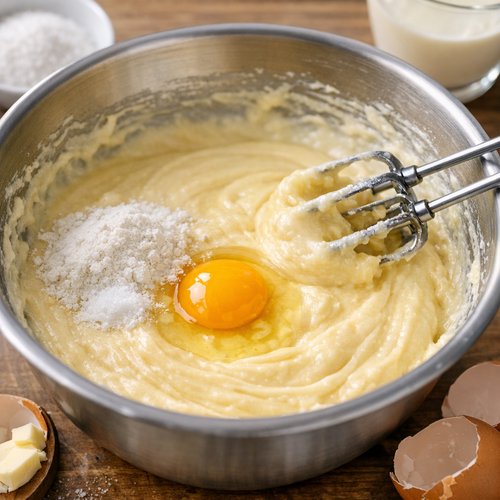
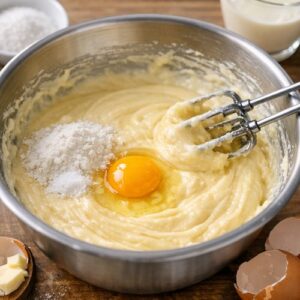
Add the flour and salt to your butter-sugar mixture. Beat on medium speed for about one minute until combined. Then add your three room-temperature eggs, one at a time, beating well after each addition. The batter should look smooth and homogeneous. Room-temperature eggs blend in more smoothly than cold eggs, which means fewer lumps in your final custard. Take the eggs out of the fridge about 15 minutes before you start baking.
Step 4: Combine Buttermilk, Lemon, and Vanilla
In a small measuring cup or bowl, whisk together the buttermilk, fresh lemon juice, and vanilla extract. Pour this mixture into your egg batter and blend on medium speed for about 1 to 2 minutes until everything is combined. Here’s where some home bakers panic: the mixture may look slightly curdled or separated, and that’s completely normal. Buttermilk and eggs naturally separate slightly when mixed, especially with acid (the lemon juice). This is not a mistake. The custard will smooth out and set beautifully as it bakes.

Step 5: Pour and Prepare for the Oven
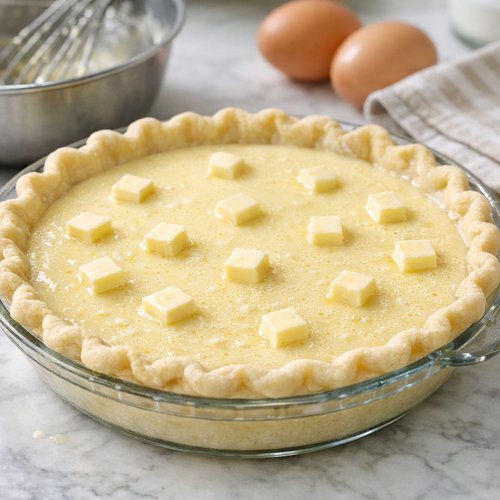
Pour your filling into the prepared pie crust. If you have a cookie sheet, place the pie pan directly on it. This is a professional baker’s trick that prevents the bottom crust from getting soggy or burning. The cookie sheet distributes heat more evenly under the pie and catches any drips. It’s a small step that makes a big difference in texture.
Preheat your oven to 350°F if you haven’t already. If you’d like to add a small touch of richness, dot the top of the custard with tiny pieces of butter (about 1 tablespoon total, cut into small cubes). This creates a subtle, golden top, but it’s completely optional.
Step 6: Bake Until Set
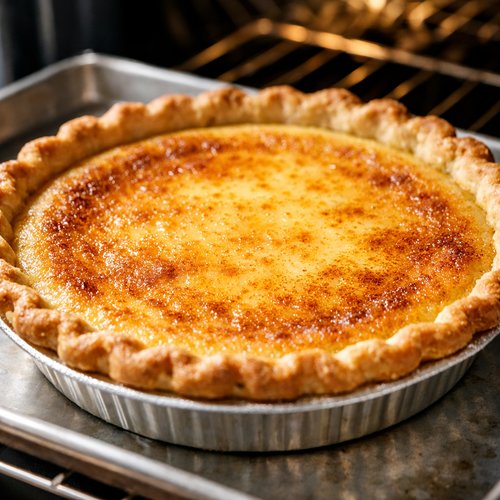
Place the pie (on the cookie sheet) into your preheated 350°F oven and bake for 50 to 55 minutes. You’re looking for a pie that is lightly golden brown on top and mostly set but still slightly jiggly in the very center—about a 2-inch circle in the middle should jiggle slightly when you gently shake the pan. This is the sweet spot. If you bake it until it’s completely firm and set throughout, it will continue cooking as it cools and may become rubbery.
Every oven runs differently. Start checking at the 45-minute mark. If you notice the edges are browning too quickly, tent the top loosely with aluminum foil for the final 10 minutes.
Step 7: Cool Completely
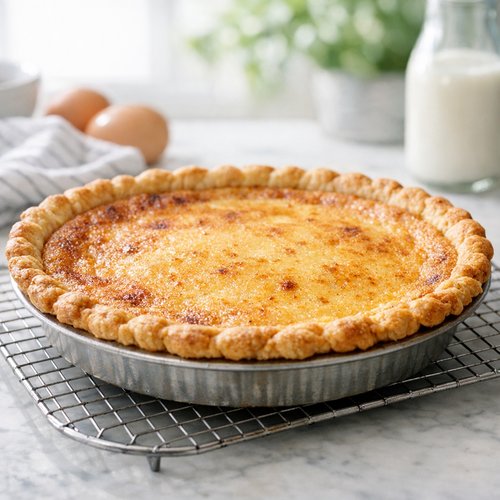
Place the pie on a wire cooling rack and let it cool to room temperature—this takes about 2 to 3 hours. This cooling time is not optional; it allows the custard to set properly. If you try to slice it while it’s warm, the filling will be too soft and the slices will fall apart. I know waiting is hard, but I promise it’s worth it. Serve at room temperature, or chill it in the refrigerator for a cooler, denser texture—both are delicious.
Expert’s Nutritional Insight
As a registered dietitian, I want to highlight something often overlooked: buttermilk is a nutrition powerhouse hiding in plain sight. One cup of buttermilk contains about 100 calories, 8 grams of protein, and a significant amount of calcium and probiotics (especially if it’s cultured buttermilk). The tangy flavor comes from lactic acid, which aids digestion. So this pie isn’t just delicious—it’s delivering real nutritional value, especially the protein and calcium per slice. Pair it with a simple fruit salad or fresh berries, and you’ve balanced the dessert nicely.
Make-Ahead Guide: The Professional’s Approach
Up to 3 days ahead: Thaw your pie crust at room temperature and assemble it in the pie pan. Cover loosely with plastic wrap and refrigerate. This actually helps the crust—cold, pre-assembled crusts are less likely to shrink during baking.
Up to 2 days ahead: Prepare the entire filling (through Step 4). Pour it into the crust, cover with plastic wrap, and refrigerate. You can bake it straight from the fridge—just add an extra 5 to 10 minutes to the bake time since the filling will be cold.
Same day, morning of serving: Bake the pie in the morning, and it will be at perfect room temperature by evening. If you’d prefer to serve it chilled, bake it the day before and refrigerate overnight.
Make-ahead strategy for entertaining: When I’m hosting a dinner party, I bake this pie the morning of my event. It’s ready to serve by dinnertime, and my kitchen doesn’t smell like pie all day (sometimes you want to avoid that, believe it or not). The pie holds its texture beautifully for three days in the refrigerator.
Common Mistakes to Avoid
- Using cold butter and cold eggs: This is the number-one mistake. Cold ingredients don’t incorporate smoothly, resulting in a lumpy, uneven custard with separated texture. Set your butter and eggs on the counter 30 minutes before you start. This one small step improves your results dramatically.
- Overbaking the pie: The most common second mistake is baking until the pie is completely firm. Remember: it will continue cooking as it cools. That slight jiggle in the center is intentional. Overbaked custard pie becomes grainy and rubbery. Watch carefully after the 45-minute mark.
- Skipping the cooling rack or rushing the cooling time: Some people skip the cooling rack and let the pie cool on the counter, or worse, try to slice it while it’s warm. The cooling rack allows air circulation underneath, and the full cooling time allows the custard to set properly. Patience here is non-negotiable for the best texture.
- Substituting imitation vanilla: I mention this throughout because it truly matters in such a delicate pie. Imitation vanilla has a chemical aftertaste that becomes obvious in simple recipes like this. The filling has minimal other flavors to mask it. Pure vanilla is worth the extra 50 cents.
How to Stretch This Recipe Further
- Feed a larger crowd by making two pies. The filling comes together in under 15 minutes. Making two pies costs you roughly $16 instead of $9, but you’re feeding 16 people dessert for $1 per person. Buy your frozen crusts when they’re on sale and keep extras in the freezer. This pie actually freezes beautifully after baking—wrap it well in plastic wrap and aluminum foil, and it will keep for up to one month in the freezer.
- Transform leftovers into a custard trifle. If you have leftover pie (though this rarely happens in my house), break it into chunks and layer it in a glass with whipped cream and fresh berries. Suddenly you have an elegant trifle that looks like you spent hours preparing it. Top with toasted breadcrumbs or granola for texture.
- Freeze baked pies for emergency desserts. I always keep one baked, fully cooled buttermilk custard pie wrapped and frozen at all times. When unexpected guests arrive, I thaw it in the refrigerator overnight and serve it the next day. It’s a secret weapon in my entertaining toolkit.
Budget Substitutions That Don’t Sacrifice Quality
- Make-your-own buttermilk → Fresh buttermilk from the dairy case: If you can’t find buttermilk or it’s out of stock, combine 1 cup of regular whole milk with 1 tablespoon of lemon juice or white vinegar. Let it sit for 5 minutes and it becomes buttermilk. The flavor will be nearly identical. This can save you a trip to another store and gets your pie on the table. However, if you find buttermilk on sale, buy it anyway—you’ll use it in other recipes, and the flavor is slightly richer than the homemade version.
- Frozen pie crust → Homemade pie crust: If you’re comfortable making pastry from scratch, this is a valid option, but let me be honest: for the purpose of this budget recipe, it’s not worth your time. A homemade crust requires additional ingredients (more butter, flour, salt, ice water, and 30 minutes of hands-on time). The frozen crust is convenient, reliable, and only costs $2. Spend your time on the filling, where this pie truly shines.
- Lemon juice → Vinegar or lime juice: In a pinch, you can substitute 1 tablespoon of white vinegar or fresh lime juice for the lemon juice. The flavor will shift slightly (vinegar is more acidic, lime is more tart), but the pie will still set beautifully and taste delicious. I prefer lemon, but I’ve made this with all three and never regretted it.
- Pure vanilla → No vanilla at all: If you’re completely out of vanilla, the pie will still be wonderful. The buttermilk and lemon carry plenty of flavor. However, don’t use imitation vanilla—it’s better to leave it out entirely. The pie will taste cleaner without it than with a chemical aftertaste.
Seasonal Variations to Keep This Recipe Fresh Year-Round
- Spring/Summer Citrus Version: Add ½ teaspoon of lime zest and substitute lime juice for lemon juice. The brighter, more tropical flavor is perfect when you’re craving something refreshing alongside fresh berries or stone fruit.
- Fall Spiced Version: Add ¼ teaspoon of ground nutmeg and ⅛ teaspoon of ground cinnamon to your flour mixture. Top the baked pie with a light dusting of cinnamon sugar before serving. This variation pairs beautifully with apple dishes and feels more seasonal.
- Winter Eggnog Version: Substitute ¾ cup of eggnog and ¼ cup of buttermilk for the full cup of buttermilk. Add ⅛ teaspoon of ground nutmeg. This creates a creamier, richer pie that’s perfect during the holiday season. It tastes like Christmas in a slice.
- Summer Berry Version: After pouring the filling into the crust, gently scatter 1 cup of fresh or frozen berries (blueberries or raspberries work best) over the top. They’ll sink slightly as the custard bakes and create pockets of fruit throughout. No additional ingredients needed—just one extra step that transforms the whole experience.
Can I Store Buttermilk Custard Pie Recipe?
Storage is where this pie truly shines in terms of value and convenience. Refrigerator: Store the baked, cooled pie covered loosely with plastic wrap or aluminum foil for up to 4 days. The custard will continue to set slightly, becoming denser and more custard-like as it sits. Honestly, it tastes better on day two than it does warm.
Freezer: Wrap the completely cooled pie tightly in plastic wrap, then again in aluminum foil (double wrapping prevents freezer burn). It will keep for up to one month. Thaw in the refrigerator overnight before serving. The texture remains creamy and smooth even after freezing—there’s no graininess or separation.
Room temperature: You can leave the pie on the counter for up to 8 hours covered loosely, making this ideal for potlucks or casual gatherings. After 8 hours, the custard can develop an off smell, so refrigerate anything you won’t serve immediately.
Individual slices: If you want grab-and-go portions, slice the pie, wrap individual slices in plastic wrap, and store in an airtight container in the refrigerator for up to 4 days. They’re perfect for breakfast with coffee or a quick afternoon snack.
Nutrition Information
Per serving (1 slice, based on 8 servings per pie): approximately 315 calories, 14g fat (saturated fat 8g), 40g carbohydrates, 1g dietary fiber, 25g sugar, 6g protein, and 125mg sodium. According to USDA FoodData Central, buttermilk adds significant calcium (120mg per 1 cup) and a small amount of probiotics if it’s cultured buttermilk. Eggs contribute choline and lutein, which support brain and eye health. This is a dessert with actual nutritional value—not just empty calories. The protein and fat help moderate blood sugar impact, making this more satisfying than a pure sugar-based dessert.
Nutritional value per dollar spent: You’re paying approximately $1 to $1.20 per slice, which contains 315 calories of nutrient-dense dessert. That’s roughly 260 calories per dollar—excellent value for a homemade, from-scratch dessert. A slice of pie at a restaurant runs $5 to $7, meaning you’re purchasing the same dessert for one-fifth of the cost while supporting your own kitchen.
What Can I Serve With Buttermilk Custard Pie Recipe?
This pie is elegant enough to stand alone, but here are my favorite pairings that keep your budget intact and your meal balanced:
- Fresh berries: A simple cup of fresh blueberries, raspberries, or strawberries (especially when they’re in season and inexpensive) alongside a slice of pie adds brightness, color, and fiber. Cost: $2 to $3 for a season’s worth of berries.
- Whipped cream: Make your own by whipping heavy cream with a touch of sugar and vanilla. One carton of heavy cream (about $3) whips up enough to serve eight people. Much cheaper than buying pre-whipped cream, and it tastes noticeably better.
- A simple green salad before dessert: I serve a light mixed greens salad with lemon vinaigrette before this rich dessert. It cleanses the palate and makes the meal feel more complete. This is a professional trick—a small salad before a rich dessert feels more elegant than jumping straight to pie.
- Black coffee or chamomile tea: The subtle, tangy custard pairs beautifully with coffee or herbal tea. No added cost—you likely have these at home already. This is my favorite way to serve it in the morning with a slice for breakfast.
- Sliced fresh peaches or nectarines (summer only): When stone fruits are at peak season (July through August), a few slices alongside the pie create a seasonal moment. The soft fruit and creamy custard together feel luxurious. When they’re in season, peaches are incredibly inexpensive.
For those looking for more dessert inspiration to balance your eating plan, this chocolate pie is another budget-friendly option that uses similar techniques. Or if you want to explore other custard-based desserts, baked french toast creates that same creamy custard magic in a breakfast format.
FAQs
Can I Make This Pie Without a Pie Crust?
Yes, though you’ll lose some of that classic appeal. Pour the filling into a buttered 9-inch cake pan and bake at the same temperature for the same time. You’ll end up with something between a cake and a custard—it’s delicious but entirely different. If you want the pie experience without a crust, buying a frozen crust is honestly the easiest and most economical solution. The crust costs under $2 and elevates the entire dish.
What If My Pie Filling Looks Curdled When I Mix It?
This is completely normal and nothing to worry about. Buttermilk (which is acidic) and eggs naturally separate slightly when mixed, especially when you add lemon juice. This doesn’t indicate a mistake. The custard will smooth out and set beautifully as it bakes. I see nervous home bakers throw out perfectly good filling because they think it’s broken. Trust the process. If you’re really concerned, strain the mixture through a fine-mesh sieve into the pie crust before baking. This removes any visible lumps and gives you peace of mind.
How Do I Know When It’s Done Baking?
The pie is done when the edges are set and lightly golden brown, but the very center still jiggles slightly—about a 2-inch circle in the middle should move when you gently shake the pan. Think of it like a very firm Jell-O: it has structure but slight flexibility. This is the difference between a creamy, perfect custard and an overcooked, rubbery custard. Use a timer, start checking at 45 minutes, and don’t rely on appearance alone. Every oven is different.
Can I Use Milk Instead of Buttermilk?
Not directly. Plain milk is thinner and doesn’t have the tangy flavor that defines this pie. That tanginess is what makes it special. However, you can make buttermilk by adding 1 tablespoon of lemon juice or vinegar to 1 cup of milk and letting it sit for 5 minutes. The flavor will shift slightly toward regular milk (less tangy), but the pie will still be delicious and set properly. This is a legitimate substitution when buttermilk isn’t available, and it costs you only the price of milk (about $1 versus $2 for buttermilk).
Why Is My Pie Watery or Didn’t Set?
This usually means it was underbaked. Custard pies need that full 50-55 minutes (or sometimes even a few minutes longer in a cooler oven). The baking time isn’t flexible—you can’t rush it. Also ensure you’re using the correct oven temperature (350°F is specific for a reason) and that your oven is actually calibrated correctly. If you have an older oven, invest in a cheap oven thermometer from the grocery store ($5 to $8). It will tell you if your oven is running hot or cold, which explains baking inconsistencies. Finally, remember that the custard will seem softer than you expect when it comes out of the oven. The full cooling time is when it firms up.
Can I Make This Ahead for a Party or Holiday?
Absolutely—this is one of the great advantages of custard pie. Make it one to two days ahead, refrigerate it covered, and serve cold or at room temperature. It tastes better on day two as the custard continues to set and flavors meld. You can even freeze it for up to one month if you want to make it weeks ahead. Thaw in the refrigerator overnight and serve. This pie is the busy person’s elegant dessert.
More Budget-Friendly Recipes
- The Best Chocolate Sheet Cake Recipe – A crowd-pleasing chocolate cake that costs under $8 and serves 15 people. Another recipe that costs pennies per serving but tastes restaurant-quality.
- Cornbread Casserole Recipe – A savory comfort dish that stretches a few ingredients into a complete meal for under $6.
- Banana Bread Recipe – A classic quick bread that uses affordable pantry ingredients and transforms overripe bananas you might otherwise throw away.

Buttermilk Custard Pie Recipe
Ingredients
Method
- Remove your pie crust from the freezer and let it thaw at room temperature for about 10 minutes—just long enough that it’s pliable but still cold. If you’re using a homemade crust, that’s wonderful, but buy frozen to save $3 to $5 and 30 minutes of your time. Place the crust in a 9-inch pie pan. If it has a rim, you can crimp it with your fingers for a decorative edge, or leave it flat. Set the prepared crust aside at room temperature while you make the filling.
- In a large mixing bowl, combine your softened butter and sugar. Using an electric mixer on medium speed, beat for about 2 to 3 minutes until the mixture is pale, fluffy, and noticeably lighter than when you started. This step is crucial—you’re incorporating air into the batter, which creates a lighter, more delicate custard. Don’t skip this step or rush it. If your butter is cold, let it sit out longer. Cold butter won’t cream properly, and you’ll end up with a denser pie. Pro tip: If you don’t have an electric mixer, use a wooden spoon and some elbow grease for about 5 minutes. Your arm will get a workout, but you’ll achieve the same fluffy texture.

- Add the flour and salt to your butter-sugar mixture. Beat on medium speed for about one minute until combined. Then add your three room-temperature eggs, one at a time, beating well after each addition. The batter should look smooth and homogeneous. Room-temperature eggs blend in more smoothly than cold eggs, which means fewer lumps in your final custard. Take the eggs out of the fridge about 15 minutes before you start baking.
- In a small measuring cup or bowl, whisk together the buttermilk, fresh lemon juice, and vanilla extract. Pour this mixture into your egg batter and blend on medium speed for about 1 to 2 minutes until everything is combined. Here’s where some home bakers panic: the mixture may look slightly curdled or separated, and that’s completely normal. Buttermilk and eggs naturally separate slightly when mixed, especially with acid (the lemon juice). This is not a mistake. The custard will smooth out and set beautifully as it bakes.

- Pour your filling into the prepared pie crust. If you have a cookie sheet, place the pie pan directly on it. This is a professional baker’s trick that prevents the bottom crust from getting soggy or burning. The cookie sheet distributes heat more evenly under the pie and catches any drips. It’s a small step that makes a big difference in texture. Preheat your oven to 350°F if you haven’t already. If you’d like to add a small touch of richness, dot the top of the custard with tiny pieces of butter (about 1 tablespoon total, cut into small cubes). This creates a subtle, golden top, but it’s completely optional.

- Place the pie (on the cookie sheet) into your preheated 350°F oven and bake for 50 to 55 minutes. You’re looking for a pie that is lightly golden brown on top and mostly set but still slightly jiggly in the very center—about a 2-inch circle in the middle should jiggle slightly when you gently shake the pan. This is the sweet spot. If you bake it until it’s completely firm and set throughout, it will continue cooking as it cools and may become rubbery. Every oven runs differently. Start checking at the 45-minute mark. If you notice the edges are browning too quickly, tent the top loosely with aluminum foil for the final 10 minutes.

- Place the pie on a wire cooling rack and let it cool to room temperature—this takes about 2 to 3 hours. This cooling time is not optional; it allows the custard to set properly. If you try to slice it while it’s warm, the filling will be too soft and the slices will fall apart. I know waiting is hard, but I promise it’s worth it. Serve at room temperature, or chill it in the refrigerator for a cooler, denser texture—both are delicious.