Is there anything that brings more joy to a gathering than a grand slice of cake, especially a vibrant rainbow cake? Imagine being surrounded by friends and family, laughter filling the air, while a colorful, cheerful cake sits at the center of attention on your table.
It’s the kind of dessert that can brighten even the dreariest of days—perfect for birthdays, holidays, or just because the sun is shining. Pairing this cake with a scoop of vanilla ice cream or a mug of hot coffee elevates it even further. There’s something so comforting yet playful about a slice of rainbow cake!

Today, I’m excited to share with you my take on a basic rainbow cake—a classic dessert that’s as fun to make as it is to eat. It’s characterized by its colorful layers and rich, creamy frosting. Kids love it, adults admire it, and it’s undoubtedly the star of any dessert table.
Whether you’re celebrating a birthday or just want to try something new, this cake brings smiles all around.
You Might Like These Recipes!
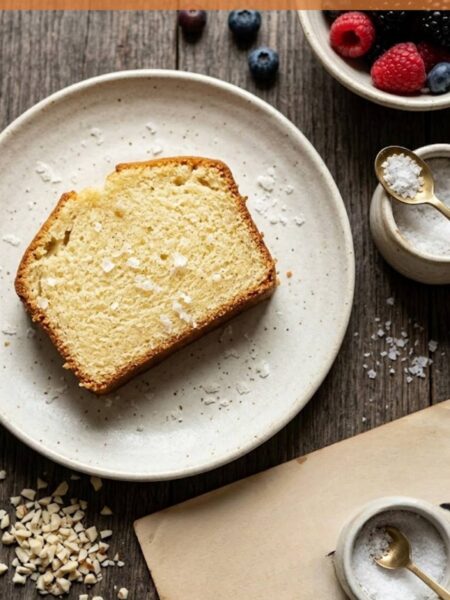
Banana Bread Recipe Black People Recipe
7UP Pound Cake Recipe With Cream Cheese Recipe
What is a Basic Rainbow Cake Recipe?
A basic rainbow cake is a multi-layer cake that showcases vibrant, rainbow-hued layers of vanilla sponge cake, all stacked together and frosted to perfection. The combination of colors captures the essence of nostalgia and joy, reminding many of childhood parties and celebrations. Each layer is a different color, often achieved with gel food coloring stirred into the batter, leading to a beautiful cake that looks as good as it tastes.
Why This Recipe Works
This recipe works because it combines a fluffy, vanilla-flavored cake with a simple yet rich frosting. The use of buttermilk gives the cake an extra moist quality while ensuring that the texture remains light and airy. By making your own frosting instead of relying on store-bought versions, you add a personal touch and can adjust flavors as you see fit.
How Does It Taste?
The basic rainbow cake boasts a sweet vanilla flavor, complemented by buttery undertones. Each bite melts in your mouth, and the smoothness of the frosting ties the layers together beautifully. The subtle sweetness, combined with just the right amount of richness from the butter, creates a satisfying treat without being overpowering. It’s a cake that promises happiness with every slice.
What Sets This Recipe Apart from Other Variations?
What sets my basic rainbow cake recipe apart from others is its emphasis on freshness and flavor. Instead of artificial colors or flavors, this recipe highlights the natural taste of high-quality ingredients, plus it replaces traditional elements with healthier options without sacrificing taste. The addition of extra flavors like almond extract and a touch of lemon zest gives it a delightful twist that makes it memorable.
The Ingredients

Here’s a delightful list of what you’ll need to create this colorful cake:
Vanilla Rainbow Cake
– 3 cups (390g) all-purpose flour
– 3 teaspoons baking powder
– 1 teaspoon salt
– 3/4 cup (168g) unsalted Challenge butter, softened at room temperature
– 1/4 cup (60ml) vegetable oil
– 2 cups (414g) granulated sugar
– 4 large eggs
– 1 tablespoon vanilla extract
– 1 1/3 cups (400ml) buttermilk*
– Additional: 1 teaspoon almond extract
– Gel icing colors: Violet, Royal Blue, Leaf Green, Lemon Yellow, Orange, and Red
Vanilla Rainbow Buttercream
– 2 cups (448g) salted Challenge butter, softened at room temperature
– 1 cup (189g) shortening
– 11-12 cups (1265g-1380g) powdered sugar
– 1 tablespoon vanilla extract*
– 4-5 tablespoons (60-75ml) water or milk
– Optional: 1 tablespoon lemon zest
– Gel icing colors: Violet, Royal Blue, Leaf Green, Lemon Yellow, Orange, and Red
*Tip: Feel free to use unsweetened plain yogurt as a substitute for buttermilk.
Ingredients From : lifeloveandsugar.com
How to Make Basic Rainbow Cake Recipe?
Let’s dive into how you can create this vibrant cake step-by-step. The process is just as fun as the final result!
Instructions
Step 1: Prepare the Cake Layers

Start by prepping three 8-inch round cake pans. Line the bottoms with parchment paper circles and grease the sides generously to prevent sticking. Preheat your oven to 350°F (176°C). This step is critical for ensuring your cakes bake evenly.
Step 2: Mix the Dry Ingredients

In a medium-sized mixing bowl, combine the all-purpose flour, baking powder, and salt. Give it a quick whisk to evenly distribute the dry ingredients. Set this bowl aside; we’ll come back to it.
Step 3: Create the Base of the Cake

In a large mixing bowl, add the softened butter, vegetable oil, and granulated sugar. Using a mixer, beat together these ingredients for about 3-4 minutes. You want your mixture to become light and fluffy—don’t rush this part. The change in color and texture will let you know it’s ready.
Step 4: Add the Eggs and Vanilla

Add your eggs two at a time, mixing well after each addition. With the second round of eggs, toss in your vanilla extract, too. Make sure to scrape down the bowl’s sides and bottom as needed to ensure everything is well blended.
Step 5: Combine the Dry and Wet Ingredients

Now, gradually add in half of your flour mixture. Mix just until combined. Next, pour in the buttermilk and mix until smooth. Finally, add the remaining dry ingredients and mix until everything is incorporated but be cautious not to over-mix.
Step 6: Divide and Color the Batter

Divide the batter evenly into six bowls. Each bowl should hold just a bit more than a cup of batter. Add one gel color to each bowl and gently fold until the color is completely blended throughout.
Step 7: Layer the Colors in the Pans
Now comes the fun part! Starting with the violet batter, spoon it into the bottom of the prepared pans. Follow it with the blue, green, yellow, orange, and finally red—the colors should be divided evenly between the three pans. A gentle jiggle of the pans helps distribute the batter slightly.
Step 8: Bake
Pop the pans in your preheated oven and bake for 28-33 minutes. You’ll know they’re ready when a toothpick inserted in the center comes out clean.
Step 9: Cool Down
After baking, let the cakes cool in the pans for about 2-3 minutes before transferring them to cooling racks. Allow them to cool completely before frosting—patience is key!
Step 10: Make the Frosting
To whip up your frosting, combine the softened salted butter and shortening in a large mixing bowl. Beat until smooth. Add about half of the powdered sugar and mix until it’s well blended and smooth. After that, incorporate the vanilla and a couple of tablespoons of water or milk, mixing until combined. Gradually mix in the remaining powdered sugar and adjust the consistency with more liquid if needed.
Step 11: Assemble the Cake
Start by leveling the tops of your cooled cakes. Place the first layer on a cake plate. Add about one cup of frosting over the top of this layer and spread it evenly. Repeat with the second layer, topping it with frosting as well. Once you add the third layer, frost the sides and top of the entire cake until smooth.
Step 12: Color the Remaining Frosting
Divide any leftover frosting among six bowls. Using your gel colors, tint each bowl with one of the six rainbow colors.
Step 13: Create the Swirl for Decoration
To create a rainbow swirl for the cake’s edges, fill a piping bag (or a zip-lock bag with the tip cut off) with your colored frostings side by side on a piece of clear wrap, then roll it into a log. Pipe shells of frosting around the top edge of the cake, slightly twisting the bag to create a swirled effect.
Step 14: Final Touches
Pipe additional shells at the base of the cake if desired.
Store the cake in an airtight container until it’s time to serve. The flavors deepen and improve over a couple of days!
Notes
– Bake the layers a day ahead for easier assembly.
– Make your frosting a day in advance and let it sit covered at room temperature. Mix again before use.
– If you want to save time, use pre-made frosting instead of making your own.
– Always let your cakes cool completely before frosting to avoid melting the frosting.
– Get creative! You can add sprinkles or edible glitter on top for extra pizzazz.
How Do You Store This Basic Rainbow Cake Recipe?
To keep your rainbow cake fresh, store it in an airtight container at room temperature if you plan to consume it within a couple of days. If you won’t be finishing the cake within that time frame, it’s best to store it in the refrigerator. For longer storage, consider wrapping individual slices in plastic wrap and placing them in a freezer bag for freezing. Just remember to thaw it overnight in the fridge before enjoying.
Sides for Basic Rainbow Cake Recipe
– Vanilla Ice Cream: The creaminess pairs wonderfully with the sweetness of the cake.
– Fresh Berries: Their tartness balances the cake’s sweetness and adds color.
– Whipped Cream: Light and fluffy, whipped cream adds an elegant touch.
– Chocolate Sauce: Drizzle a bit of chocolate for a delightful contrast.
– Fruit Salad: A fresh fruit salad adds a vibrant, refreshing element to your dessert table.
What Alternatives Can You Use for the Ingredients If They Are Not Present in Your Kitchen?
– All-Purpose Flour: Can be substituted with cake flour or a gluten-free blend for a lighter texture.
– Buttermilk: Use a mixture of milk and lemon juice or vinegar (1 cup milk + 1 tablespoon lemon juice/vinegar) to mimic buttermilk.
– Butter: Coconut oil can be used as a dairy-free option.
– Gel Icing Color: Liquid food coloring can substitute, but be careful not to use too much as it can affect the batter’s consistency.
– Powdered Sugar: You can blend granulated sugar in a blender to create homemade powdered sugar if you’re in a pinch.
Conclusion
Creating a basic rainbow cake is an adventure in baking that promises to brighten any occasion. With a few simple ingredients, some vibrant gel colors, and a willingness to get your hands a little messy, you can create an eye-catching and delicious centerpiece for your next gathering.
So gather your friends, bake away, and let the good times—and cake—roll! Enjoy every slice, and don’t forget to savor the compliments that will surely come your way. Happy baking!
You Might Also Like These Latest Recipes!
Basic Cornbread Recipe For Dressing Recipe
Banana Bread Recipe Black People Recipe
Bake Macaroni Cheese Recipe Southern Style Recipe

Basic Rainbow Cake Recipe – Delicious Meal Ideas
Description
Today, I’m excited to share with you my take on a basic rainbow cake—a classic dessert that’s as fun to make as it is to eat. It’s characterized by its colorful layers and rich, creamy frosting. Kids love it, adults admire it, and it’s undoubtedly the star of any dessert table. Whether you’re celebrating a birthday or just want to try something new, this cake brings smiles all around.
Ingredient
Vanilla Rainbow Cake
- Additional: 1 teaspoon almond extract
Vanilla Rainbow Buttercream
- Optional: 1 tablespoon lemon zest
Instructions
Step 1: Prepare the Cake Layers
-
Start by prepping three 8-inch round cake pans. Line the bottoms with parchment paper circles and grease the sides generously to prevent sticking. Preheat your oven to 350°F (176°C). This step is critical for ensuring your cakes bake evenly.
Step 2: Mix the Dry Ingredients
-
In a medium-sized mixing bowl, combine the all-purpose flour, baking powder, and salt. Give it a quick whisk to evenly distribute the dry ingredients. Set this bowl aside; we’ll come back to it.
Step 3: Create the Base of the Cake
-
In a large mixing bowl, add the softened butter, vegetable oil, and granulated sugar. Using a mixer, beat together these ingredients for about 3-4 minutes. You want your mixture to become light and fluffy—don’t rush this part. The change in color and texture will let you know it’s ready.
Step 4: Add the Eggs and Vanilla
-
Add your eggs two at a time, mixing well after each addition. With the second round of eggs, toss in your vanilla extract, too. Make sure to scrape down the bowl’s sides and bottom as needed to ensure everything is well blended.
Step 5: Combine the Dry and Wet Ingredients
-
Now, gradually add in half of your flour mixture. Mix just until combined. Next, pour in the buttermilk and mix until smooth. Finally, add the remaining dry ingredients and mix until everything is incorporated but be cautious not to over-mix.
Step 6: Divide and Color the Batter
-
Divide the batter evenly into six bowls. Each bowl should hold just a bit more than a cup of batter. Add one gel color to each bowl and gently fold until the color is completely blended throughout.
Step 7: Layer the Colors in the Pans
-
Now comes the fun part! Starting with the violet batter, spoon it into the bottom of the prepared pans. Follow it with the blue, green, yellow, orange, and finally red—the colors should be divided evenly between the three pans. A gentle jiggle of the pans helps distribute the batter slightly.
Step 8: Bake
-
Pop the pans in your preheated oven and bake for 28-33 minutes. You'll know they’re ready when a toothpick inserted in the center comes out clean.
Step 9: Cool Down
-
After baking, let the cakes cool in the pans for about 2-3 minutes before transferring them to cooling racks. Allow them to cool completely before frosting—patience is key!
Step 10: Make the Frosting
-
To whip up your frosting, combine the softened salted butter and shortening in a large mixing bowl. Beat until smooth. Add about half of the powdered sugar and mix until it’s well blended and smooth. After that, incorporate the vanilla and a couple of tablespoons of water or milk, mixing until combined. Gradually mix in the remaining powdered sugar and adjust the consistency with more liquid if needed.
Step 11: Assemble the Cake
-
Start by leveling the tops of your cooled cakes. Place the first layer on a cake plate. Add about one cup of frosting over the top of this layer and spread it evenly. Repeat with the second layer, topping it with frosting as well. Once you add the third layer, frost the sides and top of the entire cake until smooth.
Step 12: Color the Remaining Frosting
-
Divide any leftover frosting among six bowls. Using your gel colors, tint each bowl with one of the six rainbow colors.
Step 13: Create the Swirl for Decoration
-
To create a rainbow swirl for the cake’s edges, fill a piping bag (or a zip-lock bag with the tip cut off) with your colored frostings side by side on a piece of clear wrap, then roll it into a log. Pipe shells of frosting around the top edge of the cake, slightly twisting the bag to create a swirled effect.
Step 14: Final Touches
-
Pipe additional shells at the base of the cake if desired.
-
Store the cake in an airtight container until it’s time to serve. The flavors deepen and improve over a couple of days!
Nutrition Facts
Servings 16
- Amount Per Serving
- Calories 450kcal
- % Daily Value *
- Total Fat 56.9g88%
- Cholesterol 150.9mg51%
- Sodium 215.1mg9%
- Total Carbohydrate 145.3g49%
- Sugars 122g
- Protein 5.5g11%
* Percent Daily Values are based on a 2,000 calorie diet. Your daily value may be higher or lower depending on your calorie needs.
Note
- Bake the layers a day ahead for easier assembly.
- Make your frosting a day in advance and let it sit covered at room temperature. Mix again before use.
- If you want to save time, use pre-made frosting instead of making your own.
- Always let your cakes cool completely before frosting to avoid melting the frosting.
- Get creative! You can add sprinkles or edible glitter on top for extra pizzazz.