Before diving into the delightful world of chocolate pie, let’s chat about its companions. Pairing is fun! It elevates the whole experience. Picture this: a slice of rich chocolate pie sitting next to a scoop of vanilla bean ice cream. The cold, creamy texture cuts through the pie’s richness perfectly.
How about a hot cup of coffee? The slight bitterness complements the sweetness wonderfully. For a fruity contrast, fresh berries, like strawberries or raspberries, offer a burst of flavor. Lastly, don’t forget whipped cream. A cloud of sweet, airy goodness crowns each slice beautifully and adds a touch of elegance.

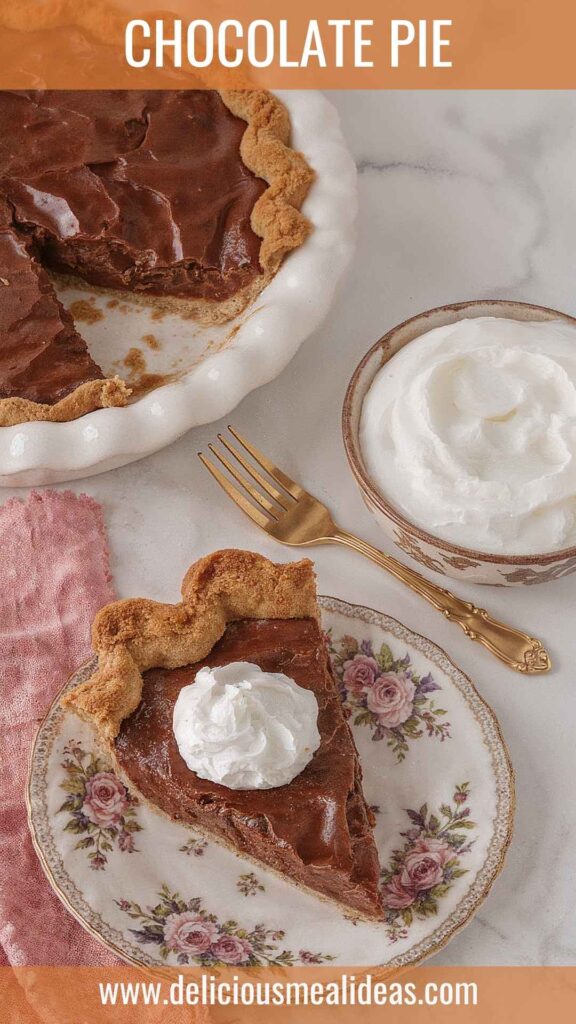
What is Chocolate Pie?
Chocolate pie is decadence served on a plate. At its core, it is a delightful dessert consisting of a pastry crust filled with a rich chocolate custard. This custard is silky and smooth, usually made from cocoa or melted chocolate.
Sometimes, you’ll find whipped cream or a fluffy meringue topping, but that’s a matter of personal preference. Each slice promises a delightful balance of sweetness and bittersweet chocolatey goodness.
Why This Recipe Works
Now, you may wonder, what makes this chocolate pie recipe a standout? Here are four solid reasons that guarantee success:
1. Simple Ingredients
The best part? The ingredients are straightforward and often found in your pantry. No fancy items here! You’ll need cocoa powder, granulated sugar, unsalted butter, and eggs. When baking feels like a chore, simplicity comes as a welcome relief.
2. Perfect Balance of Flavor
This chocolate pie strikes an ideal balance. The cocoa offers that familiar chocolatey richness, while the sea salt enhances its flavor. Additionally, the hint of espresso powder adds depth. Your taste buds will dance.
3. Easy to Follow Steps
Even if you’re a beginner in the kitchen, this recipe is approachable. Each step is broken down clearly, ensuring that you know exactly what to do. Trust me; if you stick to the steps, you’ll end with a pie that looks as good as it tastes.
4. Versatile Topping Options
Don’t let the filling steal the spotlight! You get to decide how to finish your masterpiece. A dollop of whipped cream, a sprinkle of chocolate shavings, or even a drizzle of caramel can transform this pie based on your mood.
Ingredients You’ll Need to Make This Chocolate Pie Recipe
Gathering your ingredients can feel almost like a treasure hunt. Here’s what you need:
- ½ teaspoon sea salt
- 1½ cups fine granulated sugar (300g)
- ¼ cup unsalted butter, cut into cubes (57g)
- 2 tablespoons dark chocolate, finely chopped
- ½ cup premium unsweetened cocoa powder (50g) (preferably Dutch-processed for a richer flavor)
- 3 tablespoons sifted all-purpose flour
- 4 large egg yolks, at room temperature
- 2 cups whole milk (480ml) (or substitute with half-and-half for a creamier texture)
- ¼ teaspoon instant espresso powder
- 1 prepared pie crust (either homemade or high-quality store-bought)
- Whipped cream, for serving (lightly sweetened or plain)
- 1 teaspoon pure vanilla extract

How to Make This Chocolate Pie?
Let’s roll up those sleeves! Here’s how you can make this chocolate pie seamlessly.
Step 1: Prepare the Pie Crust
If you’re using a store-bought crust, follow the package instructions and place it in a pie dish. If you’re making your own, roll it out to fit the dish and pre-bake it according to your recipe.
Step 2: Melt the Butter & Chocolate
In a heavy saucepan over low heat, combine the butter and dark chocolate. Stir occasionally until fully melted and smooth.
Step 3: Mix the Dry Ingredients
In a separate bowl, mix the granulated sugar, cocoa powder, flour, sea salt, and espresso powder. Combine them well, so every bite of your pie is consistently flavorful.
Step 4: Whisk the Egg Yolks
In a small mixing bowl, whisk the egg yolks until well beaten. This will help in creating a velvety filling.
Step 5: Heat the Milk
In another saucepan, heat the milk over a medium flame until it’s just bubbling. Don’t boil it! This keeps the creaminess intact.
Step 6: Combine Mixtures
Slowly add half of the hot milk to the dry mixture, whisking constantly. This tempers the eggs and prevents scrambling. Once combined, pour this mixture back into the remaining milk in the saucepan.
Step 7: Cook the Filling
Over medium-low heat, cook the mixture, stirring constantly until it thickens. This should take about 5-6 minutes. Once it coats the back of a spoon, remove from heat.
Step 8: Add Chocolate & Vanilla
Stir in the melted chocolate and butter mixture along with the vanilla extract. Mix until smooth. Pour this luscious chocolate filling into the prepared pie crust.
Step 9: Chill
Let the pie cool at room temperature, then cover it and refrigerate for at least four hours. This allows the filling to set permanently.
Step 10: Serve & Enjoy
Top with whipped cream and enjoy each spoonful! Don’t be surprised if you find yourself going back for seconds.
Tips for the Perfect Chocolate Pie
Ready for some insider knowledge? Here are my top five tips to ensure your pie comes out just right:
- Use Quality Ingredients: Invest in good quality chocolate and cocoa powder. The flavor really shines through!
- Room Temperature Eggs: Ensure your egg yolks are at room temperature, as they incorporate into the mixture more smoothly.
- Don’t Rush the Cooling: Be patient and let the filling set properly in the fridge. It will be worth the wait.
- Presentation Matters: For an extra touch, you can sprinkle sea salt on top of the whipped cream before serving. It’s all about the little details!
- Experiment with Flavors: Feel free to play with the vanilla—try different extracts like almond or orange for a unique twist.
Nutrition Information
Now, let’s get down to the numbers. For a fair estimate, one slice (about 1/8th of the pie) generally contains:
- Calories: 350
- Fat: 20g
- Carbohydrates: 40g
- Protein: 4g
- Sugar: 25g
Calories may vary based on your choice of crust and toppings, but that gives you a rough idea.
How to Store Leftovers?
First off, if you have leftovers, congratulations on your self-control! Store any leftover pie slices covered in the fridge. Use plastic wrap or foil to wrap it tightly, preventing it from absorbing smells from other food.
You can also keep the pie in an airtight container. It’s good for about 3–4 days. Just fresh whipped cream can be added when you’re ready to serve.
Recommended Side Dishes for Chocolate Pie Recipe
Addictively delicious on its own, chocolate pie can be even better when paired with these sides:
1. Fresh Berries: Strawberries, raspberries, or mixed berries served on the side provide a refreshing contrast to the rich pie. Their tartness balances out the sweetness perfectly.
2. Ice Cream: Vanilla or salted caramel ice cream creates a delightful temperature contrast. Each bite, warm and cold, is blissful harmony.
3. Coffee: A well-brewed cup of coffee pairs beautifully. The slight bitterness provides a nice foil to the sweet chocolatey slice on your plate.
4. Whipped Cream: Perfectly dolloped, light and airy whipped cream is a classic. It adds an elegant touch and a touch of texture with each bite.
Ingredient Substitutes
Sometimes you need to improvise, right? If you’re missing an ingredient, don’t fret! Here are some substitutes:
1. Cocoa Powder: Unsweetened chocolate can be used instead—just melt it and adjust the sugar since cocoa powder is unsweetened.
2. Granulated Sugar: Brown sugar will give a deeper flavor while honey or maple syrup can provide a different sweetness profile.
3. Unsalted Butter: Coconut oil or vegetable oil can replace butter. Use the same amount, melted.
4. Whole Milk: Almond milk or oat milk can work wonders too. Just keep the measurements consistent.

Conclusion
There you have it—an amazing journey to create the perfect chocolate pie, filled with insights, tips, and flavorful pairings. Each slice tells a story, and that story is meant to be savored and shared.
Whether you’re enjoying it at a family gathering or a quiet evening at home, this chocolate pie is sure to bring smiles all around. So go ahead, gather those ingredients, foster your inner baker, and make some magic in your kitchen. Remember—life is short; eat dessert first!
You’ll also like the following recipes!

Chocolate Pie – Delicious Meal Ideas
Description
Hello, fellow dessert lovers! If you’ve ever felt that moment of bliss when biting into a piece of chocolate pie, you know exactly what I mean. It is one of those desserts that can instantly lift your spirits, like a warm hug or your favorite song on a rainy day. No fuss. Just pure enjoyment.
Today, I want to share a chocolate pie recipe that has become a cherished tradition in my home. With a smooth chocolate filling tucked into a buttery crust, this treat is reliable and irresistibly delicious.
Ingredients
Instructions
Step 1: Prepare the Pie Crust
-
If you're using a store-bought crust, follow the package instructions and place it in a pie dish. If you're making your own, roll it out to fit the dish and pre-bake it according to your recipe.
Step 2: Melt the Butter & Chocolate
-
In a heavy saucepan over low heat, combine the butter and dark chocolate. Stir occasionally until fully melted and smooth.
-
Step 3: Mix the Dry Ingredients
-
In a separate bowl, mix the granulated sugar, cocoa powder, flour, sea salt, and espresso powder. Combine them well, so every bite of your pie is consistently flavorful.
Step 4: Whisk the Egg Yolks
-
In a small mixing bowl, whisk the egg yolks until well beaten. This will help in creating a velvety filling.
Step 5: Heat the Milk
-
In another saucepan, heat the milk over a medium flame until it's just bubbling. Don’t boil it! This keeps the creaminess intact.
Step 6: Combine Mixtures
-
Slowly add half of the hot milk to the dry mixture, whisking constantly. This tempers the eggs and prevents scrambling. Once combined, pour this mixture back into the remaining milk in the saucepan.
Step 7: Cook the Filling
-
Over medium-low heat, cook the mixture, stirring constantly until it thickens. This should take about 5-6 minutes. Once it coats the back of a spoon, remove from heat.
Step 8: Add Chocolate & Vanilla
-
Stir in the melted chocolate and butter mixture along with the vanilla extract. Mix until smooth. Pour this luscious chocolate filling into the prepared pie crust.
Step 9: Chill
-
Let the pie cool at room temperature, then cover it and refrigerate for at least four hours. This allows the filling to set permanently.
Step 10: Serve & Enjoy
-
Top with whipped cream and enjoy each spoonful! Don’t be surprised if you find yourself going back for seconds.
-
Tips for the Perfect Chocolate
Nutrition Facts
Servings 8
- Amount Per Serving
- Calories 350kcal
- % Daily Value *
- Total Fat 20g31%
- Total Carbohydrate 40g14%
- Sugars 25g
- Protein 4g8%
* Percent Daily Values are based on a 2,000 calorie diet. Your daily value may be higher or lower depending on your calorie needs.
Note
- Use Quality Ingredients: Invest in good quality chocolate and cocoa powder. The flavor really shines through!
- Room Temperature Eggs: Ensure your egg yolks are at room temperature, as they incorporate into the mixture more smoothly.
- Don’t Rush the Cooling: Be patient and let the filling set properly in the fridge. It will be worth the wait.
- Presentation Matters: For an extra touch, you can sprinkle sea salt on top of the whipped cream before serving. It’s all about the little details!
- Experiment with Flavors: Feel free to play with the vanilla—try different extracts like almond or orange for a unique twist.