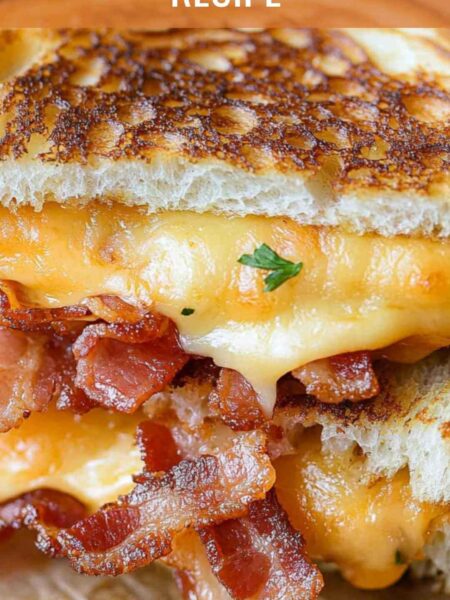
Let me take you on a little culinary adventure through the magical world of Disneyland. Imagine walking down Main Street, the scent of popcorn wafting through the air, and children laughing as they enjoy their favorite rides. Amid all this excitement, there’s something else that’s equally enticing: the iconic Disneyland grilled cheese sandwich.
If you’ve ever had one, you know it’s a crispy, cheesy delight that warms the soul and tickles the taste buds. Today, I’m going to share not just the recipe for this amazing grilled cheese but also my journey in discovering it and everything that makes it special. So, grab your apron, and let’s dive in!

What is Disneyland Grilled Cheese?
The Disneyland grilled cheese is a masterpiece of simplicity, featuring a crispy exterior that houses an array of rich, gooey cheeses. When you take a bite, the crunch gives way to an irresistible melty center that dances on your tongue.
It’s not just a sandwich; it’s comfort food that brings joy to adults and kids alike. Often served with a delightful dipping sauce or paired with a side of tomato soup, this sandwich embodies everything you love about food: warmth, love, and nostalgia.
I remember the first time I had one of these sandwiches. I was wandering through Disneyland, exhausted from the rides, when I spotted a food cart. The smell wafted through the air, and my stomach growled louder than the roller coasters nearby. I ordered one without hesitation. I took a bite, and it instantly transported me back to childhood gatherings and simple family dinners.
Why You’ll Love This Disneyland Grilled Cheese
If you’re wondering whether this grilled cheese is worth your time, let me assure you, it is. Here are a few reasons to fall in love with this recipe:
Cheese Lover’s Paradise: With layers of melting cheese, it’s the ultimate comfort food. Each bite explodes with flavor that will make you crave more.
Easy to Make: This recipe doesn’t require culinary degrees or hours of prep. Just gather the ingredients and let your creative juices flow.
Customizable: Feel free to modify the cheeses or add ingredients based on your preference. Want to toss in some jalapeños for a kick? Go for it!
Great for All Ages: Whether you’re making it for yourself, your kids, or your friends, everyone will enjoy this sandwich. It’s a guaranteed crowd-pleaser.
Perfect for Any Occasion: Lunch, dinner, or a snack—this grilled cheese can be served anytime and still impress.
The Ingredients
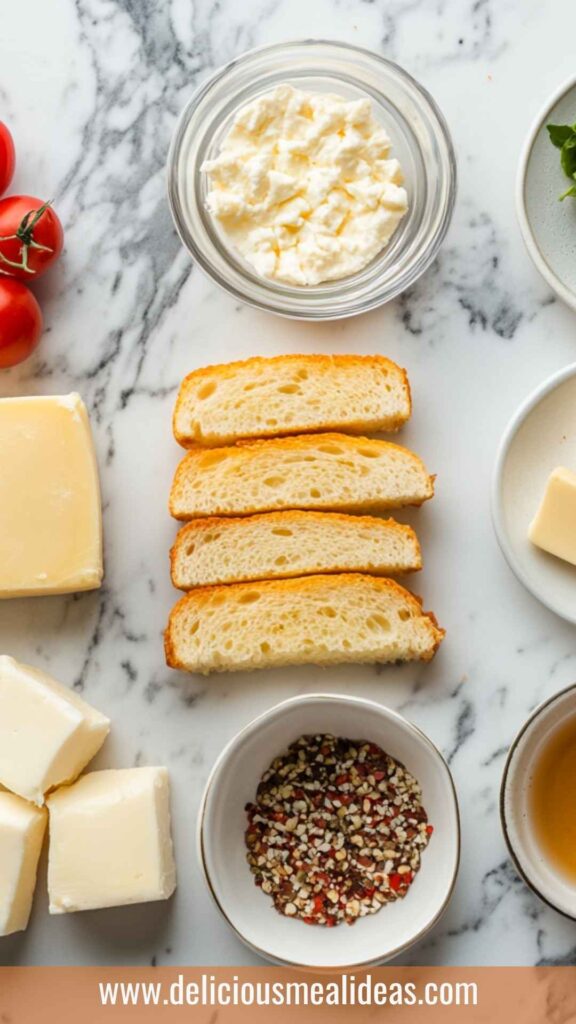
Here’s what you need to conjure up Disneyland’s grilled cheese magic in your kitchen.
Grilled Four-Cheese Sandwich
- 8 slices rustic artisan bread
- 8 slices medium cheddar cheese
- 8 slices provolone cheese
- 2 tablespoons unsalted butter (for grilling)
- 1 teaspoon dried oregano (optional, for a herby touch)
Cream Cheese Spread
- 1/2 cup whipped cream cheese
- 1/2 cup finely shredded double Gloucester or sharp cheddar cheese
- 2 tablespoons heavy cream
- 1/4 teaspoon flaky sea salt
Garlic Spread
- 1 cup creamy mayonnaise
- 1 1/2 teaspoons freshly minced garlic
- 1/2 teaspoon kosher salt
- 1 teaspoon lemon zest (optional, for a fresh tangy note)
With these ingredients, you’re ready to embark on a delightful cooking excursion.
Step by Step Instructions
Now, let’s go through the process of crafting this dream grilled cheese one step at a time.
Step 1: Prepare the Spreads
Start by whipping up the cream cheese spread. In a mixing bowl, combine the whipped cream cheese, shredded double Gloucester or sharp cheddar cheese, heavy cream, and flaky sea salt. Mix well until the ingredients meld together beautifully. This spread will provide a delicious layer of flavor in your grilled cheese.
Step 2: Make the Garlic Spread
In another bowl, mix the mayonnaise, minced garlic, kosher salt, and lemon zest. This garlic spread adds a savory depth you didn’t know you needed. Stir until it’s thoroughly mixed. Set it aside; we’ll use it for spreading on the bread.
Step 3: Assemble the Sandwiches
Take a slice of rustic artisan bread. Spread a generous layer of the cream cheese mix on one side of the bread. Then, add a slice of cheddar cheese followed by a slice of provolone cheese. Don’t skimp on the cheese; it’s what makes this sandwich sing!
Step 4: Add More Cheese
Put another layer of your beautiful cheeses on top of the first slice. Why not double the joy? Now, grab another slice of bread and spread the garlic mayo on one side. Place the mayo-spread slice on top of your cheesy creation, mayo side facing inside.
Step 5: Grilling Time
Grab a skillet and melt the unsalted butter over medium heat. Gently place your sandwich in the pan. Grill until the bread turns golden and crispy; this can take about 3-4 minutes. You’ll know it’s ready to flip when you see the cheese beginning to ooze out just a little bit.
Step 6: Flip and Cook
Carefully flip the sandwich over using a spatula. Grill the other side for another 3-4 minutes. Be patient; let that cheese melt and the crust become delightfully crispy.
Step 7: Serve and Devour
Once both sides are perfectly grilled, remove the sandwich from the heat. Let it cool for a minute before slicing it in half. Serve it with your favorite dipping sauce or a side salad. It’s time to indulge!
Tips & Tricks
- Choose the Right Bread: Rustic artisan bread holds up well against all that cheese and adds flavor. Avoid flimsy white bread; it might not do justice.
- Cheese Variety: Feel free to experiment. Add gouda for smokiness or mozzarella for stretchiness! Each variety brings its flair.
- Grill on Low Heat: Keep the heat on medium or lower. This allows the cheese to melt without burning the bread prematurely.
- Use a Pan Press: If you have a pan with a weight or a grill press, it can help achieve even grilling and compress the sandwich perfectly.
- Let It Rest: After grilling, let the sandwich sit for a minute before slicing. It helps the cheese set a little and prevents a cheesy avalanche when you cut.
Nutrition Information
Here’s a breakdown to help you enjoy without guilt.
(Per serving – estimated)
- Calories: ~450
- Protein: ~20g
- Carbohydrates: ~30g
- Fats: ~30g
- Fiber: ~2g
Keep in mind, this nutritional value may vary based on specific ingredients and portions used.
Can I Store Disneyland Grilled Cheese?
Yes, you can store leftover grilled cheese sandwiches! Allow them to cool, then wrap in foil or plastic wrap. Store in the refrigerator for up to 3 days.
Reheat them in a skillet on low heat to bring back that crispy goodness.
What Can I Serve with Disneyland Grilled Cheese?
Pair this delightful sandwich with:
- Tomato Soup: A classic match made in heaven.
- Side Salad: Crisp greens or a refreshing cucumber salad.
- Pickles: The tanginess cuts through the richness beautifully.
- Chips: A crunchy side that everyone loves.
- Fruit Salad: Something sweet to balance the savory.
Variations
Feel free to experiment as much as you want! Here are some variations that add a twist to the classic grilled cheese:
1. Pesto Grilled Cheese: Spread pesto on the inside before adding cheese. It adds a refreshing herby flavor.
2. Caprese Grilled Cheese: Use fresh mozzarella, basil, and tomatoes. Drizzle balsamic glaze for extra flair.
3. Spicy Grilled Cheese: Add jalapeños or crushed red pepper flakes to the cheese mix for some heat.
4. Breakfast Grilled Cheese: Layer in scrambled eggs and crispy bacon for a hearty breakfast option.
5. Vegan Grilled Cheese: Substitute dairy cheeses with vegan cheese and use avocado spread for a creamy texture without the dairy.
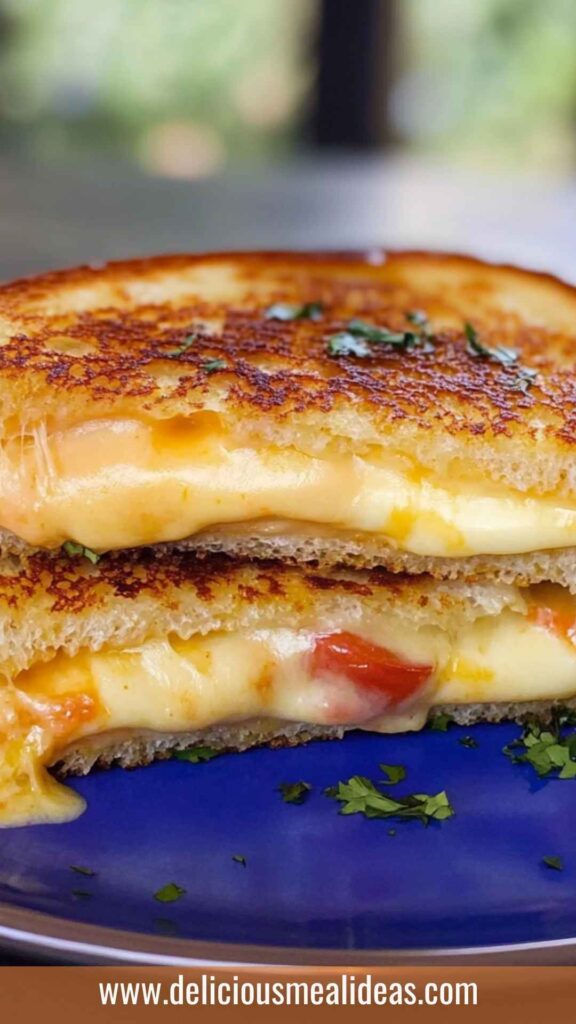
Conclusion
Crafting the Disneyland grilled cheese in your own kitchen is nothing short of historical. From picking the right ingredients to enjoying your culinary creation, I hope this guide has inspired you to embark on your grilled cheese journey.
Not only do you get to savor a delicious sandwich, but you also create memories with family and friends. So next time you’re in need of comfort, you know just what to whip up—a Disneyland grilled cheese. Now, if you’ll excuse me, I need to restock my cheese supply!
You’ll also like the following recipes!
- Birria Grilled Cheese Copycat Recipe
- How |To Make Sourdough Grilled Cheese
- Best Lobster Grilled Cheese Recipe

Disneyland Grilled Cheese Recipe – Delicious Meal Ideas
Description
Let me take you on a little culinary adventure through the magical world of Disneyland. Imagine walking down Main Street, the scent of popcorn wafting through the air, and children laughing as they enjoy their favorite rides. Amid all this excitement, there’s something else that’s equally enticing: the iconic Disneyland grilled cheese sandwich.
If you’ve ever had one, you know it’s a crispy, cheesy delight that warms the soul and tickles the taste buds. Today, I’m going to share not just the recipe for this amazing grilled cheese but also my journey in discovering it and everything that makes it special. So, grab your apron, and let's dive in!
Ingredients
Grilled Four-Cheese Sandwich
Cream Cheese Spread
Garlic Spread
Instructions
Step 1: Prepare the Spreads
-
Start by whipping up the cream cheese spread. In a mixing bowl, combine the whipped cream cheese, shredded double Gloucester or sharp cheddar cheese, heavy cream, and flaky sea salt. Mix well until the ingredients meld together beautifully. This spread will provide a delicious layer of flavor in your grilled cheese.
Step 2: Make the Garlic Spread
-
In another bowl, mix the mayonnaise, minced garlic, kosher salt, and lemon zest. This garlic spread adds a savory depth you didn’t know you needed. Stir until it's thoroughly mixed. Set it aside; we’ll use it for spreading on the bread.
Step 3: Assemble the Sandwiches
-
Take a slice of rustic artisan bread. Spread a generous layer of the cream cheese mix on one side of the bread. Then, add a slice of cheddar cheese followed by a slice of provolone cheese. Don’t skimp on the cheese; it’s what makes this sandwich sing!
Step 4: Add More Cheese
-
Put another layer of your beautiful cheeses on top of the first slice. Why not double the joy? Now, grab another slice of bread and spread the garlic mayo on one side. Place the mayo-spread slice on top of your cheesy creation, mayo side facing inside.
Step 5: Grilling Time
-
Grab a skillet and melt the unsalted butter over medium heat. Gently place your sandwich in the pan. Grill until the bread turns golden and crispy; this can take about 3-4 minutes. You’ll know it’s ready to flip when you see the cheese beginning to ooze out just a little bit.
Step 6: Flip and Cook
-
Carefully flip the sandwich over using a spatula. Grill the other side for another 3-4 minutes. Be patient; let that cheese melt and the crust become delightfully crispy.
Step 7: Serve and Devour
-
Once both sides are perfectly grilled, remove the sandwich from the heat. Let it cool for a minute before slicing it in half. Serve it with your favorite dipping sauce or a side salad. It’s time to indulge!
Nutrition Facts
Servings 8
- Amount Per Serving
- Calories 450kcal
- % Daily Value *
- Total Fat 30g47%
- Total Carbohydrate 30g10%
- Dietary Fiber 2g8%
- Protein 20g40%
* Percent Daily Values are based on a 2,000 calorie diet. Your daily value may be higher or lower depending on your calorie needs.
Note
- Choose the Right Bread: Rustic artisan bread holds up well against all that cheese and adds flavor. Avoid flimsy white bread; it might not do justice.
- Cheese Variety: Feel free to experiment. Add gouda for smokiness or mozzarella for stretchiness! Each variety brings its flair.
- Grill on Low Heat: Keep the heat on medium or lower. This allows the cheese to melt without burning the bread prematurely.
- Use a Pan Press: If you have a pan with a weight or a grill press, it can help achieve even grilling and compress the sandwich perfectly.
- Let It Rest: After grilling, let the sandwich sit for a minute before slicing. It helps the cheese set a little and prevents a cheesy avalanche when you cut.


