When I think about pea salad, I envision sunny picnics and vibrant dinner tables bustling with laughter and good company. This dish pairs seamlessly with a variety of foods, making it perfect for any occasion.
Imagine serving it alongside grilled chicken skewers, or placing it next to a charcuterie board adorned with cured meats and cheeses. It also complements sandwiches beautifully. A turkey and avocado sandwich? Yes, please! It can elevate a simple BBQ, adding freshness next to smoky ribs or burgers.
You can even serve it as part of a buffet spread with crispy breadsticks or as a refreshing side to shrimp cocktails. The beauty of pea salad lies in its versatility. It's a great way to add color and nutrition to your meal, and the creamy goodness can balance out spicy or savory flavors.
What is Pea Salad?
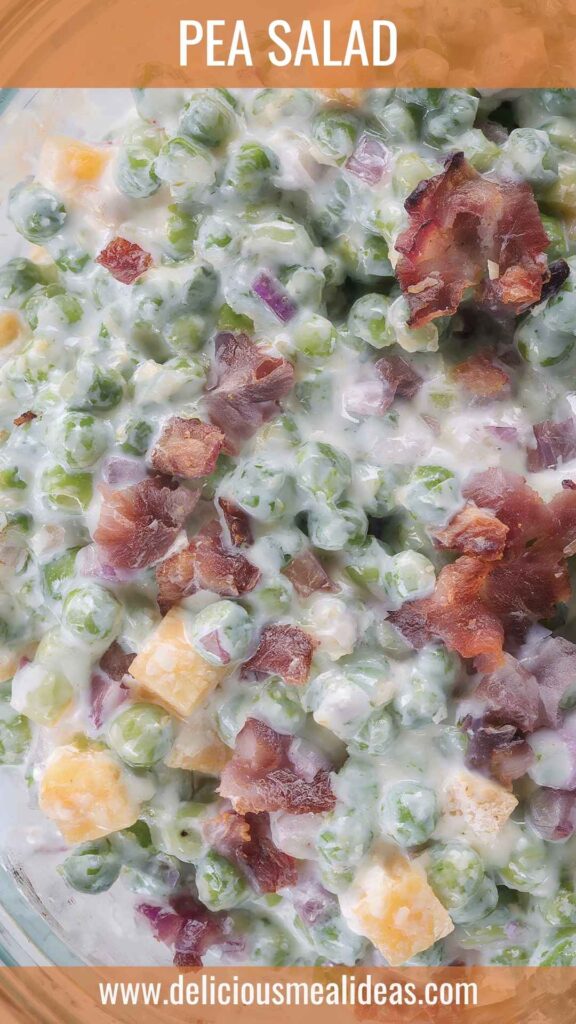
Pea salad is a delightful combination of green peas, crunchy vegetables, a creamy dressing, and sometimes, bacon—an ingredient that always adds a touch of indulgence. This easy-to-make salad has roots in various culinary traditions, often beloved for its straightforwardness and refreshing qualities.
Typically prepared using full-fat sour cream and mayonnaise, it strikes a balance between rich and refreshing. Ingredients often vary based on personal preferences, but classic versions incorporate sweet peas, bright red onions, and a sprinkle of crispy bacon. For those wanting a healthier twist, it’s simple to modify. The beauty of pea salad lies in its adaptability, making each batch uniquely yours.
Why You'll Love This Pea Salad
This isn't just any salad; it's a comforting bowl of nostalgia and flavor. Every bite feels like a hug. Imagine sweet peas nestled beside crunchy vegetables, marrying with the creamy tang of dressing. But what truly makes this dish shine?
Flavor Bomba: The marriage of peas, bacon, onions, and creamy dressing creates a burst of sensations. The sweetness of peas dances elegantly with the salty crunch of bacon, while onion adds a delightful zing.
Nutritional Powerhouse: Peas are not just sweet and delicious; they pack a nutritious punch. They’re rich in vitamins A, C, and K, and they're a great source of protein and fiber. This makes pea salad not just a side dish, but a beneficial addition to your diet.
No Fuss: Let’s face it, life can get chaotic. Pea salad is uncomplicated. In less than 30 minutes, you'll have a delicious dish ready to grace your table.
Crowd-Pleaser: It doesn’t matter if it’s a summer barbecue or a holiday dinner; this salad often takes center stage. The vibrant colors and delightful crunch appeal to both kids and adults.
Make Ahead: Who doesn’t love a dish that gets better with time? Making this salad a few hours in advance allows the flavors to meld together beautifully. Just pop it in the fridge, and you’re good to go!
The Ingredients You Will Need to Make Pea Salad
Let’s take a closer look at the superstar components that come together to create this fabulous dish. Here’s what you need:
4 cups frozen green peas, thawed: The stars of the show, sweet and tender.
8 slices bacon, chopped: Adds richness and crunch.
3/4 cup sharp cheddar cheese, cubed: For a creamy, cheesy goodness.
1/4 cup mayonnaise: Classic dressing component.
1/2 cup full-fat sour cream: For creaminess; makes the salad richer.
1 tablespoon granulated white sugar: Balances the tanginess of the dressing.
1/8 teaspoon freshly ground black pepper: A dash of seasoning.
2 teaspoons apple cider vinegar: For a hint of acidity.
1/4 teaspoon coarse sea salt: Enhances all the flavors.
1/3 cup finely diced red onion: Provides crunch and a bite of flavor.
1 tablespoon chopped fresh chives: To add a mild oniony freshness.
Directions for Pea Salad
Step 1: Cook the Bacon
Start by crisping up your bacon. In a skillet over medium heat, cook the chopped bacon until it’s golden brown and crispy. This might take around 6–8 minutes. Drain the bacon on a paper towel to absorb excess grease.
Step 2: Prepare the Vegetables
In the meantime, while the bacon is cooking, focus on prepping your vegetables. Finely chop your red onion and chives. Halve or cube the sharp cheddar cheese. This is where you can add a little zest to your step—feel free to do a little dance while chopping. Trust me; it helps!
Step 3: Mix the Dressing
In a large bowl, mix the mayonnaise, sour cream, apple cider vinegar, and sugar. Stir until fully combined and smooth. Add black pepper and sea salt. Give it a taste—this mixture should be creamy yet tangy.
Step 4: Combine Ingredients
Once your bacon has cooled, it's time to bring everything together. In the bowl with the dressing, add the thawed peas, chopped bacon, diced onions, cheddar cheese, and chives. Gently fold everything to ensure the peas get fully coated in that creamy goodness.
Step 5: Chill
Cover the bowl and place it in the refrigerator for at least 2 hours. This resting period allows the flavors to marry. If you can wait overnight, even better!
Step 6: Serve and Enjoy
When you’re ready to serve, give the salad a gentle stir. Taste it one more time to see if it needs a little more seasoning. Sublime flavor bombs are ready to hit the table!
Notes on Making Pea Salad
Here are some tips to enhance your pea salad making experience:
Swapping Ingredients: No bacon? No worries! Try turkey bacon or leave it out for a vegetarian option.
Fresh Peas: If preferred, you can use fresh peas instead of frozen. Just blanch them for a few minutes in boiling water and plunge in ice water.
Cheese Options: Feel free to experiment with different cheeses, such as feta or mozzarella. Each cheese brings a different character to the salad.
Add Heat: A few dashes of hot sauce can really wake up the flavor if you enjoy a kick.
Extra Veggies: Include some diced bell peppers or shredded carrots for added color and nutrition.
Storage Tips
Pea salad can be stored quite well. Here’s how to keep it fresh:
Refrigeration: Store in an airtight container in the fridge. It should last for about 3–5 days.
Freezing: I wouldn’t recommend freezing this salad. The texture of peas and the dressing might not hold up well once thawed.
Fresh Ingredients: If you plan to keep leftovers, consider storing the bacon separately until ready to eat to maintain its crispiness.
Nutrition Information
Wondering what’s packed in this delicious pea salad? Here's the breakdown per serving assuming 8 servings:
Calories: Approximately 210
Total Fat: 13g
Saturated Fat: 5g
Cholesterol: 30mg
Sodium: 270mg
Carbohydrates: 14g
Fiber: 4g
Sugars: 2g
Protein: 7g
Serving Suggestions
Pea salad shines as a side dish on its own but can blend well with many main courses. Here are some suggestions to serve it up right:
With Grilled Chicken: Serve it next to juicy grilled chicken to create a well-rounded meal.
As a Side for Steaks: The creamy salad contrasts beautifully with the savory flavor of steak.
In a Wrap: Spread it in a wrap with some greens and your favorite protein for a delightful lunch.
At Buffets: It’s a perfect addition to a buffet, sitting pretty beside pasta and potato salads.
Picnics: Easy to transport, pea salad is a hit at picnics and gatherings—just keep it cool!
What Other Substitutes Can I Use in Pea Salad?
Experimenting can be fun! Here are some substitutes to consider:
Greek Yogurt for Mayonnaise: Swap out mayonnaise with Greek yogurt for a healthier dressing. It adds a nice tang.
Quinoa instead of Peas: If you want something heartier, replace peas with cooked quinoa for a protein boost.
Chickpeas: Toss in chickpeas for extra fiber and protein. They’ll give a new texture and flavor.
Avocado: Substitute avocado in place of cheese for a creamy, rich flavor that’s also healthy.
Vegetable Variations: Substitute or add other fresh veggies like corn, cucumber, or diced celery to switch things up.
Conclusion
Pea salad is a versatile, tasty, and simple dish that deserves a spot on your table. Its combination of flavors and textures makes it universally loved. Whether you’re preparing it for a gathering or simply craving something fresh, this salad will not disappoint. I hope this guide empowers you to create your own version of pea salad.
So, grab your ingredients, roll up your sleeves, and enjoy every moment as you create this delightful dish. Happy cooking!
You’ll also like the following recipes!