
This post contains affiliate links. As an Amazon Associate I earn from qualifying purchases.
Every January, I’d watch my grandmother stand over a steaming pot of black eyed peas, stirring slowly while the aroma wrapped around our kitchen like a hug. She never used a recipe—just knew. I spent years trying to recreate that magic, frustrated when my peas turned mushy or bland, when the broth tasted thin, when that smoky richness somehow disappeared. Sound familiar?
I finally realized I wasn’t missing an ingredient. I was missing understanding—why we soak, why bacon fat matters, why timing is everything.
Today, I’m sharing exactly what my grandmother knew intuitively, plus the nutrition science that makes this dish so nourishing. This black eyed peas with chicken broth recipe has become my go-to comfort meal when life gets busy, and I can’t wait to cook it with you.
Why Your Black Eyed Peas Never Turn Out Right (And How to Fix It)
Here’s what I hear from clients and friends constantly: “My peas came out gritty.” “The broth was flavorless.” “Everything turned to mush.” As a registered dietitian, I’ve seen people give up on this humble dish because they assumed they weren’t “good at cooking.”
That’s never the truth. The problem is almost always one of three things: skipping the soak, not building a proper flavor base, or cooking at the wrong temperature. I spent my early kitchen years making every single one of these mistakes—until my grandmother finally sat me down and taught me the why behind each step.
What changed everything? Understanding that black eyed peas need respect. They’re not just vegetables tossed in broth. They’re legumes with a story, and when you honor that story with proper technique, they transform into something transcendent. That’s what this recipe is really about.
What Makes This Black Eyed Peas With Chicken Broth Recipe Different?
The secret lives in three critical places. First, we’re building a proper aromatic base by cooking bacon until crispy, which renders fat that becomes the foundation for everything else. Second, we’re using that bacon fat to coax sweetness and depth from onions before they ever meet the peas—this is called caramelization, and it’s non-negotiable for flavor.
Third, we’re keeping our simmer gentle and our timing deliberate, which means your peas stay whole and creamy instead of collapsing into a sad paste.
Most recipes skip the soak or rush the cooking. This one doesn’t. The six-hour (or overnight) soak actually changes the chemistry of the pea, making it more digestible and helping it cook evenly. The gentle simmer—20 to 30 minutes after your peas come to a boil—is the sweet spot where they become tender-creamy without losing their integrity. That’s the difference between a good dish and one that feels like home.
Before You Start: What You Need to Know
There are two pieces of knowledge that change everything about this recipe, and most cookbooks skip right over them. Let me give them to you straight.
- Soaking isn’t optional—it’s chemistry. When you soak dried black eyed peas for at least six hours, you’re activating enzymes that break down oligosaccharides (the compounds that cause digestive discomfort). You’re also ensuring even cooking because the moisture penetrates uniformly into each pea. Rush this step, and you’ll have some peas tender while others stay hard. The kitchen magic isn’t in rushing; it’s in planning ahead.
- Bacon fat is your secret weapon, not a shortcut. Many recipes tell you to use oil, but bacon fat brings smokiness and umami that create a flavor foundation nothing else can match. When you cook bacon first and leave just 1 to 2 tablespoons of that rendered fat in the pan, you’re not being indulgent—you’re being intentional. This is what transforms the broth from “nice” to “unforgettable.”
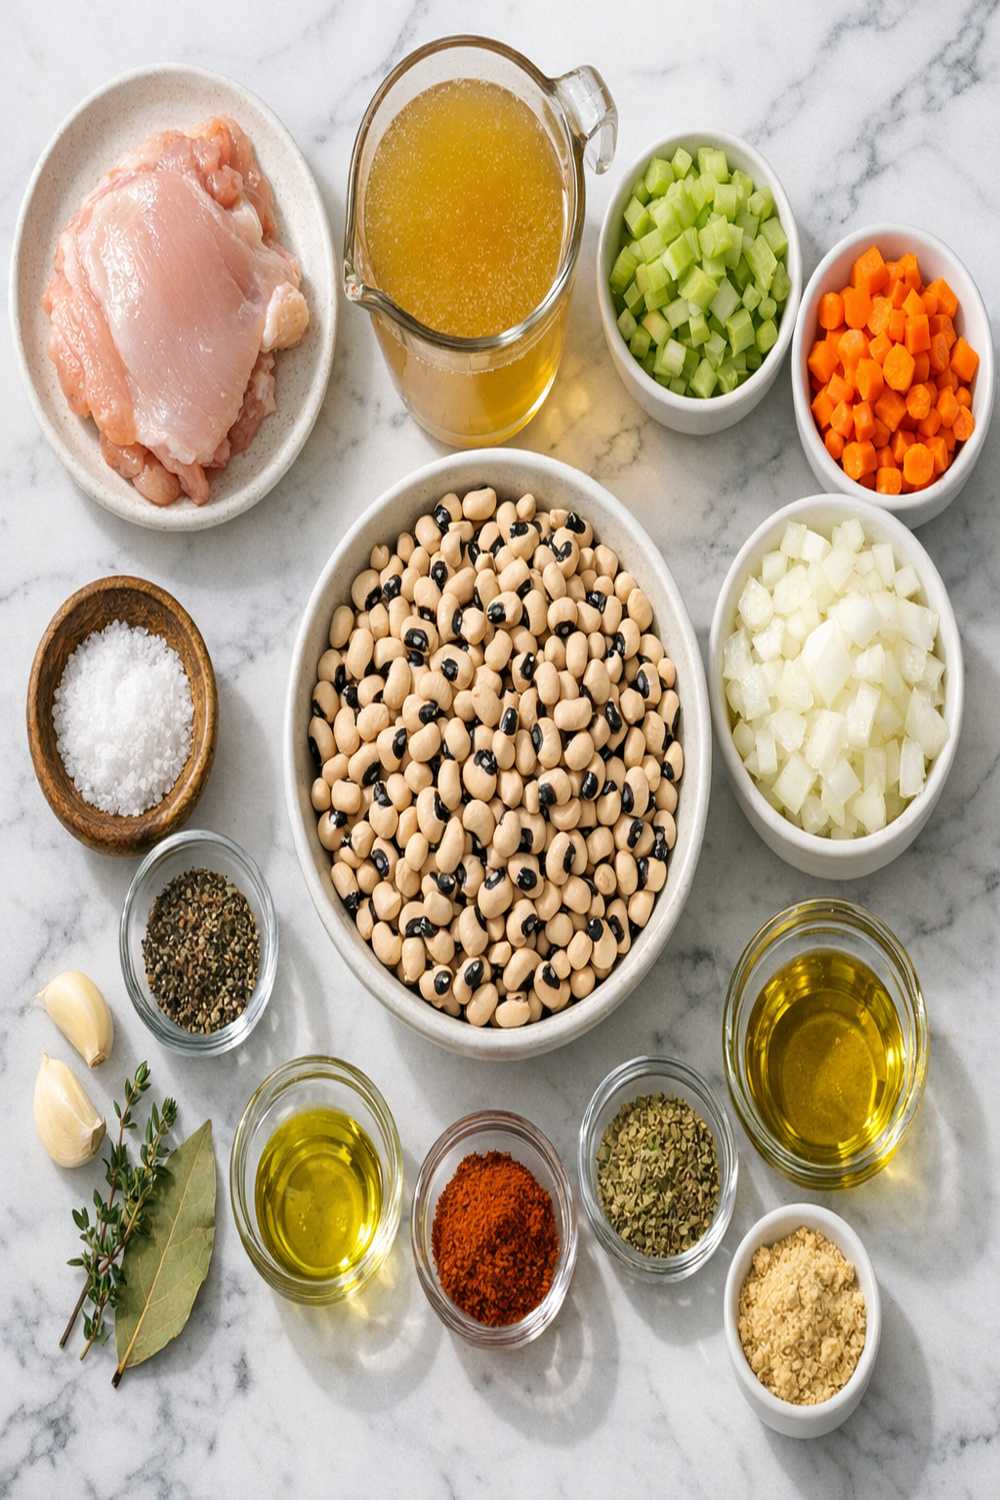
The Ingredients
I’ve chosen each ingredient for a specific reason. This isn’t a list of what “goes into” black eyed peas—it’s a carefully balanced ensemble where every player matters. Let me walk you through why each one earned its place in this dish.
- ½ teaspoon freshly ground black pepper (add to taste, adjusting as needed)
- 2 cups dried black eyed peas (the foundation; look for ones that are uniform in size and color, free of wrinkles or cracks)
- 8 ounces bacon, chopped into bite-sized pieces (quality bacon makes a measurable difference; I choose uncured when possible)
- 4 cups chicken broth, low-sodium (the base of your pot; low-sodium lets you control final salt levels)
- 1 teaspoon smoked salt (or regular sea salt; smoked salt echoes the bacon and deepens the broth)
- 2 tablespoons fresh flat-leaf parsley, chopped (brightness and color for serving)
- 1 cup white onions, diced into small, consistent pieces (white onions cook down sweeter than yellow; the uniformity ensures even cooking)
- 1 to 2 teaspoons fresh garlic, minced (not jarred; fresh garlic brings brightness that jarred cannot)
- ¼ to ½ teaspoon red pepper flakes (start with ¼ teaspoon if you prefer milder heat; you can always add more at the end)
- 1 bay leaf (adds subtle herbal depth; always remove before serving)
- Hot sauce for finishing (optional but encouraged; a splash adds complexity)
Step-by-Step: How to Make Black Eyed Peas With Chicken Broth Recipe Without Fail
I’m walking you through this with complete confidence that you can do this. The steps are straightforward, but the intention behind each one matters. Pay attention to what I’m telling you about the “why,” and you’ll build intuition that carries you through any recipe.
Step 1: Prepare Your Peas the Right Way
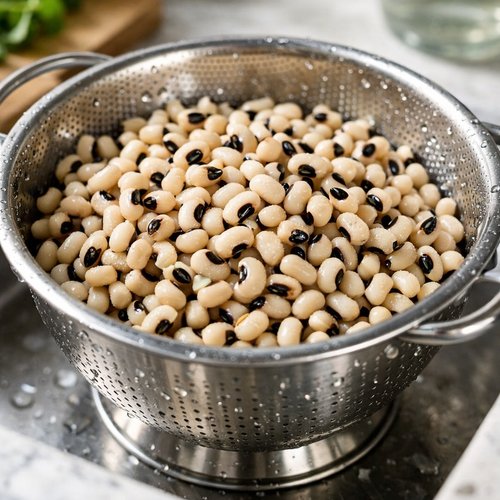
Pour your dried black eyed peas into a colander and rinse them thoroughly under cool running water. As the water flows through, look carefully—you’re hunting for anything that doesn’t belong. Occasionally a small stone or dried debris hides in the bag.
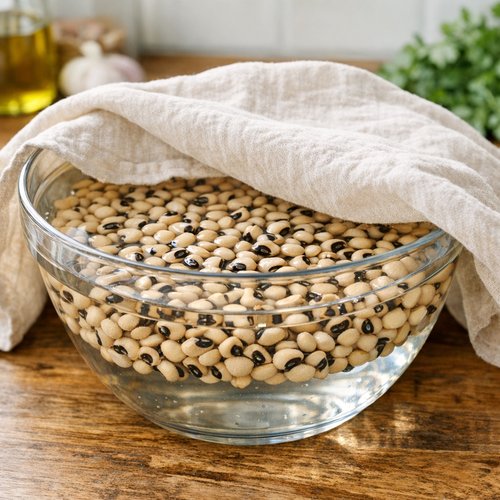
Your teeth will thank you for taking this minute. Once the water runs clear, transfer your rinsed peas to a large bowl and cover them completely with fresh, cool water (about 2 inches of water above the peas). Cover the bowl loosely with a kitchen towel and let them sit at room temperature for at least six hours, though overnight is ideal. This isn’t laziness; this is science working in your favor.
Step 2: Drain and Set Aside
After soaking, drain your peas in the colander again and rinse one final time. The soaking liquid contains some of those compounds we wanted to break down, so we discard it. Your peas are now primed for cooking—they’ve absorbed moisture uniformly and are ready to cook evenly. Set them in a bowl nearby; you’ll need them in just a moment.
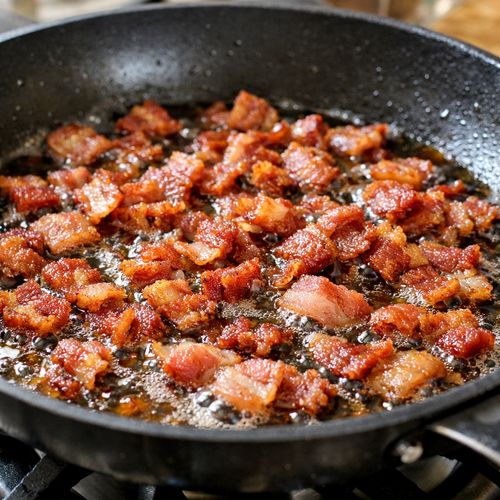
Step 3: Cook the Bacon Until Crispy
Place a large skillet over medium heat and add your chopped bacon pieces. Let them cook slowly, stirring occasionally, until they’re golden and crispy—not floppy, not burnt, just perfectly rendered. This takes about 8 to 10 minutes depending on your stove. The bacon should give up its fat, and you should hear gentle crackling. Once it’s crispy, transfer the bacon to a paper towel–lined plate to drain and cool slightly. Don’t discard that precious bacon fat in the pan—that’s liquid gold.
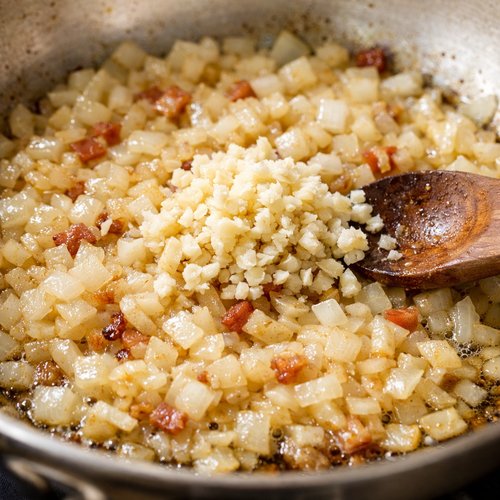
Step 4: Build Your Flavor Base With Onions and Garlic
Leave about 1 to 2 tablespoons of bacon fat in your skillet (drain the excess if there’s more than that; you want flavor, not grease). With the heat still at medium, add your diced onions to the warm fat. This is the moment magic begins. Stir them occasionally for about 5 to 7 minutes, letting them soften and turn translucent.
You’re not rushing this; you’re allowing the bacon fat to coax sweetness from the onions. Once they’re soft and glossy, add your minced garlic and cook for just another minute or so until fragrant—you’ll smell it clearly, and that’s your signal. Don’t let garlic cook longer than a minute or it turns bitter.
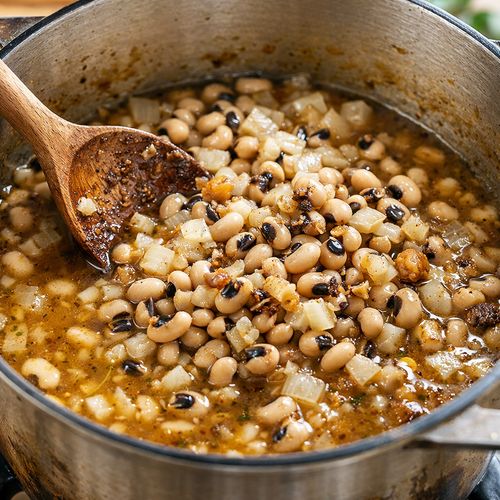
Step 5: Combine Everything in Your Cooking Pot
Transfer your drained peas to a large pot (not the skillet). Pour in your 4 cups of low-sodium chicken broth. Using a wooden spoon, scrape the bottom of your skillet where those onions and garlic bits cling—that’s called deglazing, and it captures every molecule of flavor. Add the onions, garlic, and all those browned bits to the pot with the peas and broth. Drop in your bay leaf and sprinkle in your red pepper flakes (start with ¼ teaspoon if you’re heat-sensitive). Stir gently to combine.
Step 6: Bring to a Boil, Then Reduce Heat
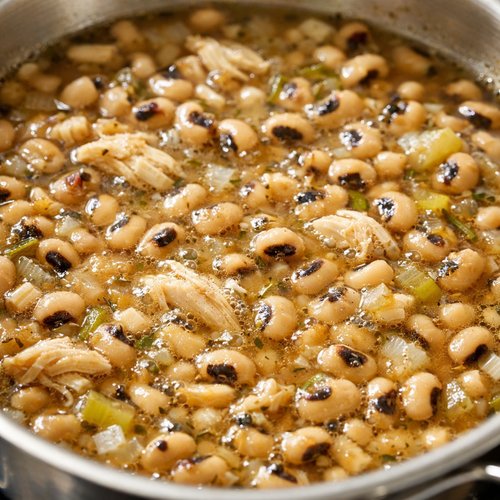
Place your pot over medium-high heat and bring the broth to a rolling boil. You’ll see it bubble vigorously, and the peas will start to bob at the surface. Once it reaches a true boil, reduce your heat to medium-low immediately.
This is where patience becomes your greatest tool. You want a gentle simmer—tiny bubbles that occasionally break the surface, not an aggressive rolling boil. An aggressive boil breaks down peas and clouds your broth. A gentle simmer keeps everything intact while coaxing out creaminess.
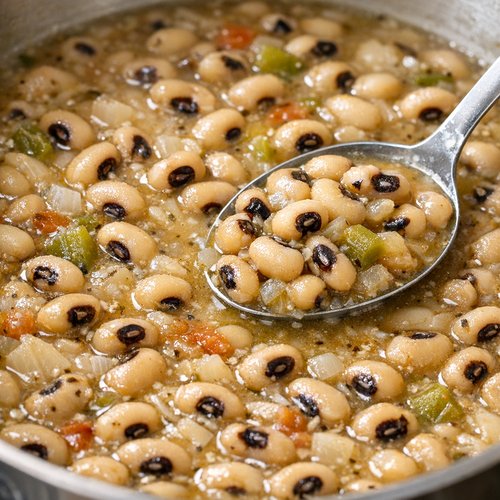
Step 7: Simmer Until Peas Reach Perfect Tenderness
Let your peas cook gently for 20 to 30 minutes. Start checking them around the 18-minute mark by fishing out a single pea with a spoon and tasting it. The pea should be tender enough to bite through without resistance, but still hold its shape—not mushy, not hard. As they cook, you may notice the broth becoming slightly creamy; that’s starch released from the peas creating natural body. This is beautiful. If your broth looks thin, that’s fine too; it will deepen in flavor as it cools slightly.
Step 8: Season With Intention
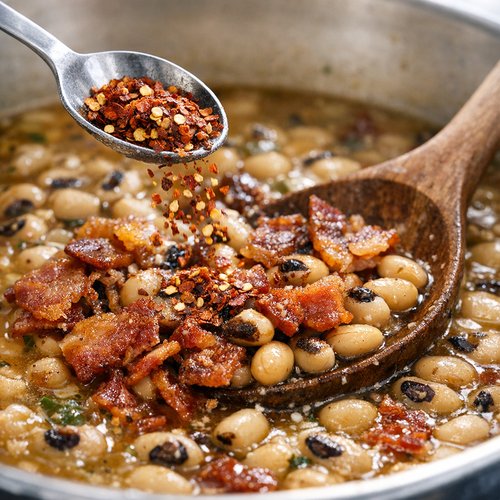
Once your peas have reached the exact tenderness you want, taste the broth carefully. Add your smoked salt and black pepper a pinch at a time, tasting after each addition. Remember: you can always add more salt, but you cannot remove it. If you used ¼ teaspoon of red pepper flakes and want more heat, now is the time to add the additional ¼ teaspoon.
Stir in your crispy bacon pieces (or save them as a garnish if you want them to stay especially crispy on top). Add a splash of hot sauce if you’d like that final layer of complexity.
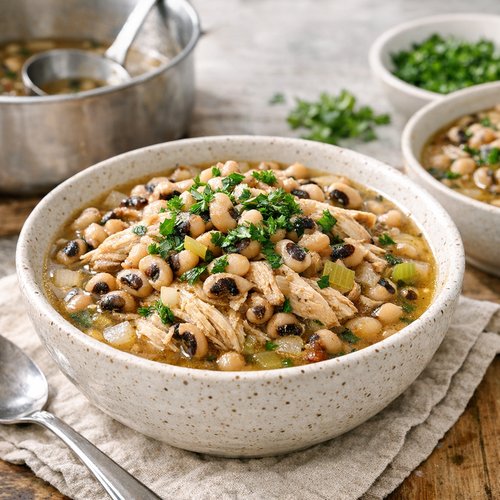
Step 9: Rest and Serve
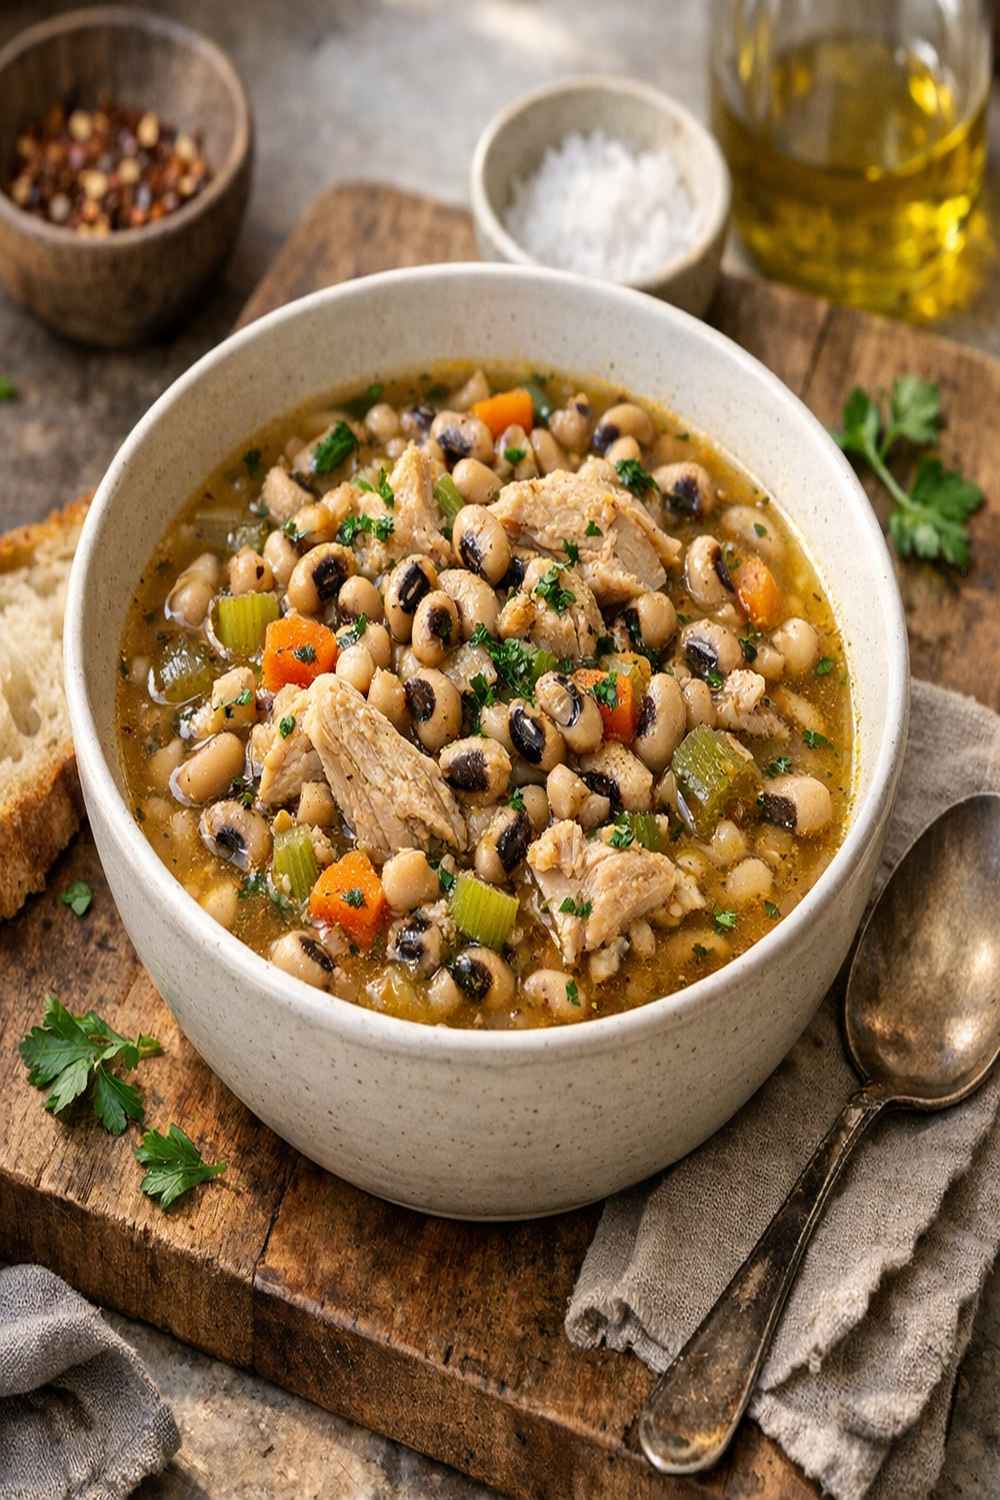
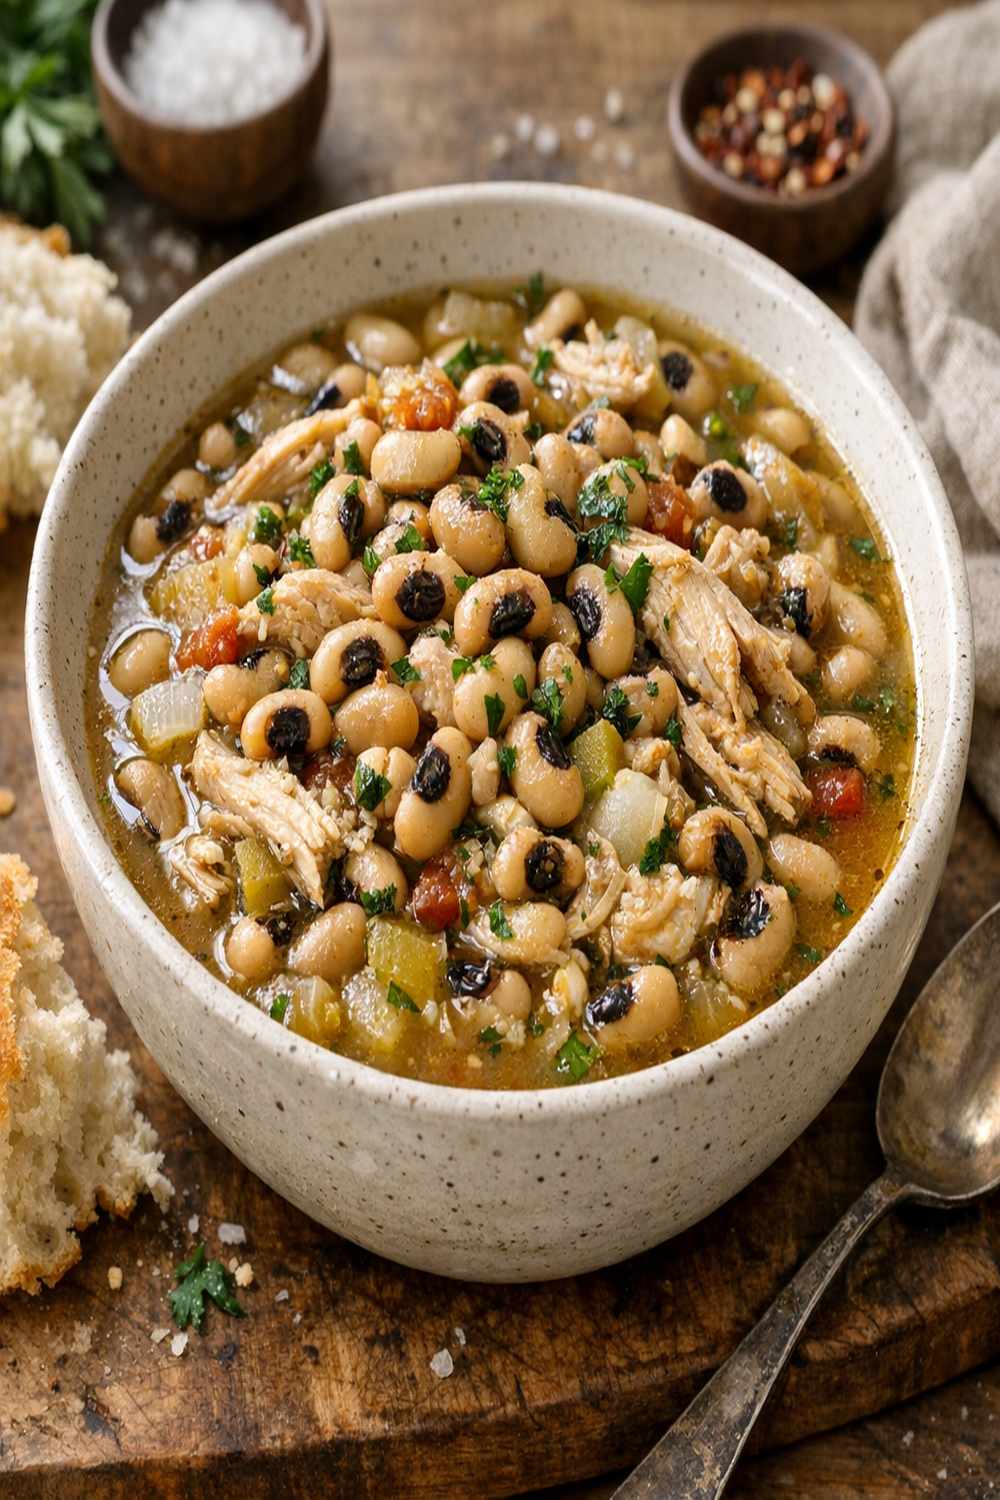
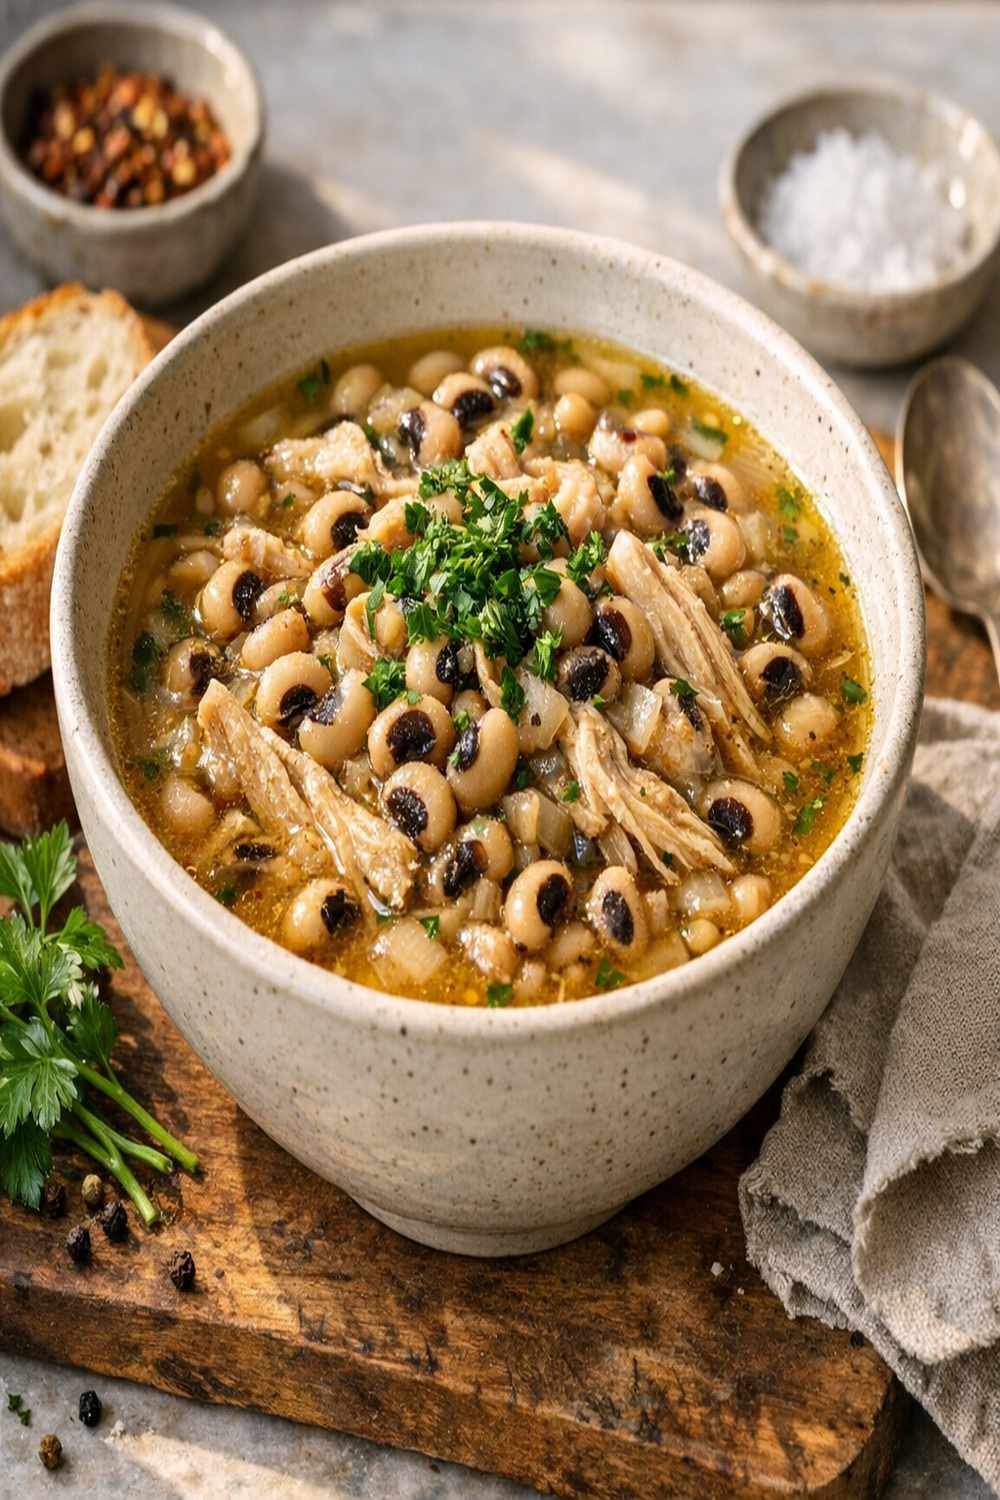
Let your finished pot sit off heat for 5 minutes. This resting period allows flavors to marry and settle. Ladle into bowls, top with fresh chopped parsley, and serve hot. If you reserved crispy bacon as a garnish, sprinkle it on top right before serving so it stays textured and crispy rather than absorbing broth.
The Most Common Mistakes (And How to Avoid Them)
- Skipping the soak or soaking for too short a time. When you skip soaking, peas cook unevenly because moisture hasn’t penetrated uniformly. Some become mushy while others stay hard. Even worse, you miss the enzyme activation that makes peas easier to digest. Solution: Plan ahead. Soak for at least six hours, preferably overnight. This is non-negotiable for success.
- Cooking at too high a temperature. A rolling boil will break down peas into a paste and cloud your broth with starch. It also speeds up cooking in a way that seems helpful but actually prevents even doneness. Solution: Once you reach a boil, reduce heat immediately to medium-low and maintain a gentle simmer. You should see occasional bubbles, not constant roiling.
- Using store-bought minced garlic instead of fresh. I know it’s convenient, but jarred garlic lacks the brightness of fresh garlic and often has a slightly metallic taste. For just a teaspoon or two, take 30 seconds to mince fresh garlic. Your broth will taste noticeably better. Solution: Buy a small head of garlic and mince what you need. The difference is worth it.
- Oversalting before tasting. Because bacon is salty and chicken broth is salty, it’s easy to over-season without realizing it. Solution: Always taste before adding more salt. Add in small increments and stir well before tasting again. You’re building layers, not dumping in salt at once.
How Do I Know When It’s Done?
This is where intuition matters. Timing is a guide, not a guarantee—your stove, your exact pot, even your altitude all affect cooking time. Here’s what to look for instead: Pick out a single pea and let it cool for a moment, then bite it. A perfectly cooked pea yields gently to your teeth without being mushy or chalky. It should taste creamy inside, not starchy or hard.
The broth should taste rich and slightly thickened by starch from the peas, though it won’t be thick like a soup. If you see peas with their skins starting to split or slip off, you’re right at the edge of doneness—pull it from heat immediately. If you see peas still holding their firm shape with no give when bitten, give them another 5 minutes.
Don’t rely on timing alone. The soak time, your specific stove, and the age of your dried peas all affect final cooking time. Check at 18 minutes, then every 2 to 3 minutes after that. This takes less than a minute and prevents overcooking.
Troubleshooting: When Things Go Wrong
- Peas are still hard after 35 minutes of simmering. This usually means either your peas are very old (dried peas have a shelf life), or they didn’t soak long enough. Mid-cook solution: Keep simmering and check every 5 minutes. If they’re still not tender after 50 minutes total, they were likely past their prime when you bought them. Next time, look for peas with consistent color and no visible cracks. For future batches, soak for the full overnight if possible—old peas especially need this.
- Your broth tastes thin and one-dimensional, lacking the smoky depth you expected. You likely used too little bacon fat or rendered it out completely instead of leaving some in the pan. Mid-cook solution: It’s too late to fix this batch, but next time, measure that bacon fat carefully—1 to 2 tablespoons makes a massive difference. Also, make sure you’re using quality bacon. Some commercial bacons are heavily processed and lack smoky flavor.
- Peas are mushy and falling apart. Your heat was too high, or you cooked them too long. While you can’t uncook them, you can at least finish the dish well by serving them as a creamy, thick broth (almost like a purée) rather than trying to highlight whole peas. For next time: Reduce heat to medium-low immediately after boiling and check peas starting at 18 minutes, not 25.
Can I Store Black Eyed Peas With Chicken Broth Recipe?
Yes, absolutely—and this dish actually improves as it sits. Refrigerate in an airtight container for up to five days. The flavors continue to deepen, and the broth thickens slightly as it cools. To reheat, warm gently over medium heat, stirring occasionally and adding a splash of water if the broth has thickened too much.
You can freeze this dish for up to three months in a freezer-safe container, leaving about an inch of headspace for expansion. Thaw overnight in the refrigerator, then reheat gently. I often make a double batch on Sunday and portion it into individual containers for quick lunches and easy dinners throughout the week.
If you’ve kept the bacon separate as a garnish, store it in an airtight container in the refrigerator for up to three days. Add it fresh when you reheat, so it stays crispy instead of absorbing broth.
Expert’s Nutritional Tip: Why This Dish Is More Nourishing Than You Realize
As a registered dietitian, I see people reach for processed foods because they believe simple foods aren’t nutritious enough. Black eyed peas shatter that myth. One cup of cooked black eyed peas contains approximately 15 grams of plant-based protein and 11 grams of fiber—according to USDA nutrition data.
That fiber is crucial; it feeds beneficial gut bacteria and helps stabilize blood sugar, which means you stay fuller longer without energy crashes. The combination of peas and chicken broth adds even more value: the broth provides collagen and gelatin (especially if you use bone broth instead of regular), which support joint and gut health.
The bacon, while containing saturated fat, also provides selenium and B vitamins that support thyroid function and energy metabolism. This isn’t indulgence; it’s nourishment designed by nature.
What Can I Serve With Black Eyed Peas With Chicken Broth Recipe?
This dish is wonderfully versatile. It stands beautifully on its own as a complete meal, but it also plays well with others. Here’s what I love serving alongside it:
- Cornbread or a crusty loaf of bread – the bread soaks up every last drop of broth, making this a deeply satisfying meal. I often make cornbread because the slight sweetness balances the smoky, peppery broth perfectly.
- Simple sautéed greens (collards, kale, or spinach) – adds color, nutrition, and a slight bitterness that contrasts beautifully with the richness of the peas. Cook them with garlic and a bit of the bacon fat from your recipe.
- A crisp green salad with vinaigrette – the acidity of vinegar cuts through the richness and cleanses the palate. Try a simple lemon vinaigrette.
- Roasted root vegetables (carrots, turnips, or sweet potatoes) – earthy and hearty, these complement the peas without competing for attention.
- A simple tomato-based dish like Beefsteak Tomato Sauce Recipe – if you want to make a heartier meal, serving this alongside a tomato-based protein creates a satisfying, balanced plate.
The beauty of this dish is that it’s humble enough to eat alone with nothing but a spoon, but elegant enough to anchor a complete menu.
Seasonal Variations: Adapting This Recipe Year-Round
I love cooking with seasons because it keeps my kitchen exciting and connects me to what’s growing around me. Here’s how I adapt this recipe:
Winter (as written): Use the recipe exactly as described. The warmth and richness suit cold months perfectly. Add extra bay leaves if you want more herbaceous notes.
Spring: Add fresh herbs as you finish cooking—thyme, oregano, or marjoram bring brightness. Consider stirring in a handful of fresh spinach or arugula right at the end; it wilts into the warm broth beautifully. Add a squeeze of fresh lemon juice for acidity.
Summer: Keep the cooking method but serve at room temperature rather than piping hot—it becomes almost a salad when cooled. Top with fresh herbs, diced tomatoes, and a drizzle of good olive oil. The dish tastes lighter while retaining all the nutrition.
Fall: Add diced sweet potato or butternut squash during the last 10 minutes of cooking. The sweetness echoes the caramelized onions and adds seasonal depth. A pinch of cinnamon or nutmeg is beautiful here too.
Make-Ahead Guide: Meal Prep Like a Registered Dietitian
This is one of my favorite dishes to make ahead because it genuinely improves over time. Here’s my professional approach:
Full Batch Preparation (Sunday Cooking): Make the entire recipe on Sunday. Cool completely, then divide into individual portions in glass containers. Refrigerate for up to five days or freeze for up to three months. When you need a meal, simply reheat gently over medium heat or in the microwave (in a microwave-safe container) until warmed through.
Component Prep (If You Prefer): Soak your peas Friday night. Saturday morning, cook the bacon and prepare the onion and garlic mixture; store them separately in airtight containers in the refrigerator. When you’re ready to cook (Sunday evening, Monday morning, whenever), simply combine everything and simmer for 20 to 30 minutes. This takes 35 minutes total but spreads the work across multiple days.
Batch Freezing for Busy Weeks: Make a triple batch and freeze in portions. I use both quart-sized containers (for family servings) and individual pint containers (for quick lunches). Label with the date. Thaw overnight in the refrigerator and reheat gently. This means you always have a nourishing meal ready without the stress.
Nutrition Information
Per serving (1 cup), this recipe provides approximately 280 calories, 15 grams of protein, 11 grams of fiber, and 8 grams of healthy fat (according to USDA nutrition database calculations). The high protein and fiber content makes this a complete, satisfying meal that keeps blood sugar stable and supports healthy digestion. The selenium from bacon supports thyroid function, while the iron in peas (especially when paired with the vitamin C from fresh parsley) is well-absorbed by your body. This is nutritionally dense food that tastes like comfort—that’s the sweet spot I always chase.
Black Eyed Peas With Chicken Broth Recipe
Ingredients
Method
- Pour your dried black eyed peas into a colander and rinse them thoroughly under cool running water. As the water flows through, look carefully—you’re hunting for anything that doesn’t belong. Occasionally a small stone or dried debris hides in the bag. Your teeth will thank you for taking this minute. Once the water runs clear, transfer your rinsed peas to a large bowl and cover them completely with fresh, cool water (about 2 inches of water above the peas). Cover the bowl loosely with a kitchen towel and let them sit at room temperature for at least six hours, though overnight is ideal. This isn’t laziness; this is science working in your favor.
- After soaking, drain your peas in the colander again and rinse one final time. The soaking liquid contains some of those compounds we wanted to break down, so we discard it. Your peas are now primed for cooking—they’ve absorbed moisture uniformly and are ready to cook evenly. Set them in a bowl nearby; you’ll need them in just a moment.
- Place a large skillet over medium heat and add your chopped bacon pieces. Let them cook slowly, stirring occasionally, until they’re golden and crispy—not floppy, not burnt, just perfectly rendered. This takes about 8 to 10 minutes depending on your stove. The bacon should give up its fat, and you should hear gentle crackling. Once it’s crispy, transfer the bacon to a paper towel–lined plate to drain and cool slightly. Don’t discard that precious bacon fat in the pan—that’s liquid gold.
- Leave about 1 to 2 tablespoons of bacon fat in your skillet (drain the excess if there’s more than that; you want flavor, not grease). With the heat still at medium, add your diced onions to the warm fat. This is the moment magic begins. Stir them occasionally for about 5 to 7 minutes, letting them soften and turn translucent. You’re not rushing this; you’re allowing the bacon fat to coax sweetness from the onions. Once they’re soft and glossy, add your minced garlic and cook for just another minute or so until fragrant—you’ll smell it clearly, and that’s your signal. Don’t let garlic cook longer than a minute or it turns bitter.
- Transfer your drained peas to a large pot (not the skillet). Pour in your 4 cups of low-sodium chicken broth. Using a wooden spoon, scrape the bottom of your skillet where those onions and garlic bits cling—that’s called deglazing, and it captures every molecule of flavor. Add the onions, garlic, and all those browned bits to the pot with the peas and broth. Drop in your bay leaf and sprinkle in your red pepper flakes (start with ¼ teaspoon if you’re heat-sensitive). Stir gently to combine.
- Place your pot over medium-high heat and bring the broth to a rolling boil. You’ll see it bubble vigorously, and the peas will start to bob at the surface. Once it reaches a true boil, reduce your heat to medium-low immediately. This is where patience becomes your greatest tool. You want a gentle simmer—tiny bubbles that occasionally break the surface, not an aggressive rolling boil. An aggressive boil breaks down peas and clouds your broth. A gentle simmer keeps everything intact while coaxing out creaminess.
- Let your peas cook gently for 20 to 30 minutes. Start checking them around the 18-minute mark by fishing out a single pea with a spoon and tasting it. The pea should be tender enough to bite through without resistance, but still hold its shape—not mushy, not hard. As they cook, you may notice the broth becoming slightly creamy; that’s starch released from the peas creating natural body. This is beautiful. If your broth looks thin, that’s fine too; it will deepen in flavor as it cools slightly.
- Once your peas have reached the exact tenderness you want, taste the broth carefully. Add your smoked salt and black pepper a pinch at a time, tasting after each addition. Remember: you can always add more salt, but you cannot remove it. If you used ¼ teaspoon of red pepper flakes and want more heat, now is the time to add the additional ¼ teaspoon. Stir in your crispy bacon pieces (or save them as a garnish if you want them to stay especially crispy on top). Add a splash of hot sauce if you’d like that final layer of complexity.
- Let your finished pot sit off heat for 5 minutes. This resting period allows flavors to marry and settle. Ladle into bowls, top with fresh chopped parsley, and serve hot. If you reserved crispy bacon as a garnish, sprinkle it on top right before serving so it stays textured and crispy rather than absorbing broth.
FAQs
Can I Use Canned Black Eyed Peas Instead of Dried?
Yes, though the flavor and texture won’t be quite the same. If you use canned peas, drain and rinse them thoroughly, then skip the soaking and boiling steps entirely. Start at Step 4 (building your flavor base with bacon, onions, and garlic), and simmer the canned peas in the broth for just 10 to 15 minutes instead of 20 to 30. They’re already cooked, so you’re just heating them through and infusing flavor. The broth won’t develop quite the same body and richness because canned peas don’t release as much starch, but it’s still a delicious shortcut when you’re short on time.
What If I Don’t Eat Pork or Want to Skip Bacon?
I’d suggest using smoked salmon or even smoked paprika-seasoned diced chicken breast to capture that smoky flavor the bacon provides. Cook your chosen substitute first, render any fat if possible, then proceed with the onions and garlic. If you’re vegetarian or vegan, use a good-quality vegetable broth instead of chicken broth and add 1 teaspoon of smoked paprika plus a pinch of liquid smoke to mimic the smokiness bacon would contribute. You’ll still have a deeply flavorful, warming dish.
My Peas Split Open During Cooking. Did I Do Something Wrong?
Not necessarily—splitting happens when peas are overcooked or when you’re cooking at too high a temperature. Split peas still taste delicious; they just release more starch into the broth, making it thicker and creamier. If you prefer whole peas with intact skin, reduce your cooking time (pull them from heat at 18 to 20 minutes instead of 25 to 30), and keep your temperature very gentle. But honestly? Some people prefer the slightly thickened, creamier texture that split peas create. There’s no “wrong” here—just different textures.
Can I Add Other Vegetables to This Dish?
Absolutely. I often add diced carrots and celery along with the onions during Step 4, giving them time to soften in the bacon fat before adding the peas and broth. Fresh tomatoes are beautiful added near the end (they don’t need much cooking). Diced bell peppers, corn, and spinach all work wonderfully too. Just remember: harder vegetables should go in earlier (during the onion cooking stage), while softer vegetables or greens should go in during the last few minutes of cooking so they don’t turn mushy.
What’s the Difference Between Black Eyed Peas and Black Beans?
Black eyed peas are smaller, creamier, and have a slightly earthier, more delicate flavor than black beans. They also cook faster (20 to 30 minutes after soaking versus 1 to 2 hours for black beans). Black beans have a firmer texture and more robust flavor. You can substitute black beans in this recipe, but you’ll need to increase simmering time to 45 to 60 minutes after boiling, and the overall flavor profile will be slightly different—earthier, less delicate. Either way, you’ll have a delicious dish; it’s just a different experience.
More Recipes You’ll Love
- White Chicken Chili Recipe – another warming, broth-based comfort dish that shares similar comfort-food DNA
- this cozy soup – hearty and perfect for busy weeknights, with that same deeply satisfying quality
- this cozy soup – another vegetable-forward, broth-based dish that nourishes without heaviness
You now have everything you need to make black eyed peas that taste like home, taste like love, and taste like you’ve been cooking this way your whole life. The secret was never complicated—it was patience, intention, and understanding the “why” behind each step. My grandmother knew it by heart. Now you do too. Trust yourself in that kitchen. Trust the gentle simmer. Trust the bacon fat. Trust your taste buds. You’ve got this, and I’m cheering you on. Enjoy!