This post contains affiliate links. As an Amazon Associate I earn from qualifying purchases.
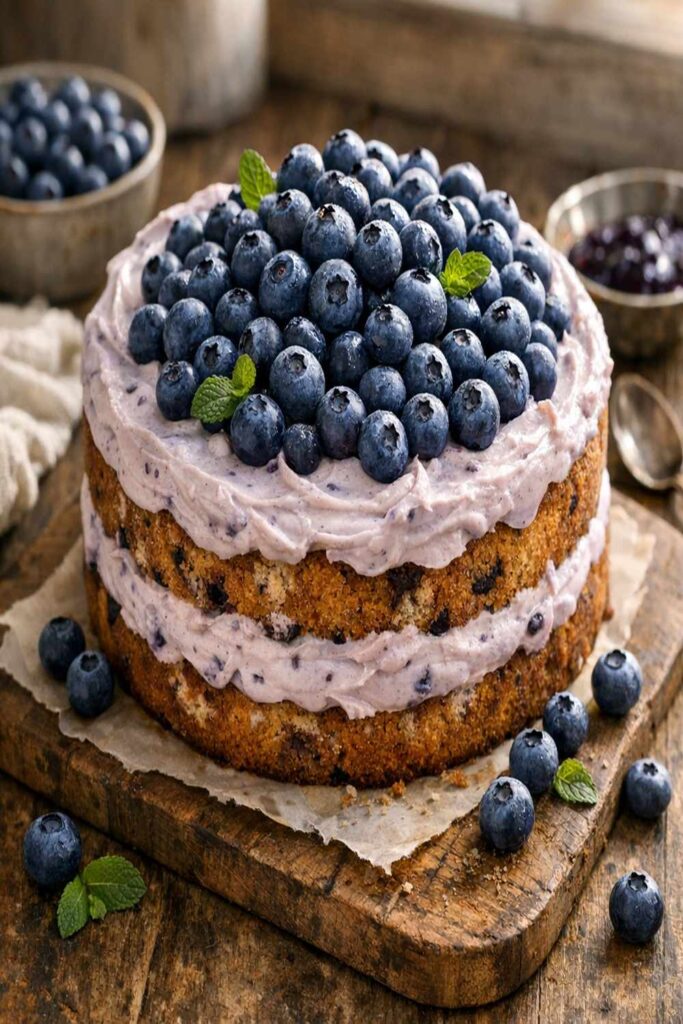
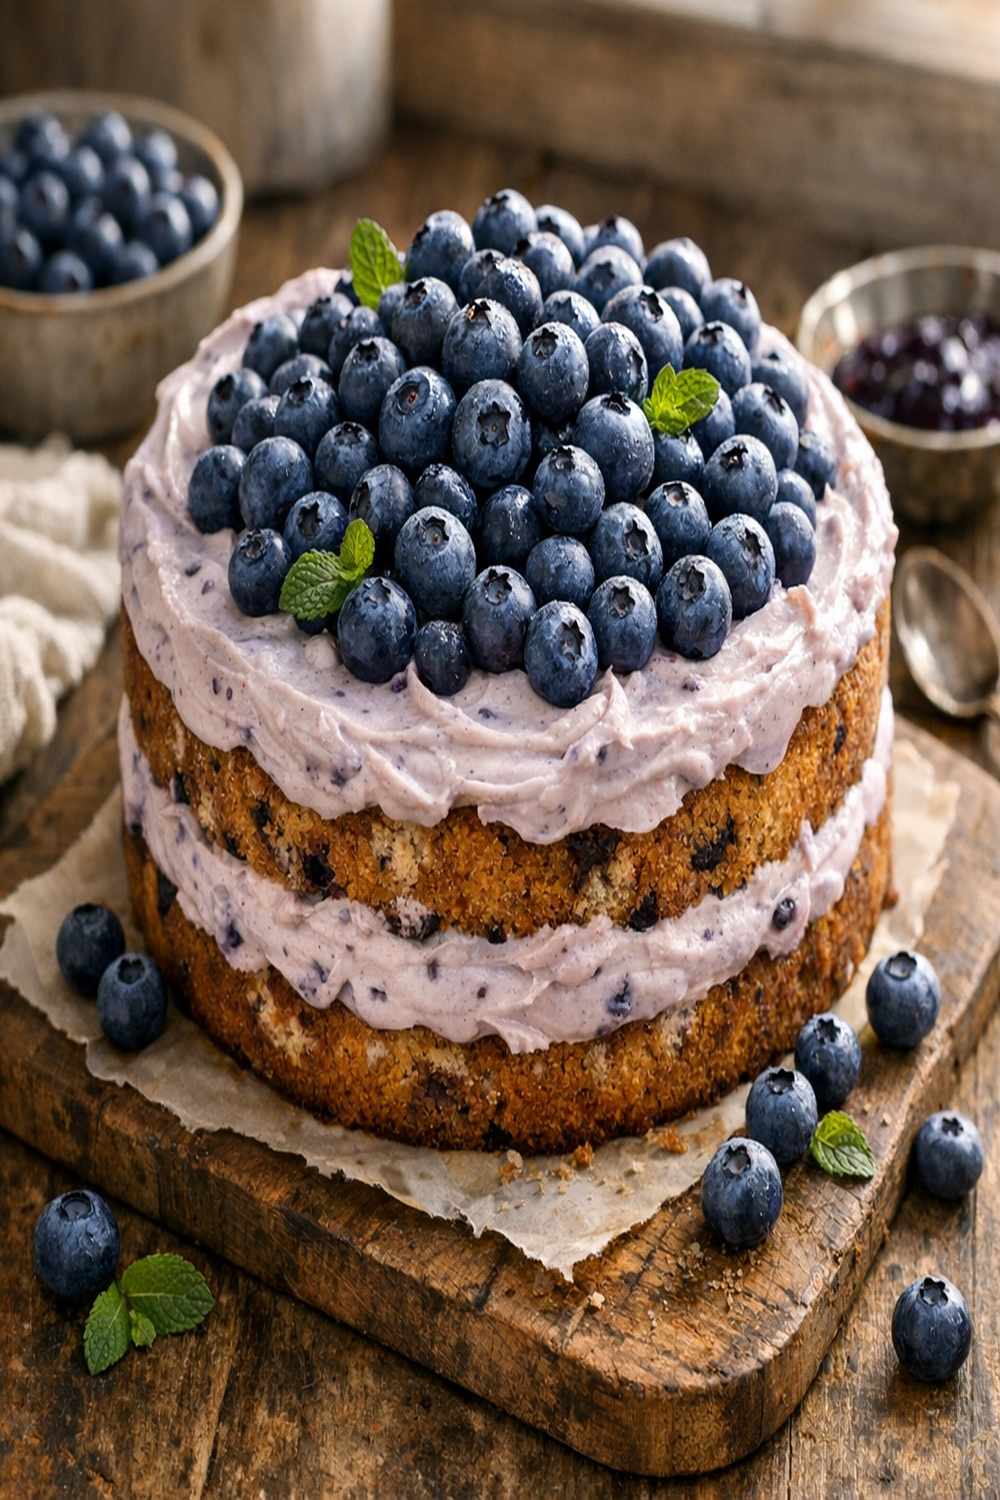
This stunning blueberry cake looks like you spent hours in a professional kitchen, yet it costs under $10 to make and comes together in about an hour. I’m talking restaurant-quality layers of tender crumb studded with juicy berries, the kind of dessert that makes people ask for your secret. The best part? You’re spending a fraction of what that same slice would cost at a bakery. I’ve built my career helping busy families eat incredibly well without the sticker shock, and this recipe perfectly captures that philosophy.
Restaurant-Quality Blueberry Cake With Fresh Blueberries Recipe for Under $10 (No Shortcuts on Flavor)
I still remember standing in my grandmother’s kitchen on summer mornings, watching her transform a handful of blueberries and basic pantry staples into something so memorable that family members talked about it for years. She didn’t have much money, but she had technique, timing, and an understanding that simple ingredients prepared with care beat expensive shortcuts every single time. That lesson shaped how I approach food today—especially desserts.
When I work with clients in Syracuse, I see the same pattern: people think eating well means spending more. They see a beautiful blueberry cake and assume the cost must be prohibitive. Then I show them the math. This cake feeds 12 people for less than a dollar per slice. That’s not deprivation—that’s actually being smart with your resources while feeding people something that genuinely delights them.
The Real Cost Breakdown
Let me show you exactly what you’re spending here. I’ve priced this based on current grocery costs at major retailers in the Northeast, though your actual costs may vary slightly based on location and sales timing.
- Unsalted butter (¾ cup) – approximately $1.20. Buy store brand at Wegmans or Tops; avoid premium European brands for baking.
- Granulated sugar (1 cup total) – approximately $0.35. Store brand is identical to name brand; buy the largest bag available.
- All-purpose flour (2¼ cups) – approximately $0.18. The cheapest flour works perfectly for cake; save your splurges for bread flour.
- Fresh blueberries (2¼ cups) – approximately $4.50-$6.00 depending on season. This is your primary ingredient cost; buy in-season (June-August) or use frozen.
- Large eggs (3 eggs) – approximately $0.75. Generic large eggs are nutritionally identical to cage-free; save money here.
- Baking powder (2 teaspoons) – approximately $0.05. One canister lasts months.
- Whole milk (⅔ cup) – approximately $0.35. Store brand works beautifully; full-fat creates better texture than skim.
- Pure vanilla extract (2 teaspoons) – approximately $0.40. Don’t buy imitation; real vanilla is worth the few extra cents and transforms the flavor.
- Fine sea salt (½ teaspoon) – approximately $0.02. Pinch from a container you likely already have.
Total cost: $7.80-$9.20 depending on blueberry availability and your store’s sales that week. This makes one 9-inch cake serving 12 people, bringing the cost per serving to roughly 65-75 cents. A comparable slice at a Syracuse bakery runs $4-$6.
Smart Shopping Tips for This Recipe
- Buy blueberries in peak season (June through August) and freeze them yourself. Fresh blueberries cost $2-$3 per pint in summer but jump to $6-$8 in winter. Wash, dry completely on paper towels, spread on a sheet tray, freeze solid, then transfer to freezer bags. They work beautifully in this cake and cost a third of the price. You can also check the markdown section at your grocery store—slightly soft berries are perfect for baking.
- Buy eggs by the 18-count or larger, never individual dozens. The price per egg drops significantly. Store-brand large eggs are completely uniform and cost less than premium varieties.
- Splurge on real vanilla extract, but buy the largest bottle available. Real vanilla costs more per ounce than imitation, yes, but one bottle lasts through dozens of recipes. Imitation vanilla tastes chemical in delicate cakes like this one. This is a worthwhile investment.
- Stock your pantry with store-brand flour, sugar, and baking powder when they’re on sale. These shelf-stable ingredients store for years. Buying them on BOGO sales means you’re actually getting them at half price.
- Avoid pre-sifted flour. It costs more and you don’t need it for this recipe. Spoon flour into your measuring cup and level with a knife—exactly as effective and cheaper.
The Ingredients
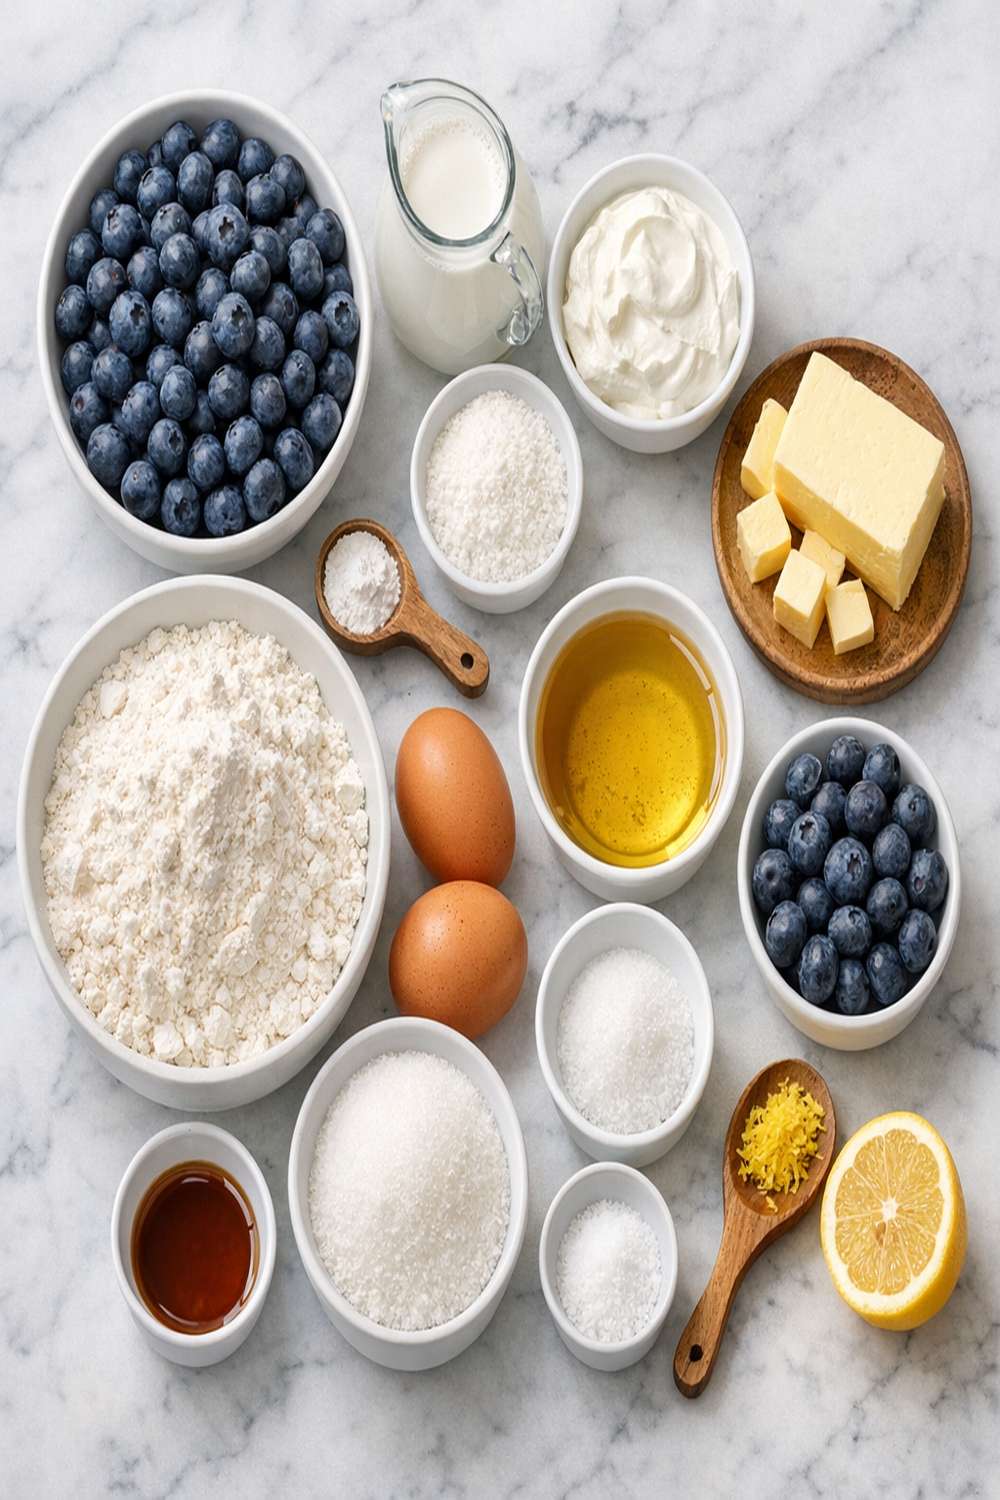
Every ingredient here earns its place in this cake. Nothing is filler, nothing is wasted. I’ve organized them by what you’re actually building: the tender cake base and the jeweled topping that makes this special.
For the Cake Base
- 2 teaspoons baking powder (aluminum-free if you’re sensitive, though standard works fine)
- 3 large eggs (separated—yolks for the base, whites beaten separately for lift)
- ¾ cup granulated sugar (fine texture dissolves smoothly into butter)
- 2¼ cups all-purpose flour (spooned and leveled, never packed down)
- ½ teaspoon fine sea salt (balances sweetness and strengthens flavor)
- ¾ cup unsalted butter (softened to room temperature, about 70 degrees—takes 20 minutes out of the fridge)
- ⅔ cup whole milk (full-fat creates better crumb than reduced-fat)
- 2 teaspoons pure vanilla extract (not imitation—this is non-negotiable)
For the Blueberry Layer and Topping
- 1½ tablespoons granulated sugar (for sprinkling on top before baking)
- ⅓ cup granulated sugar (for the meringue topping)
- 1½ tablespoons all-purpose flour (prevents berries from sinking to the bottom)
- 2¼ cups fresh blueberries (or frozen, thawed and drained completely)
This recipe yields one 9-inch round or square cake, serving 12 people with generous slices.
How to Make Blueberry Cake With Fresh Blueberries Recipe Without Breaking the Bank
Smart cooking isn’t about cutting corners—it’s about understanding technique so well that you make every ingredient count. That’s exactly what we’re doing here. The magic happens when you separate your eggs and beat the whites into a meringue; this creates air and lift without expensive leavening agents, giving you a cake that’s both tender and substantial.
Step 1: Prepare Your Pan and Preheat Your Oven
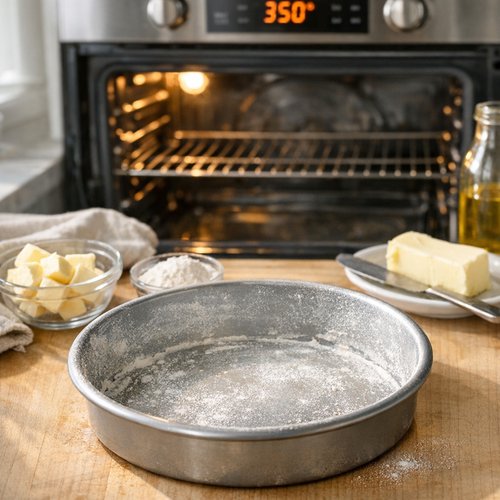
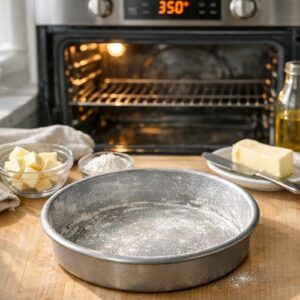
Set your oven to 350°F and let it fully preheat—this takes about 10-12 minutes and is non-negotiable for even baking. While it’s heating, take a 9-inch round or square baking pan and grease it thoroughly with butter or cooking spray, then dust lightly with flour. This costs pennies and prevents sticking far better than commercial pan spray. If you’re worried about sticking, place parchment paper on the bottom—one sheet costs less than a dollar and you can reuse it.
Step 2: Cream Your Butter and Sugar (The Foundation)
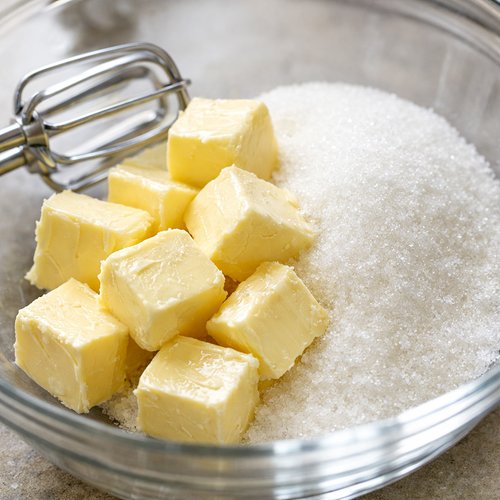
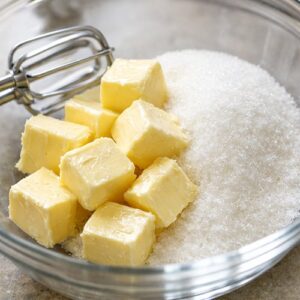
This step builds the structure of your cake, so don’t rush it. Cut your softened butter into roughly 1-inch pieces and place in a mixing bowl with ¾ cup sugar. Using an electric mixer on medium-high speed, beat for 3-4 minutes until the mixture is pale, fluffy, and increased in volume by about a third. You’ll notice it transforms from dense and grainy to light and airy. This incorporates tiny air bubbles that help the cake rise—you’re literally engineering texture here.
This step costs nothing extra but dramatically improves your result. A handheld mixer works perfectly; you don’t need a stand mixer. Stop occasionally to scrape down the bowl with a spatula so everything combines evenly.
Step 3: Add Egg Yolks, Salt, and Vanilla
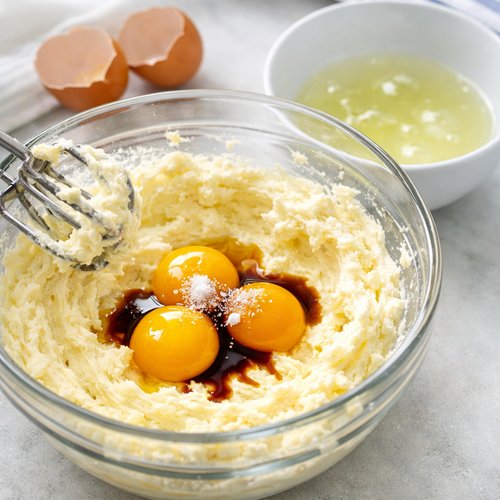
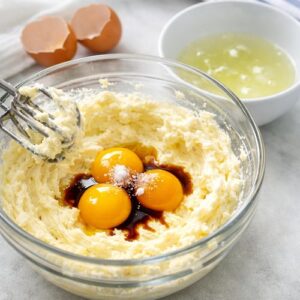
Separate your 3 eggs, placing yolks in your butter mixture and saving the whites in a separate, completely clean bowl (any fat will prevent them from whipping properly). Add ½ teaspoon salt and 2 teaspoons vanilla extract to the yolks. Beat on medium speed for about 2 minutes until everything is creamy and well combined. The mixture should lighten slightly in color as air incorporates.
This is where vanilla makes its presence known—you’ll smell the difference between real and imitation here, and it matters in a cake this simple.
Step 4: Combine Dry Ingredients
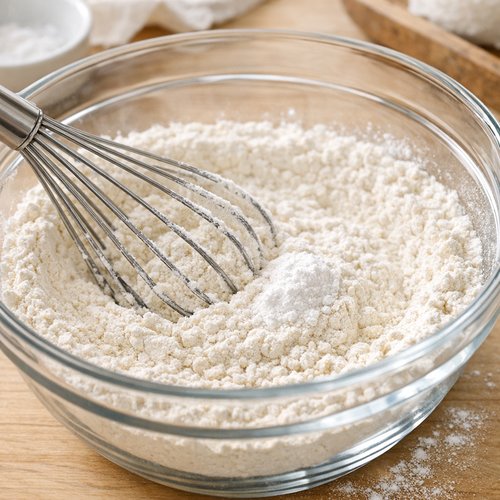
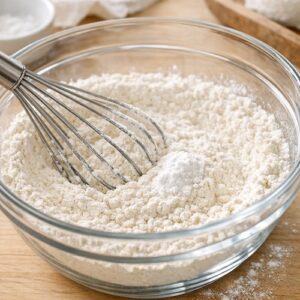
In a separate bowl, whisk together 2¼ cups flour and 2 teaspoons baking powder. Whisking them together for about 30 seconds distributes the leavening evenly, preventing dense pockets in your cake. This takes 10 seconds and costs nothing but improves results significantly. Sifting (which some recipes require) is optional for this cake—whisking does the job.
Step 5: Alternate Flour and Milk (The Critical Step)
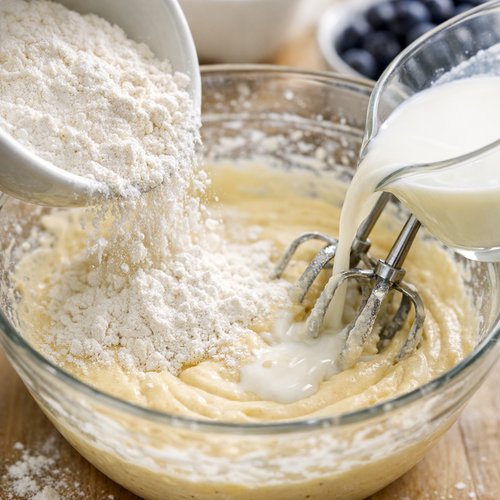
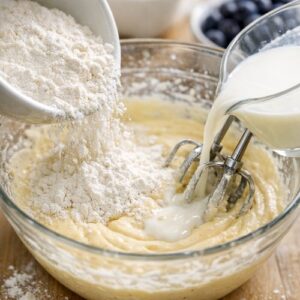
This is where technique matters. You’re going to add the flour mixture and milk to your egg yolk mixture in alternating additions, starting and ending with flour. This prevents the batter from becoming tough or curdled. Add about one-third of the flour mixture, mix on low speed until just combined (about 20 seconds), then add half the milk, mix briefly, then repeat: another third of flour, then remaining milk, then final third of flour. After each addition, mix only until you see no white streaks of dry ingredients. Overmixing develops gluten and toughens the cake.
This sounds fussy but takes maybe 2 minutes total and produces a noticeably more tender crumb. The batter should look smooth and slightly thick, like thick pancake batter.
Step 6: Prepare and Fold In the Blueberries
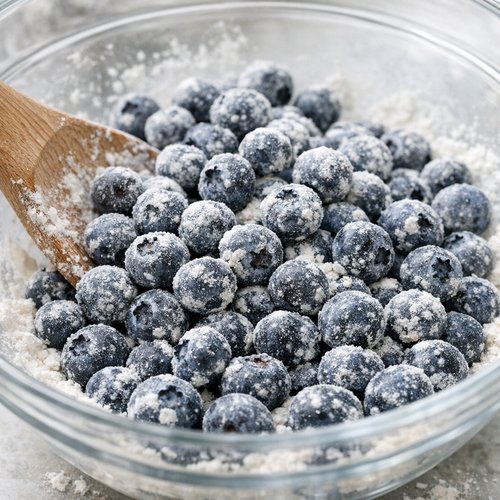
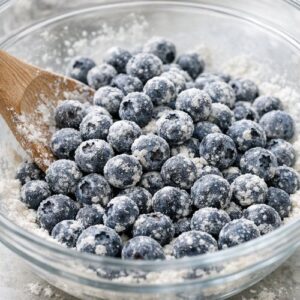
Toss your 2¼ cups fresh blueberries with 1½ tablespoons flour. This coating prevents berries from sinking to the bottom of the pan—the flour on their surface helps them “grip” the batter as it bakes. It’s a simple trick that saves you from ending up with all the berries pooled at the base. Gently fold the floured berries into your batter using a rubber spatula, making about 15 gentle folds until they’re evenly distributed but the batter isn’t deflated.
If using frozen blueberries, thaw them completely and drain excess liquid on paper towels first, or they’ll release water and make your cake soggy.
Step 7: Create the Meringue Topping (Your Secret Weapon)
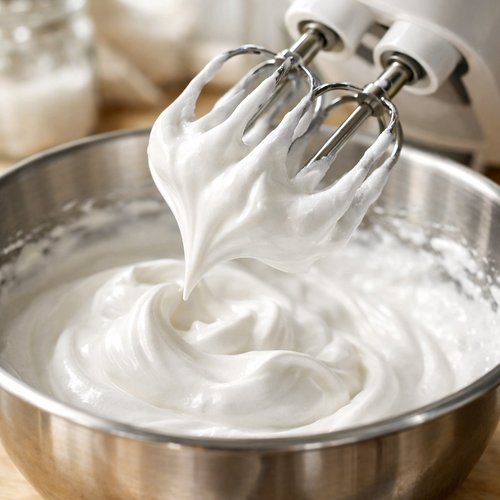
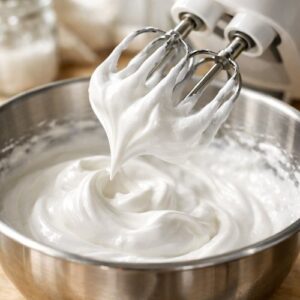
This is where the magic happens. In your clean bowl with the 3 reserved egg whites, start beating on high speed. After about 2 minutes, you’ll see soft peaks form—when you lift the beaters, the peaks flop over. This is your target. Now gradually add ⅓ cup sugar, about 1 tablespoon at a time, while continuing to beat. This takes about 3-4 minutes total. As you add sugar, the meringue transforms from foamy to glossy and stiff—the peaks should stand upright when you lift the beaters.
This meringue creates incredible lift and creates a light, almost soufflé-like texture in the finished cake. It’s not decoration; it’s structure.
Step 8: Fold in the Meringue and Bake
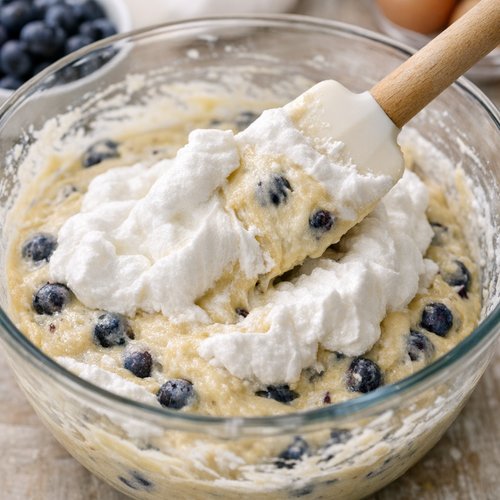
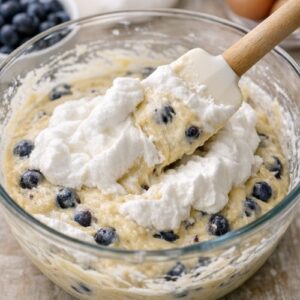
Here’s the gentle touch that separates excellent cakes from dense ones. Using a rubber spatula, gently fold the stiff meringue into your blueberry batter in three additions, rotating your bowl and scraping from the bottom as you fold. You want to maintain as much of those air bubbles as possible. The batter should be smooth and fluffy, not deflated. Pour into your prepared pan and smooth the top with your spatula.
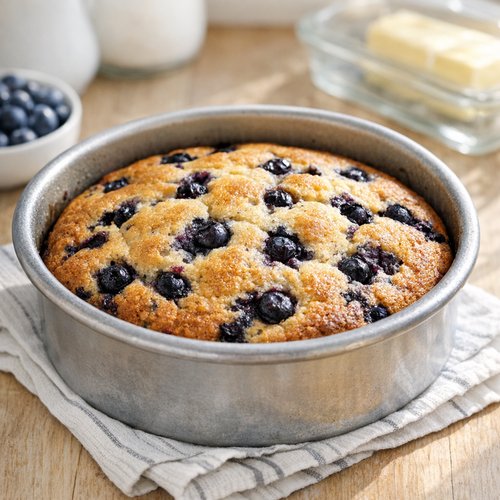
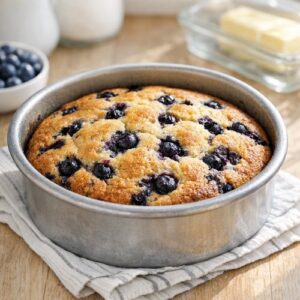
Sprinkle the remaining 1½ tablespoons sugar evenly over the top. This creates a subtle sweet crust. Bake at 350°F for 50 minutes, or until a toothpick inserted in the center comes out clean or with just a crumb or two (not wet batter). The cake should be golden brown and a toothpick should not come out with wet batter clinging to it.
Step 9: Cool Properly (This Matters More Than You’d Think)
Let the cake cool in the pan for exactly 5 minutes. This allows the crumb to set slightly so it doesn’t tear when you turn it out. After 5 minutes, run a thin knife around the edges and turn the cake out onto a cooling rack (or a plate if you don’t have a rack). Cool completely before serving—about 90 minutes at room temperature. Cutting into a warm cake causes it to crumble; cooled cake cuts cleanly.
If you’d like a dusting of powdered sugar, do this right before serving—it adds visual drama and a whisper of sweetness without cost.
Expert’s Nutritional Tip: Why Blueberries Are Worth the Investment
As a registered dietitian, I see people make the mistake of treating blueberries as a luxury item rather than functional food. Yes, they cost more than some fruits, but they’re exceptionally dense in anthocyanins—powerful antioxidants linked to reduced inflammation and better cognitive function. One cup of fresh blueberries contains only about 85 calories while delivering nearly 4 grams of fiber and significant amounts of vitamin C and vitamin K. You’re getting genuine nutritional benefit in every bite, not empty calories. That justifies the cost in my professional opinion.
Common Mistakes to Avoid
- Using eggs straight from the fridge. Cold eggs don’t incorporate smoothly into butter and sugar, creating lumpy batter. Let eggs sit at room temperature for 15 minutes before separating them.
- Overmixing the batter after adding flour. More mixing doesn’t mean better results with cakes. Mix only until you see no dry flour. Overmixing toughens the crumb significantly.
- Skipping the flour coating on blueberries. It’s tempting to skip this step, but those berries will absolutely sink to the bottom, leaving you with a dense layer of fruit at the base and plain cake on top. The flour makes a measurable difference.
- Cutting into the cake while it’s warm. I know it smells amazing and you want to eat it immediately, but warm cake tears and crumbles. Cooling takes 90 minutes. It’s worth the wait. The flavor actually develops as it cools anyway.
How to Stretch This Recipe Further
- Make it feed 16 instead of 12 by cutting smaller slices and serving with whipped cream or yogurt. A 2-ounce slice with 2 tablespoons whipped cream (about 60 calories) turns a cake slice into a more substantial dessert that feels indulgent while keeping costs lower per person.
- Transform leftovers into a simple bread pudding. Cube any leftover cake, place in a buttered baking dish, whisk together 2 eggs, 1 cup milk, ¼ cup sugar, and 1 teaspoon vanilla, pour over the cake cubes, and bake at 350°F for 30-35 minutes. You’ve created an entirely different dessert from what would otherwise be waste.
- Freeze the entire cake wrapped in plastic wrap and foil for up to 3 months. Thaw at room temperature for about 2 hours before serving. This means you can make it during blueberry season and have restaurant-quality dessert on hand for months. One batch of berries feeds your family repeatedly.
Make-Ahead Guide: A Registered Dietitian’s Strategy
This cake is actually more forgiving than you’d think for advance preparation. You can prepare the dry ingredients (flour, baking powder, salt) in a bowl and leave it covered at room temperature for up to 24 hours. You can also wash and coat your blueberries with flour up to 8 hours ahead, storing them in the refrigerator in a covered container.
Where you cannot advance-prep: the butter and sugar creaming, egg separation, and meringue. These three steps depend on temperature and timing to work properly. Plan to start these about 90 minutes before you want to serve the cake.
If you’re making this for an event, bake it the day before. Wrap the cooled cake tightly in plastic wrap and store at room temperature. The crumb actually becomes slightly more moist and tender by the next day—this cake is one of those rare desserts that improves overnight. Add any powdered sugar dusting just before serving.
Budget Substitutions That Don’t Sacrifice Quality
- Fresh blueberries → Frozen blueberries: Use frozen blueberries thawed and completely drained. They work identically in baked goods and cost 40-50% less. The flavor is actually more concentrated because they’re picked ripe and frozen immediately. The main difference is texture—they’re slightly softer—but that’s actually ideal in baked goods.
- Whole milk → Low-fat milk: You can use 2% milk without noticing a significant difference in the final cake. Full-fat creates slightly better texture, but the difference is subtle. This saves about 15 cents per cake.
- Unsalted butter → Salted butter: If you only have salted butter, use it but reduce the salt to ¼ teaspoon. You’ll get the same result; salted butter just requires this adjustment.
- Pure vanilla extract → High-quality imitation vanilla: If you absolutely cannot swing vanilla extract, use the best imitation you can find (not the cheapest). The difference is noticeable in a simple cake, but decent imitation is acceptable. I’d still suggest saving and buying real vanilla eventually—one bottle lasts for dozens of recipes.
Seasonal Variations: How to Adapt This Cake Year-Round
- Summer (June-August): Use fresh, locally-grown blueberries at peak ripeness. They’re cheapest and most flavorful. Mix in fresh lemon zest (1 teaspoon) to the batter for brightness.
- Fall (September-November): Transition to frozen blueberries and add ½ teaspoon cinnamon and ¼ teaspoon nutmeg to the dry ingredients. This spiced version feels more autumn-appropriate.
- Winter (December-February): Use frozen blueberries with the addition of 1 teaspoon orange zest. Orange and blueberry is a sophisticated pairing that feels elegant. Add the zest to your butter and sugar creaming step.
- Spring (March-May): If blueberries are available but expensive, substitute fresh raspberries or a mix of berries. Follow the same flour-coating technique. Raspberries are more delicate, so fold them in even more gently.
Can I Store Blueberry Cake With Fresh Blueberries Recipe?
Room temperature: 2 days, loosely covered with plastic wrap or in an airtight container. The cake stays moist and tender and actually improves on day two as flavors develop.
Refrigerated: 4 days in an airtight container. The cake becomes slightly denser but still delicious, especially if you warm a slice for 15 seconds in the microwave before serving.
Frozen: Up to 3 months wrapped tightly in plastic wrap, then foil. Thaw at room temperature for about 2 hours. This is your secret weapon for avoiding food waste—you can bake when blueberries are cheap and enjoy the cake for months.
Individual slices freeze beautifully too. Wrap each slice separately for grab-and-go thawing. This is my strategy when I’m helping families meal-prep: make extra cake when it’s cost-effective, slice it, freeze it, and you have emergency dessert ready whenever you need it.
Nutrition Information
According to USDA data, one slice (1/12th of the cake) contains approximately:
- Calories: 285
- Protein: 4 grams
- Carbohydrates: 42 grams
- Fat: 12 grams
- Fiber: 1.5 grams
- Vitamin C: 8% of daily value
- Vitamin K: 12% of daily value
What I love about this nutritional profile: you’re getting genuine fruit—nearly 2 tablespoons of blueberries per slice contribute real fiber, antioxidants, and micronutrients. This isn’t an empty-calorie dessert. The cost-per-serving is 65-75 cents, but you’re receiving approximately 1.5 grams of fiber and meaningful amounts of vitamins per serving. From a nutritional value-per-dollar perspective, this dessert actually delivers.
What Can I Serve With Blueberry Cake With Fresh Blueberries Recipe?
The beauty of this cake is that it shines on its own, but a few simple additions elevate it without major expense.
- Whipped cream (homemade): 15 cents per serving. Whip ½ cup heavy cream with 1 tablespoon sugar and ½ teaspoon vanilla. This costs less than commercial whipped cream and tastes noticeably better. Add 2 tablespoons per slice.
- Plain Greek yogurt: 20 cents per serving. A dollop of plain Greek yogurt alongside the cake adds tanginess that balances the sweetness. It’s also high-protein, making it feel more substantive.
- Fresh lemon juice: essentially free if you have a lemon. A squeeze of fresh lemon juice over the top brightens the berry flavor dramatically. It’s my favorite finishing touch when I’m serving this at home.
- Tea or coffee: whatever you’re already making. This cake pairs beautifully with strong black tea or espresso. It’s not overly sweet, so it works for afternoon dessert or after-dinner treats.

Blueberry Cake With Fresh Blueberries Recipe
Ingredients
Method
- Set your oven to 350°F and let it fully preheat—this takes about 10-12 minutes and is non-negotiable for even baking. While it's heating, take a 9-inch round or square baking pan and grease it thoroughly with butter or cooking spray, then dust lightly with flour. This costs pennies and prevents sticking far better than commercial pan spray. If you're worried about sticking, place parchment paper on the bottom—one sheet costs less than a dollar and you can reuse it.
- This step builds the structure of your cake, so don't rush it. Cut your softened butter into roughly 1-inch pieces and place in a mixing bowl with ¾ cup sugar. Using an electric mixer on medium-high speed, beat for 3-4 minutes until the mixture is pale, fluffy, and increased in volume by about a third. You'll notice it transforms from dense and grainy to light and airy. This incorporates tiny air bubbles that help the cake rise—you're literally engineering texture here. This step costs nothing extra but dramatically improves your result. A handheld mixer works perfectly; you don't need a stand mixer. Stop occasionally to scrape down the bowl with a spatula so everything combines evenly.
- Separate your 3 eggs, placing yolks in your butter mixture and saving the whites in a separate, completely clean bowl (any fat will prevent them from whipping properly). Add ½ teaspoon salt and 2 teaspoons vanilla extract to the yolks. Beat on medium speed for about 2 minutes until everything is creamy and well combined. The mixture should lighten slightly in color as air incorporates. This is where vanilla makes its presence known—you'll smell the difference between real and imitation here, and it matters in a cake this simple.
- In a separate bowl, whisk together 2¼ cups flour and 2 teaspoons baking powder. Whisking them together for about 30 seconds distributes the leavening evenly, preventing dense pockets in your cake. This takes 10 seconds and costs nothing but improves results significantly. Sifting (which some recipes require) is optional for this cake—whisking does the job.
- This is where technique matters. You're going to add the flour mixture and milk to your egg yolk mixture in alternating additions, starting and ending with flour. This prevents the batter from becoming tough or curdled. Add about one-third of the flour mixture, mix on low speed until just combined (about 20 seconds), then add half the milk, mix briefly, then repeat: another third of flour, then remaining milk, then final third of flour. After each addition, mix only until you see no white streaks of dry ingredients. Overmixing develops gluten and toughens the cake. This sounds fussy but takes maybe 2 minutes total and produces a noticeably more tender crumb. The batter should look smooth and slightly thick, like thick pancake batter.
- Toss your 2¼ cups fresh blueberries with 1½ tablespoons flour. This coating prevents berries from sinking to the bottom of the pan—the flour on their surface helps them "grip" the batter as it bakes. It's a simple trick that saves you from ending up with all the berries pooled at the base. Gently fold the floured berries into your batter using a rubber spatula, making about 15 gentle folds until they're evenly distributed but the batter isn't deflated. If using frozen blueberries, thaw them completely and drain excess liquid on paper towels first, or they'll release water and make your cake soggy.
- This is where the magic happens. In your clean bowl with the 3 reserved egg whites, start beating on high speed. After about 2 minutes, you'll see soft peaks form—when you lift the beaters, the peaks flop over. This is your target. Now gradually add ⅓ cup sugar, about 1 tablespoon at a time, while continuing to beat. This takes about 3-4 minutes total. As you add sugar, the meringue transforms from foamy to glossy and stiff—the peaks should stand upright when you lift the beaters. This meringue creates incredible lift and creates a light, almost soufflé-like texture in the finished cake. It's not decoration; it's structure.
- Here's the gentle touch that separates excellent cakes from dense ones. Using a rubber spatula, gently fold the stiff meringue into your blueberry batter in three additions, rotating your bowl and scraping from the bottom as you fold. You want to maintain as much of those air bubbles as possible. The batter should be smooth and fluffy, not deflated. Pour into your prepared pan and smooth the top with your spatula. Sprinkle the remaining 1½ tablespoons sugar evenly over the top. This creates a subtle sweet crust. Bake at 350°F for 50 minutes, or until a toothpick inserted in the center comes out clean or with just a crumb or two (not wet batter). The cake should be golden brown and a toothpick should not come out with wet batter clinging to it.
- Let the cake cool in the pan for exactly 5 minutes. This allows the crumb to set slightly so it doesn't tear when you turn it out. After 5 minutes, run a thin knife around the edges and turn the cake out onto a cooling rack (or a plate if you don't have a rack). Cool completely before serving—about 90 minutes at room temperature. Cutting into a warm cake causes it to crumble; cooled cake cuts cleanly. If you'd like a dusting of powdered sugar, do this right before serving—it adds visual drama and a whisper of sweetness without cost.
Notes
FAQs
Can I Make This Cake Without Separating Eggs?
Technically yes, but the result won’t be as light and tender. The separated meringue is what creates the fluffy, almost soufflé-like texture that makes this cake special. If you absolutely can’t separate eggs (allergies, anxiety, whatever reason), use 3 whole eggs creamed with the butter and sugar, increase the baking powder to 2½ teaspoons, and proceed as normal. You’ll get a denser but still delicious cake. The separated-egg method genuinely improves the result and costs nothing extra, so I encourage you to try it.
What If My Blueberries Are Frozen in a Giant Block?
Spread them on a sheet tray at room temperature for 20-30 minutes until separated but still cold. Don’t thaw them completely, or they’ll release too much liquid. The goal is separated berries that are cold but pourable. Pat them dry with paper towels before coating with flour.
Can I Use a Cake Mix as the Base to Save Money?
I’m going to be direct here: no. Cake mix costs less upfront (usually $1-$2 per box), but the result is noticeably different in texture and flavor. This recipe costs $7.80-$9.20 total; the difference between scratch and mix is small. Plus, I’m a registered dietitian—I’ve analyzed the ingredients in cake mix, and I don’t recommend them when the from-scratch version costs almost the same. Invest the extra few minutes.
My Cake Sank in the Middle. What Happened?
Three possibilities: your oven temperature wasn’t accurate (get an oven thermometer—they cost $8), you opened the oven door during baking (let it bake undisturbed for the full 50 minutes), or you didn’t beat the egg whites to stiff peaks (they should not fall when you lift the beaters). A collapsed center usually means either oven temperature or egg whites. Next time, address these two things first.
How Do I Know When It’s Actually Done Baking?
The toothpick test: insert a wooden toothpick into the center. It should come out clean or with just a crumb or two clinging to it. If wet batter coats the toothpick, it needs more time. Also look for: the top should be golden brown, the cake should smell deeply of vanilla and blueberries, and it should spring back slightly when you gently press the center with your finger. These three signs together tell you it’s done.
More Budget-Friendly Recipes You’ll Love
- Blueberry Grilled Cheese Sandwich Recipe – A creative savory-sweet combination that uses leftover cake or similar techniques for surprising flavor on a budget.
- this cozy soup – A hearty, filling main course that costs less than $8 for a full pot, perfect for pairing with homemade desserts.
- Beefsteak Tomato Sauce Recipe – A simple, seasonal sauce that teaches the same “quality ingredients, smart technique” philosophy I’ve used in this cake.
This blueberry cake represents everything I believe about feeding yourself and your family well: it’s beautiful, it’s delicious, it’s genuinely nutritious, and it costs less than you’d expect. You’re not sacrificing quality for budget—you’re being smart. You’re understanding technique so well that expensive shortcuts become unnecessary. That’s the win I want for you.
The first time you pull this cake from your oven, when your kitchen smells like vanilla and summer and hope, you’re going to realize you’ve created something restaurant-quality in your own home for under ten dollars. That’s not just a recipe; that’s empowerment. That’s the knowledge that you can feed people something genuine and meaningful without financial stress.
Make this cake. Cool it completely. Serve it with strong coffee and confidence. You’ve got this. Enjoy!