This post contains affiliate links. As an Amazon Associate I earn from qualifying purchases.
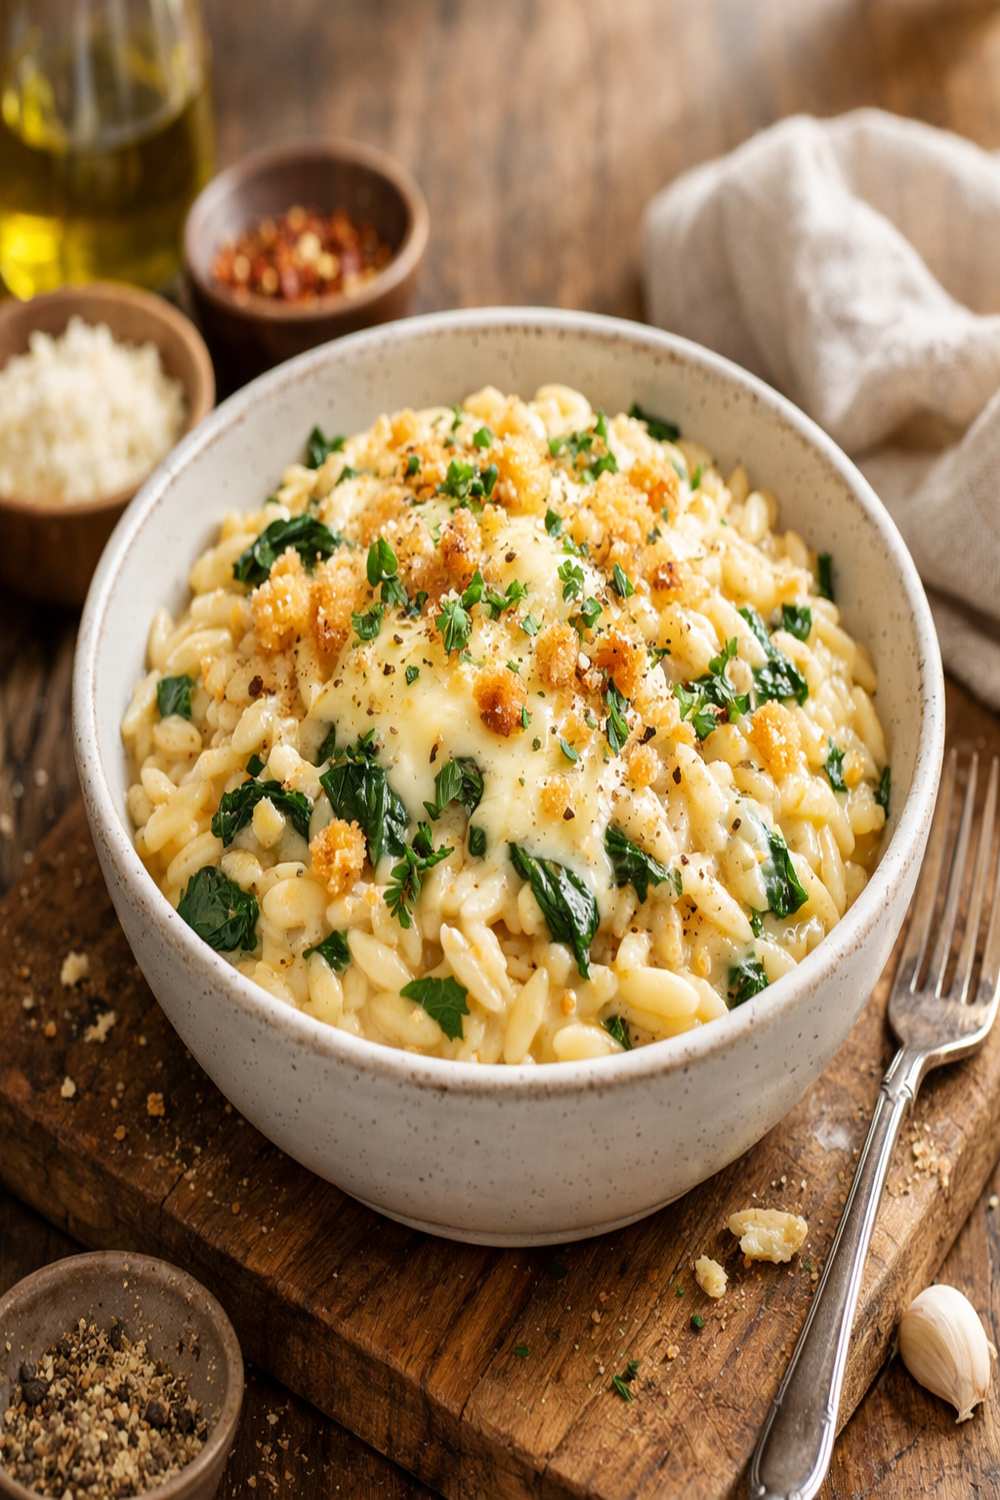
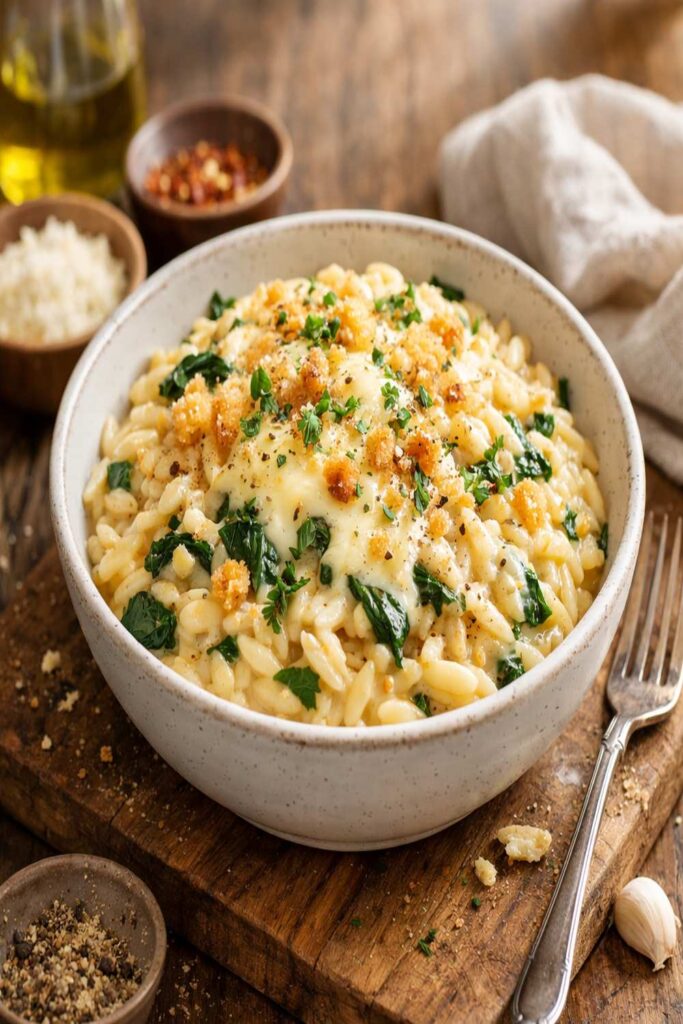
Before you throw those half-used containers from the back of your fridge away, pause for a moment. I learned this lesson years ago in my grandmother’s kitchen in Syracuse, watching her transform what looked like nothing into something magical. That’s exactly what happened the evening I created this creamy cheesy orzo recipe. I had leftover broth from Sunday’s chicken dinner, a lonely bulb of garlic, and the tail end of a block of Parmesan that had been sitting there far too long. Instead of tossing everything, I reached for a box of orzo I’d picked up on sale and decided to experiment. What emerged from my skillet was pure comfort—a dish so silky, so deeply satisfying, that I’ve been making it intentionally ever since. This recipe bridges the gap between resourceful home cooking and pure indulgence, and I can’t wait to cook with you!
How to Turn Last Night’s Leftovers Into a Creamy Cheesy Orzo Recipe (Better Than the Original)
Here’s what I’ve discovered as a registered dietitian: the best meals often come from necessity, not perfection. That evening when I created this dish, I wasn’t trying to be fancy. I was trying to be responsible—the kind of responsible that means not wasting food, not wasting money, and certainly not wasting the opportunity to sit down to something that makes your heart happy. The magic of this creamy cheesy orzo happens when you understand that humble ingredients, combined with intention and a little kitchen alchemy, become something far greater than the sum of their parts.
What I love most about this recipe is how it celebrates resourcefulness. Whether you’re pulling ingredients from your pantry or transforming actual leftovers into something new, you’re engaging in the kind of cooking that matters—the kind that nourishes both body and soul. Let me show you exactly how to do it.
What Leftovers Work Best
Not all leftovers are created equal when it comes to transformation. After years of working with clients on meal planning and food waste reduction, I’ve learned which ingredients shine in this dish and which ones deserve a different fate. Think of this creamy cheesy orzo as the ultimate canvas—it accepts certain colors beautifully while others muddy the masterpiece.
- Chicken or vegetable broth (homemade or store-bought) – This is the foundation of your transformation. Even broth that’s been in your freezer for months works beautifully here, and it’s actually safer than using it for anything raw.
- Aged Parmesan or similar hard cheeses – That wedge hiding in the back of your cheese drawer? It’s perfect. The drier and more aged your cheese, the more flavor it brings to this dish.
- Heavy cream or half-and-half (even if it’s close to its expiration date) – You’re cooking it, which makes it safer than drinking it straight, and it transforms into something luxurious.
- Garlic and onions (fresh or frozen) – These aromatics are forgiving and form the flavor foundation. Frozen works just as well as fresh.
- Leftover roasted vegetables – Mushrooms, bell peppers, zucchini, or asparagus can be stirred in during the last few minutes for added nutrition and texture.
- Soft or wilting herbs from your garden or produce drawer – Fresh parsley, basil, or chives that are past their prime get one last moment of glory as a garnish.
- Stale bread or breadcrumbs – Don’t use it in the pasta itself, but toast it separately with a little oil and cheese for a textural contrast on top.
- Cooked proteins (chicken, shrimp, or ham) – Leftovers from dinner can be diced and stirred in, turning this into a complete meal.
What to avoid: Strongly flavored leftovers like fish, spicy curries, or anything with bold vinegar-based sauces can overpower the delicate cheese and cream. Save those for dishes where their intensity is welcome. Similarly, raw or undercooked eggs have no place in this particular transformation—safety first, always.
The Transformation Pantry: What to Keep on Hand
I tell my clients that a well-stocked pantry is the secret to zero-waste cooking. You don’t need much, but you need the right things. These are my non-negotiables for turning ordinary moments into extraordinary meals. When you have these staples on your shelf, you’re never more than twenty minutes away from turning pantry items into something that tastes like you spent hours in the kitchen.
- Extra-virgin olive oil – The quality matters here because it’s tasted directly, not just a cooking medium. Choose one you genuinely like to taste.
- Orzo pasta – Keep several boxes on hand. It’s small, versatile, and cooks faster than larger pasta shapes.
- Whole or minced garlic – Fresh is ideal, but I also keep frozen garlic for backup. Both work beautifully in this recipe.
- Yellow or white onions – These store for weeks and form the aromatic base of countless dishes.
- Parmesan cheese (block form, not pre-shredded) – Blocks last longer and melt more smoothly than pre-shredded versions, which contain anti-caking agents.
- Sea salt and freshly ground black pepper – Invest in good versions. They make a measurable difference in the final taste.
- Cooking broth (chicken or vegetable, low-sodium preferred) – Keep both in your pantry. They’re the liquid gold that transforms pasta into something creamy.
The Ingredients – Leftovers + Bridge Ingredients
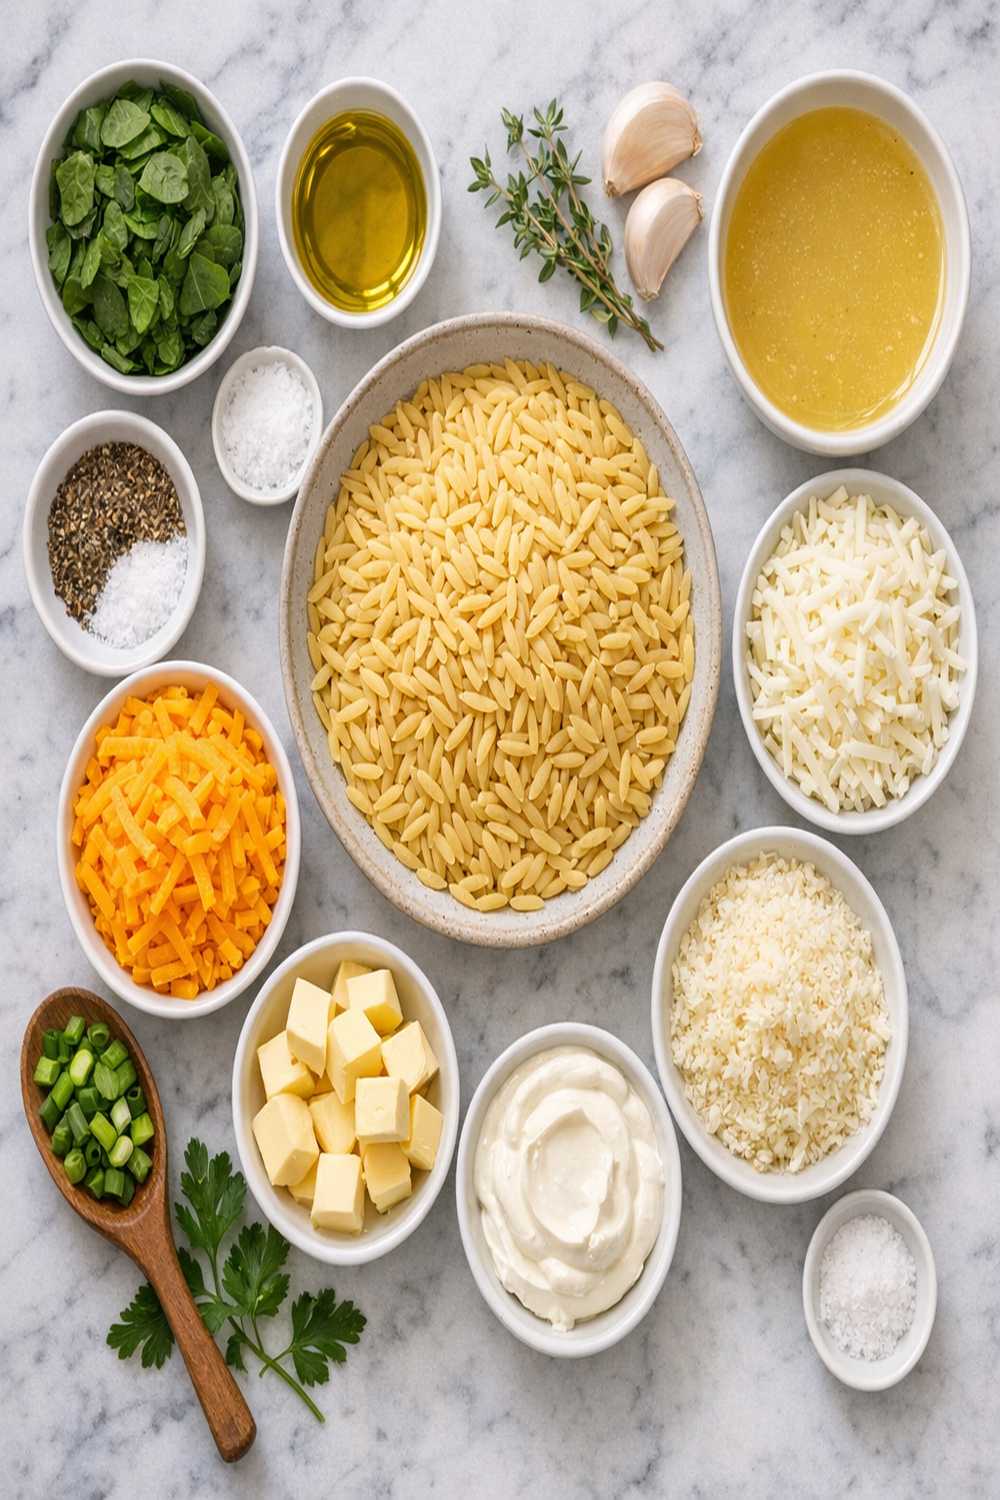
This is where resourcefulness meets restaurant-quality results. The ingredients below are organized to show you exactly what you might use from your leftovers and what bridge ingredients (the pantry staples) bring it all together. Every single item serves a purpose, and together they create something that tastes far more complicated than it actually is.
- ½ small yellow onion (finely chopped, fresh or from your freezer stash)
- ⅓ cup heavy whipping cream (or half-and-half, or even whole milk if that’s what you have)
- 2 tablespoons fresh Italian parsley (chopped, for garnish—or any fresh herb you have)
- 3 garlic cloves (minced or crushed, fresh or frozen both work)
- ⅛ teaspoon freshly ground black pepper (freshly ground matters here)
- ¾ cup shredded Parmesan cheese (freshly grated from a block if possible)
- ¼ teaspoon fine sea salt (adjust to taste—broth varies in sodium)
- ¼ teaspoon garlic powder (optional but deepens flavor)
- 4 cups chicken or vegetable broth (low-sodium works better, allowing you to control salt)
- 3 tablespoons extra-virgin olive oil (divided between sautéing and finishing)
- 2 cups orzo pasta (uncooked—this is key)
Yield: Serves 4 as a main course or 6 as a side dish
The Transformation: How to Make Creamy Cheesy Orzo Recipe From Leftovers
This is my favorite part—where the ordinary becomes extraordinary. What you’re about to do is something I call the “one-pot method,” and it’s the secret to achieving that restaurant-quality creaminess without heavy cream curdling or pasta turning to mush. The pasta absorbs the broth directly, creating its own natural sauce as the starches release. It’s alchemy, pure and simple.
Step 1: Build Your Flavor Foundation With the Aromatics
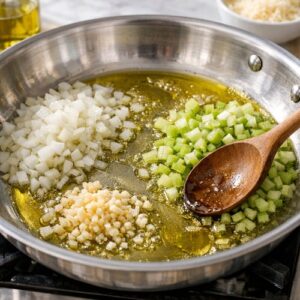
In a large 12-inch skillet over medium heat, warm about 1½ tablespoons of your olive oil until it’s fragrant and just starting to shimmer—you’ll know it’s ready when you can smell the richness. This is your foundation, and getting it right matters.
Add your finely chopped onion to the warm oil and let it cook undisturbed for about a minute. Then stir, encouraging the onion to soften and become translucent. After 2-3 minutes, add your minced garlic and optional garlic powder. Don’t let the garlic burn—you want it to become fragrant and release its oils into the oil, which should take just 30-45 seconds of stirring. If you’re using frozen garlic, no problem; it thaws instantly in the heat and works just as well as fresh.
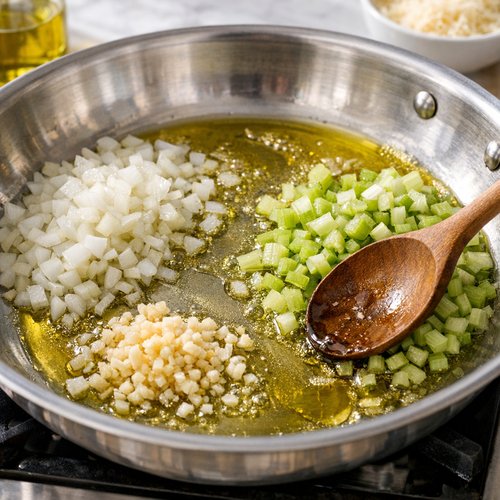
This step is crucial because you’re not just cooking vegetables; you’re building the aromatic backbone that makes this dish taste like you’ve been simmering it for hours. The onion and garlic release compounds that make your taste buds sing.
Step 2: Toast Your Orzo to Unlock Hidden Depth
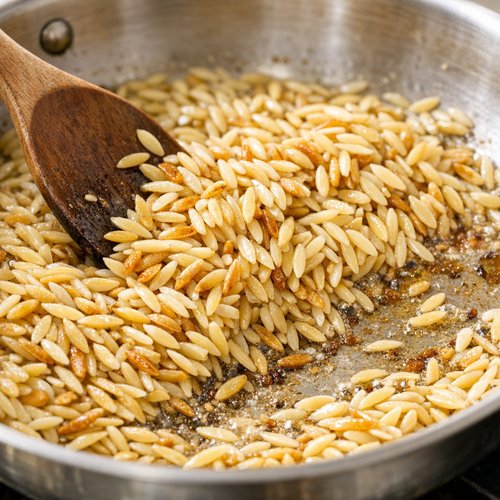
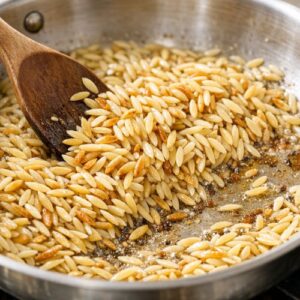
Now comes the step that most people skip, and it’s exactly why they miss out on that depth of flavor. Add your uncooked orzo directly to the pan with the onions and garlic. Stir constantly for 5-7 minutes, allowing the pasta to toast slightly in the oil. You’ll notice the orzo turning from pale white to golden, and you’ll smell something nutty and wonderful emerging. This isn’t wasting time; this is building flavor.
The toasting process helps seal the outside of the pasta slightly, which means it won’t turn mushy when you add the broth. It also develops complex flavors through a process called the Maillard reaction—the same chemistry that makes bread brown and delicious. This is professional technique made simple.
Step 3: Add Your Broth and Bring to a Gentle Boil
Pour your 4 cups of broth (whether it’s homemade, store-bought, or from your freezer) into the skillet with the toasted orzo and aromatics. Give it all a good stir, making sure nothing is sticking to the bottom. Bring the mixture to a full boil over medium-high heat—you’ll see it actively bubbling across the surface.
Once boiling, immediately reduce your heat to medium-low. This is important: you’re transitioning from a vigorous boil to a gentle simmer. Cover your skillet with a lid (even a baking sheet works in a pinch) and let it cook undisturbed for 15-20 minutes. The orzo will absorb the broth gradually, creating a creamy consistency without any cream yet. Stir occasionally—about every 5 minutes—to prevent sticking on the bottom.
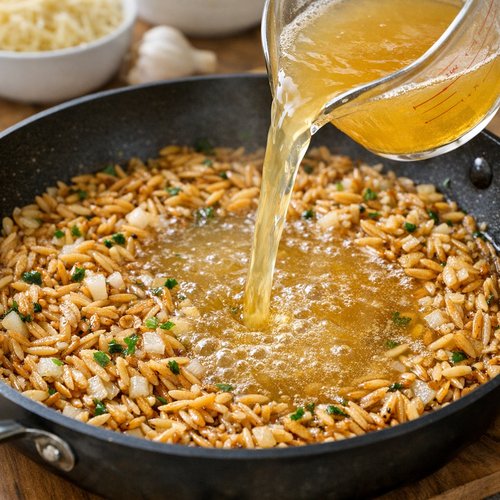
You’ll know it’s done when the liquid is almost completely absorbed and the orzo is tender but still has a slight firmness when you bite into it. That firmness is “al dente,” and it’s the difference between good pasta and great pasta.
Step 4: Finish With Cream and Cheese—The Transformation Complete
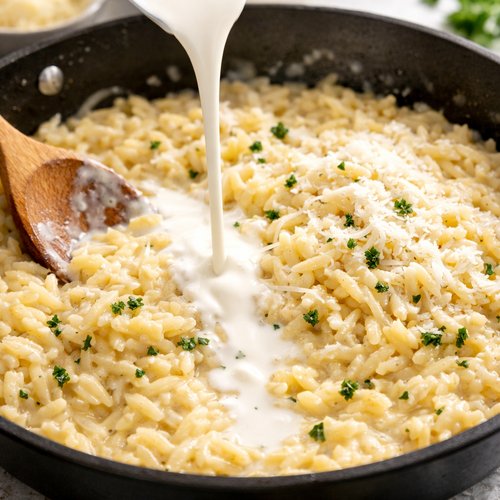
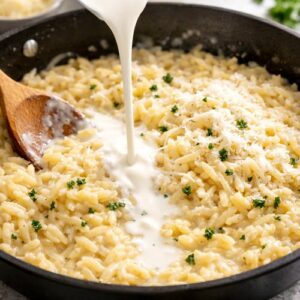
Remove your skillet from the heat (the residual warmth is your friend here). Pour in your cream—whether it’s heavy whipping cream, half-and-half, or whole milk if that’s what you have. Add your freshly grated Parmesan cheese. Stir gently but thoroughly, making sure the cheese melts completely and incorporates evenly. The residual heat will melt the cheese and warm the cream without boiling, which prevents curdling.
Taste your creation. This is your moment to adjust the seasoning. Add a pinch more salt if needed (remember, broths vary in sodium content), and grind fresh black pepper generously over the top. More black pepper than you think you need is the right amount—it brightens the creamy, cheesy richness beautifully.
Step 5: Garnish and Serve Immediately
Transfer your creamy cheesy orzo to serving bowls while it’s still warm. Top each portion with fresh chopped parsley (or basil, chives, or whatever fresh herb you have), an extra shower of Parmesan cheese, and a drizzle of that good olive oil you saved. The olive oil on top adds richness and helps the cheese shine.
Serve immediately, while the orzo is at peak creaminess and warmth. This dish is best enjoyed fresh from the skillet, though it certainly keeps well for leftovers if you have any.
How to Adapt Based on What You Have
This is where cooking becomes creative problem-solving, and honestly, it’s my favorite part of my work as a dietitian. I help people see that the ingredients they have are often just as good as the ones they think they need. Here’s how to adapt this recipe to your specific pantry situation:
- If you only have whole milk instead of cream – Use it! Simply increase the amount to ½ cup. The sauce will be slightly less rich but still delicious. You might add an extra tablespoon of Parmesan to compensate for body.
- If you don’t have Parmesan, but have Asiago, Romano, or aged Cheddar – Substitute with the same amount. Each will shift the flavor slightly, but all create a delicious result. Avoid soft cheeses like brie or fresh mozzarella, which won’t melt smoothly.
- If your broth is too salty – You can stretch it with water. Use 3 cups broth and 1 cup water to dilute the sodium content slightly. This gives you control.
- If you want to add protein – Dice cooked chicken, shrimp, or ham (about 1 cup) and stir it in during the last 2 minutes of cooking, just until heated through.
- If you want to add vegetables – Frozen peas, corn, or thawed broccoli florets can be stirred in during the last 2 minutes. Sautéed mushrooms or roasted bell peppers are wonderful too.
- If your cooked orzo seems too thick – Add warm broth, water, or milk one tablespoon at a time until you reach your desired consistency. It should be creamy, not soupy.
- If your orzo seems too thin – Let it sit for 2-3 minutes off heat. It will continue to absorb any remaining liquid and thicken slightly. If it still needs more body, you can stir in a tablespoon of grated cheese.
- If you’re using frozen garlic and onions – No need to thaw them. They’ll cook directly in the oil, though frozen onions might release more water. Just cook them a minute longer to let that evaporate.
- If you don’t have fresh herbs for garnish – A pinch of dried oregano, basil, or Italian seasoning works beautifully. You can also add a squeeze of lemon juice for brightness if you have it.
Common Mistakes to Avoid
After years of teaching clients and developing recipes, I’ve noticed patterns in where home cooks stumble. Let me save you from these missteps so your first attempt is your best attempt:
- Using pre-shredded Parmesan cheese – I know it’s convenient, but those anti-caking agents prevent smooth melting and create a gritty texture. Spend two minutes grating a block of cheese fresh. Your taste buds will thank you. This is one place where quality genuinely matters.
- Skipping the toasting step with the uncooked orzo – I understand the urge to rush, but those 5-7 minutes of toasting are what separate “nice pasta” from “why does this taste like a restaurant made it?” The nutty depth comes from this step alone.
- Boiling too vigorously after adding the broth – Keep it at a gentle simmer. Aggressive boiling causes uneven cooking and can make the orzo mushy on the outside while still firm on the inside. Medium-low is your sweet spot.
- Adding the cream and cheese while the mixture is still boiling – This is how you end up with broken, curdled cream instead of a silky sauce. Remove from heat first, then add your dairy and cheese to residual warmth.
Expert’s Nutritional Insight: Why This Dish Is Better Than You Think
As a registered dietitian, I see many clients stress about creamy, cheesy pasta dishes, assuming they’re nutritional enemies. Here’s what the research actually shows: orzo is a whole-grain pasta option when you choose it, and that matters significantly. One serving of this dish contains approximately 8-10 grams of protein from the cheese and broth, plus the complex carbohydrates in the pasta that provide sustained energy.
The small portion of cream and cheese (when divided across four servings) contributes beneficial fats that help absorb fat-soluble vitamins and keep you satisfied. The garlic and onions provide prebiotic fiber that feeds your beneficial gut bacteria. This isn’t indulgence without purpose; this is indulgence with nutrition. The key is enjoying it as part of a balanced meal with fresh vegetables and protein, which brings me to the next section.
Seasonal Variations: Adapting This Recipe Year-Round
One of the joys of cooking is working with what each season offers. This creamy cheesy orzo is infinitely adaptable to seasonal ingredients, which is how I encourage clients to eat—aligned with what’s fresh, local, and most affordable in their region.
- Spring – Stir in fresh asparagus cut into 1-inch pieces and peas (fresh or frozen) during the last 2 minutes. Finish with fresh dill and lemon zest. The brightness contrasts beautifully with the creamy sauce.
- Summer – Add diced zucchini, cherry tomatoes (halved), and fresh basil. If you have summer herbs like tarragon or chives, use them generously. The vegetable flavors are strongest now.
- Fall – Roast mushrooms, butternut squash, or Brussels sprouts separately, then stir them in. Add a pinch of sage or thyme. Consider adding crispy pancetta or prosciutto for autumn richness.
- Winter – Embrace heartier additions like roasted root vegetables, kale, or spinach (add at the end so it wilts into the creamy sauce). Thyme and rosemary are your friends here.
Zero Waste: Using Every Last Bit
This is where my philosophy of resourceful cooking truly lives. I never throw away ingredients that still have value, and I teach my clients to think the same way. Here’s how to use every component:
Vegetable scraps: If you’ve chopped onion and garlic but have trimmings (papery onion skin, garlic ends), save them. Freeze them in a bag and use them next time you make broth. They add flavor and cost you nothing extra.
Herb stems: Fresh parsley, basil, or chives often come with stems you’d normally discard. Freeze them and add them to your broth pot next time. They infuse delicate flavor without any waste.
Cheese rinds: If you have a hard Parmesan rind left from grating, don’t throw it away. Freeze it and add it to soups and broths. As it heats, it releases umami and actually becomes edible, adding body to your broths without extra ingredients.
Leftover finished dish: This recipe keeps beautifully (more on that below), but if you find yourself with a small amount left over, it’s perfect for adding to a salad, spreading on crostini, or thinning slightly with broth to create a quick soup.
Vegetable scraps from additions: If you’re adding asparagus, cut the tough bottoms off. Freeze them for broth. Same with mushroom stems, bell pepper cores, or zucchini ends. Every bit has value.
Make-Ahead Guide: Preparing This Dish for Your Busiest Days
As someone who works with busy families, I know that meals need to fit into real life, not some fantasy version where you have unlimited time. Here’s how I help clients make this dish work for their actual schedules:
Full make-ahead (the easy way): Make the entire dish up to 24 hours in advance. Let it cool completely, then transfer to an airtight container and refrigerate. When you’re ready to eat, reheat gently over medium-low heat, stirring frequently and adding a splash of broth or milk if it seems too thick. The orzo will continue absorbing liquid as it sits, so extra liquid during reheating is normal and welcome.
Partial make-ahead (my preferred method): Prepare everything through Step 3 (the orzo fully cooked in broth) up to 24 hours ahead. Store in the refrigerator. When you’re ready to serve, reheat gently over medium heat, then add your cream and cheese in Step 4. This ensures the creamiest, best texture because you’re not reheating the delicate dairy.
Ingredient prep (the fastest option): Chop your onion and garlic the night before. Grate your cheese the morning you plan to cook. Keep your broth measured and ready. When dinner time hits, you’ll move through the entire recipe in exactly 30 minutes.
Freezing note: This dish actually freezes reasonably well, though the texture becomes slightly less creamy upon thawing. I don’t recommend freezing beyond 1 month. If you do freeze it, thaw overnight in the refrigerator and reheat gently with extra broth to restore creaminess.
Can I Store Cheesy Orzo Recipe?
Yes, absolutely. As a dietitian, food safety is something I take seriously, and I’m happy to give you clear guidance on this because storage matters for both safety and quality.
Refrigerator storage: This dish keeps beautifully for 3-4 days in an airtight container. The orzo will continue to absorb any remaining liquid, becoming slightly thicker. This is normal and not a problem—simply add a splash of broth, milk, or water during reheating to restore the creamy consistency.
Reheating: Reheat gently over medium-low heat, stirring frequently to ensure even warming. Alternatively, transfer to a microwave-safe container and reheat in 30-second intervals, stirring between each, until warm throughout. Add a tablespoon of liquid (broth, water, or milk) per serving to account for absorption.
Freezer storage: While I generally recommend eating this fresh for best texture, it does freeze. Transfer cooled orzo to a freezer bag or airtight container and freeze for up to 1 month. Label with the date. Thaw overnight in the refrigerator and reheat as described above, understanding that the texture will be slightly less creamy.
Important safety note: Since this dish contains dairy (cream and cheese), don’t leave it sitting at room temperature for more than 2 hours. If your kitchen is warm or you’re serving at a gathering, aim for 1 hour maximum. Food safety isn’t negotiable, even with dishes this delicious.
Nutrition Information
Based on USDA FoodData Central and my analysis as a registered dietitian, here’s the nutritional profile per serving (serves 4):
- Calories: approximately 425
- Protein: 14 grams
- Carbohydrates: 48 grams
- Dietary Fiber: 2 grams
- Total Fat: 16 grams
- Saturated Fat: 7 grams
- Cholesterol: 32 milligrams
- Sodium: 680 milligrams (varies based on broth choice)
Key nutrients: This dish provides significant calcium (from the cheese and broth), B vitamins (from the pasta and garlic), and selenium (from the cheese). The garlic and onions contribute various phytochemicals with antioxidant properties.
Pro tip for lower sodium: Use low-sodium broth (or make your own), and taste before adding additional salt. This simple choice can reduce the sodium to around 450 milligrams per serving, which is meaningful for clients managing blood pressure.
What to Serve With Cheesy Orzo Recipe?
This creamy, rich, savory dish deserves bright, fresh companions that cleanse the palate and provide nutritional balance. I always recommend serving this with items that contrast in flavor and texture—it’s the principle of eating the rainbow in one meal.
- Fresh green salad with lemon vinaigrette – The acidity cuts through the creaminess beautifully. Use peppery greens like arugula if you have them, or simple romaine with a sharp dressing.
- Roasted or raw vegetables – Steamed broccoli, roasted Brussels sprouts, or raw carrots and bell peppers add crunch and nutrients that balance the soft pasta.
- Crusty bread for soaking – A good rustic bread isn’t just nice; it’s practical. Use it to wipe your plate clean and capture every drop of that creamy sauce.
- Simple tomato-based sauce on the side – If you’d like even more brightness, make a quick beefsteak tomato sauce and serve it alongside. Some people like to dollop it on top for contrast.
- Steamed green beans with garlic – These are elegant, simple, and provide a nice textural contrast to the creaminess.
The combination of this creamy orzo with fresh, bright sides creates a meal that feels indulgent yet balanced—exactly how I believe we should all be eating.

Cheesy Orzo Recipe
Ingredients
Method
- In a large 12-inch skillet over medium heat, warm about 1½ tablespoons of your olive oil until it's fragrant and just starting to shimmer—you'll know it's ready when you can smell the richness. This is your foundation, and getting it right matters. Add your finely chopped onion to the warm oil and let it cook undisturbed for about a minute. Then stir, encouraging the onion to soften and become translucent. After 2-3 minutes, add your minced garlic and optional garlic powder. Don't let the garlic burn—you want it to become fragrant and release its oils into the oil, which should take just 30-45 seconds of stirring. If you're using frozen garlic, no problem; it thaws instantly in the heat and works just as well as fresh. This step is crucial because you're not just cooking vegetables; you're building the aromatic backbone that makes this dish taste like you've been simmering it for hours. The onion and garlic release compounds that make your taste buds sing.
- Now comes the step that most people skip, and it's exactly why they miss out on that depth of flavor. Add your uncooked orzo directly to the pan with the onions and garlic. Stir constantly for 5-7 minutes, allowing the pasta to toast slightly in the oil. You'll notice the orzo turning from pale white to golden, and you'll smell something nutty and wonderful emerging. This isn't wasting time; this is building flavor. The toasting process helps seal the outside of the pasta slightly, which means it won't turn mushy when you add the broth. It also develops complex flavors through a process called the Maillard reaction—the same chemistry that makes bread brown and delicious. This is professional technique made simple.
- Pour your 4 cups of broth (whether it's homemade, store-bought, or from your freezer) into the skillet with the toasted orzo and aromatics. Give it all a good stir, making sure nothing is sticking to the bottom. Bring the mixture to a full boil over medium-high heat—you'll see it actively bubbling across the surface. Once boiling, immediately reduce your heat to medium-low. This is important: you're transitioning from a vigorous boil to a gentle simmer. Cover your skillet with a lid (even a baking sheet works in a pinch) and let it cook undisturbed for 15-20 minutes. The orzo will absorb the broth gradually, creating a creamy consistency without any cream yet. Stir occasionally—about every 5 minutes—to prevent sticking on the bottom. You'll know it's done when the liquid is almost completely absorbed and the orzo is tender but still has a slight firmness when you bite into it. That firmness is "al dente," and it's the difference between good pasta and great pasta.

- Remove your skillet from the heat (the residual warmth is your friend here). Pour in your cream—whether it's heavy whipping cream, half-and-half, or whole milk if that's what you have. Add your freshly grated Parmesan cheese. Stir gently but thoroughly, making sure the cheese melts completely and incorporates evenly. The residual heat will melt the cheese and warm the cream without boiling, which prevents curdling. Taste your creation. This is your moment to adjust the seasoning. Add a pinch more salt if needed (remember, broths vary in sodium content), and grind fresh black pepper generously over the top. More black pepper than you think you need is the right amount—it brightens the creamy, cheesy richness beautifully.
- Transfer your creamy cheesy orzo to serving bowls while it's still warm. Top each portion with fresh chopped parsley (or basil, chives, or whatever fresh herb you have), an extra shower of Parmesan cheese, and a drizzle of that good olive oil you saved. The olive oil on top adds richness and helps the cheese shine. Serve immediately, while the orzo is at peak creaminess and warmth. This dish is best enjoyed fresh from the skillet, though it certainly keeps well for leftovers if you have any.
Notes
FAQs
Can I make this with vegetable broth instead of chicken broth?
Absolutely. Vegetable broth creates a lighter-tasting dish that puts even more emphasis on the cheese flavor. Some people prefer this, particularly if they’re vegetarian or avoiding poultry. The cooking method and timing remain exactly the same. If anything, vegetable broth might be slightly less salty, giving you more control over the final seasoning.
What if my cream curdles when I add it to the hot pasta?
First, don’t panic—this is fixable. If you notice the cream breaking (appearing separated or grainy), immediately remove the pan from heat. Let it cool for 30 seconds, then whisk in the cream very slowly, stirring constantly. The problem typically happens when the mixture is still boiling when you add the dairy. In the future, remember Step 4: remove from heat before adding cream. The residual warmth is enough to warm it and help the cheese melt.
Is this recipe safe to eat if I’m pregnant?
Yes, as long as you follow food safety guidelines. Use pasteurized dairy products (which is standard in the US), and ensure your broth has been stored properly. The cheese is cooked, which makes it safe. If you’re using homemade broth, ensure it reached a boil during the reheating process. Always consult with your obstetrician about your specific dietary needs during pregnancy.
Can I use gluten-free pasta in this recipe?
Yes! Many people use gluten-free orzo successfully in this recipe. The cooking time might be slightly different (check your pasta box), and gluten-free pasta sometimes absorbs liquid differently, so you may need to adjust the broth amount slightly. Start with the full 4 cups and add more if needed. The technique remains the same.
Why does the recipe say to toast the uncooked orzo? Can I skip that step?
Technically, yes, you can skip it. But I wouldn’t recommend it if flavor is your goal. The toasting step develops nutty, complex flavors through the Maillard reaction—the same chemistry that makes bread brown and toast delicious. Skipping it creates a flatter-tasting dish. Those 5-7 minutes are an investment in genuine flavor that pays dividends in every bite. In my kitchen, I never skip this step.
More Leftover Transformation Recipes
If you’ve discovered the joy of transforming ordinary ingredients into something extraordinary, you’ll love these recipes that celebrate resourcefulness and real-life cooking:
- this cozy soup – Transform beef broth and leftover meat into warming comfort in a bowl
- Broccoli Cauliflower Casserole – Turn tired vegetables into a creamy, golden side dish that makes everyone ask for seconds
- Southern-Style Baked Macaroni and Cheese Recipe – A traditional approach to transforming pantry staples into celebration-worthy comfort
Final Thoughts: The Joy of Resourceful Cooking
I started this journey as a registered dietitian interested in nutrition science, but what I’ve discovered is that the real magic happens when we cook with intention, creativity, and joy. This creamy cheesy orzo recipe represents everything I believe about food: it respects ingredients enough not to waste them, it celebrates simplicity, and it delivers satisfaction that makes people happy to gather around the table.
Every time you make this dish, whether from intentional ingredients or happy accident leftovers, you’re practicing a form of cooking that matters. You’re choosing to be resourceful instead of wasteful, intentional instead of hurried, and creative instead of rigid. That’s not just cooking—that’s nourishment in the deepest sense.
I can’t wait to hear how this recipe becomes part of your kitchen story. Enjoy!