This post contains affiliate links. As an Amazon Associate I earn from qualifying purchases.
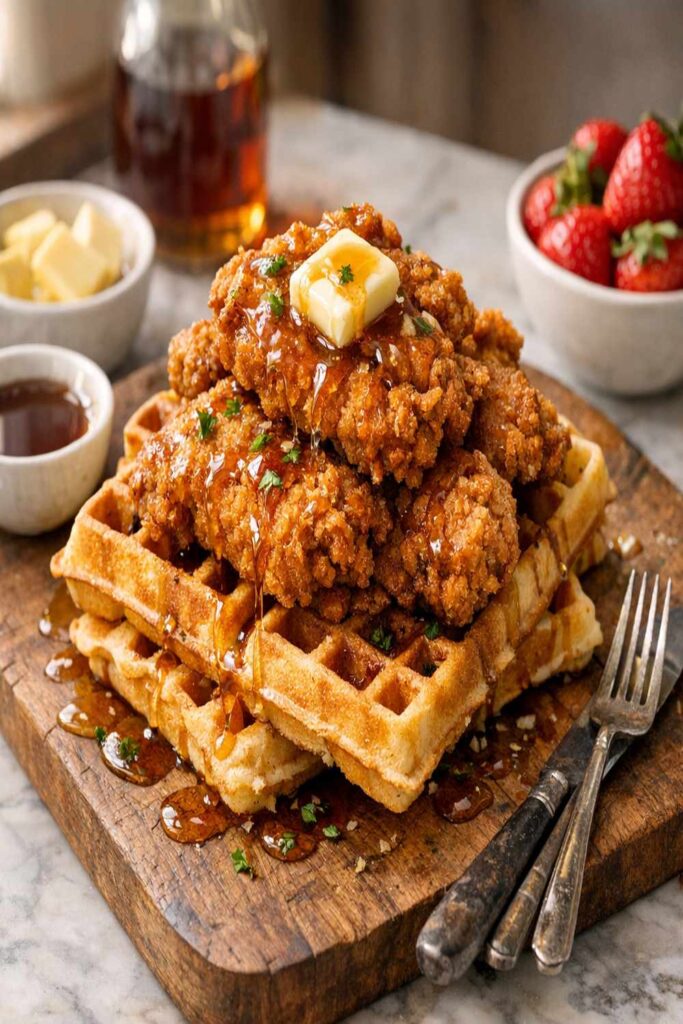
Picture this: a lazy Sunday morning in my Syracuse kitchen, sunlight streaming through the windows, the smell of buttermilk and vanilla filling the air, and family gathered around the table with anticipation in their eyes. That’s the magic of chicken and waffles—a dish that transforms an ordinary breakfast into something celebration-worthy. I’ve been making this recipe for years, ever since my grandmother taught me that the best meals aren’t about perfection; they’re about bringing people together with warmth and joy. Whether you’re hosting a special brunch, feeding a hungry crowd, or simply wanting to feel like you’re treating yourself to something restaurant-quality at home, this easy chicken and waffles recipe delivers every single time. It’s the kind of dish that makes your guests say, “You made this?” and suddenly you’re the hero of the table.
Easy Chicken And Waffles Recipe That Will Steal the Show at Your Next Brunch
I’ll never forget the first time I made this dish for my cousin’s birthday breakfast celebration. The night before, I was honestly nervous—chicken and waffles seemed intimidating, like something only professional chefs could pull off. But my grandmother’s voice echoed in my head: “Good food isn’t complicated, honey. It’s just ingredients treated with respect and love.” I prepped everything the evening before, and the next morning, I watched my cousin’s face light up when that crispy golden chicken hit the warm, fluffy waffle. That moment taught me that this recipe isn’t just about food—it’s about creating memories, making people feel cherished, and proving that you don’t need culinary school to cook like a pro.
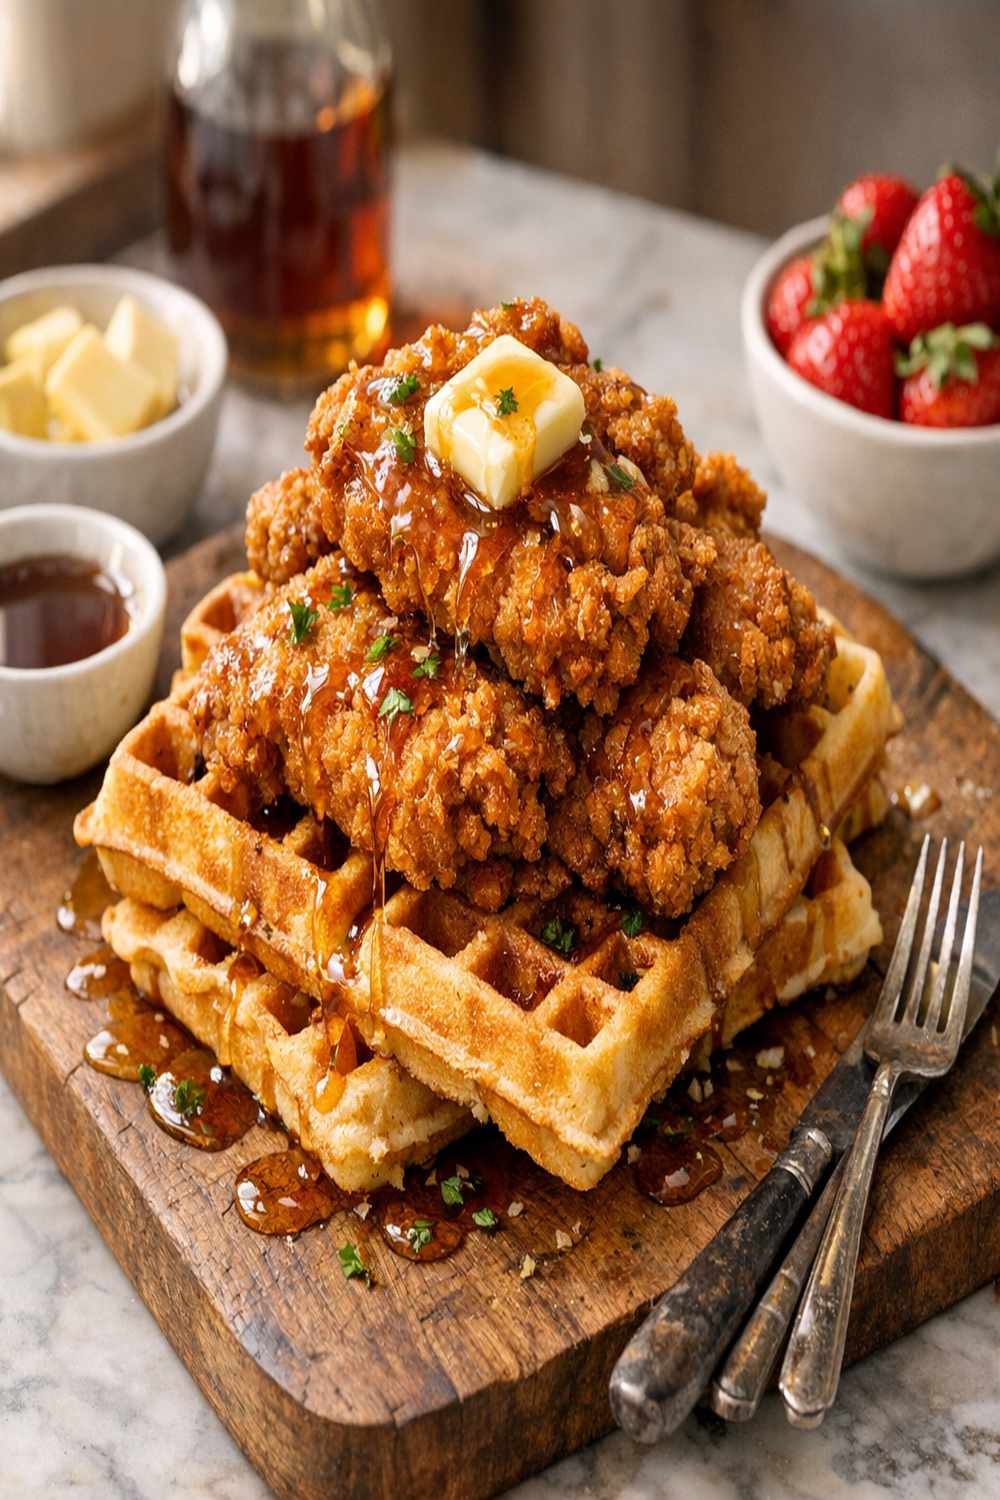
When to Make Easy Chicken And Waffles Recipe
This dish is beautifully versatile, and I’ve found there are so many perfect moments to bring it to the table. Let me share the occasions where this recipe absolutely shines and why it’s the right choice:
- Sunday brunch gatherings – When you want to impress without spending hours in the kitchen. The crispy-outside, tender-inside chicken pairs perfectly with lazy weekend vibes and mimosas with friends.
- Special birthday breakfasts – This is my go-to when someone I love wakes up on their special day. It says “you’re worth the effort” without actually requiring enormous effort on your part.
- Holiday mornings – Whether it’s Christmas, Easter, or any festive occasion, this recipe brings celebration energy to your table and creates a restaurant-quality experience at home.
- When you need comfort food – Sometimes life is overwhelming and you need something warm, satisfying, and deeply comforting. This dish wraps you in joy.
- Impressing dinner guests – I’ve served this for brunch, lunch, and even casual dinner occasions. It works whenever you want to show your guests they matter.
What Makes This Easy Chicken And Waffles Recipe Special
As a registered dietitian, I’ve learned that the best recipes bridge nutrition with genuine pleasure—and this one does both beautifully. What elevates this dish beyond ordinary breakfast is the attention to flavor layering and texture contrast. The chicken gets a luxurious buttermilk bath infused with garlic, onion, smoked paprika, and white pepper, creating a marinade that penetrates every fiber of the meat and makes it impossibly tender and flavorful.
The secret is in the buttermilk soak, which not only tenderizes the chicken through its natural acidity but also helps the coating adhere perfectly during frying, creating that coveted restaurant-quality crust. The spice blend isn’t overpowering—it’s balanced and sophisticated, allowing the quality of your chicken to shine through while building complex flavor layers.
What truly makes this special is how effortless it feels to pull off. With proper planning, you’re spending maybe 15 minutes of active cooking time on the morning of service. The rest is timing and confidence—two things this guide will help you master completely.
Scaling for Your Crowd
One of my favorite things about this recipe is how beautifully it scales. Whether you’re cooking for two or twenty, the technique stays exactly the same—you’re just multiplying quantities and managing your cooking rhythm. Here’s how I approach different crowd sizes:
- For 2-4 people (intimate breakfast) – Use the recipe as written with 1 pound of chicken tenderloins. This makes about 6-7 pieces, serving 2-3 people generously with maybe one piece left over for the cook. Keep your oil temperature steady and fry 2-3 pieces at a time, which takes about 5-6 minutes total cooking time.
- For 6-8 people (family gathering) – Double the recipe to 2 pounds of chicken and double all seasonings. You’ll need more oil for frying (about 4-5 cups total), but fry in batches as before. Stagger your waffle cooking so they come out fresh while chicken finishes. Total cook time is about 25-30 minutes from when you start frying.
- For 12+ people (party or brunch event) – Triple or quadruple the recipe as needed. Here’s my pro tip: marinate the chicken in a large bowl or food storage container the night before. The next morning, set up an assembly line with your marinating station, breading station, and frying station. Have two people working in tandem—one person pulling chicken from the marinade and coating it, another person managing the oil and frying batches. This keeps momentum flowing and prevents the oil from cooling between batches.
The Ingredients
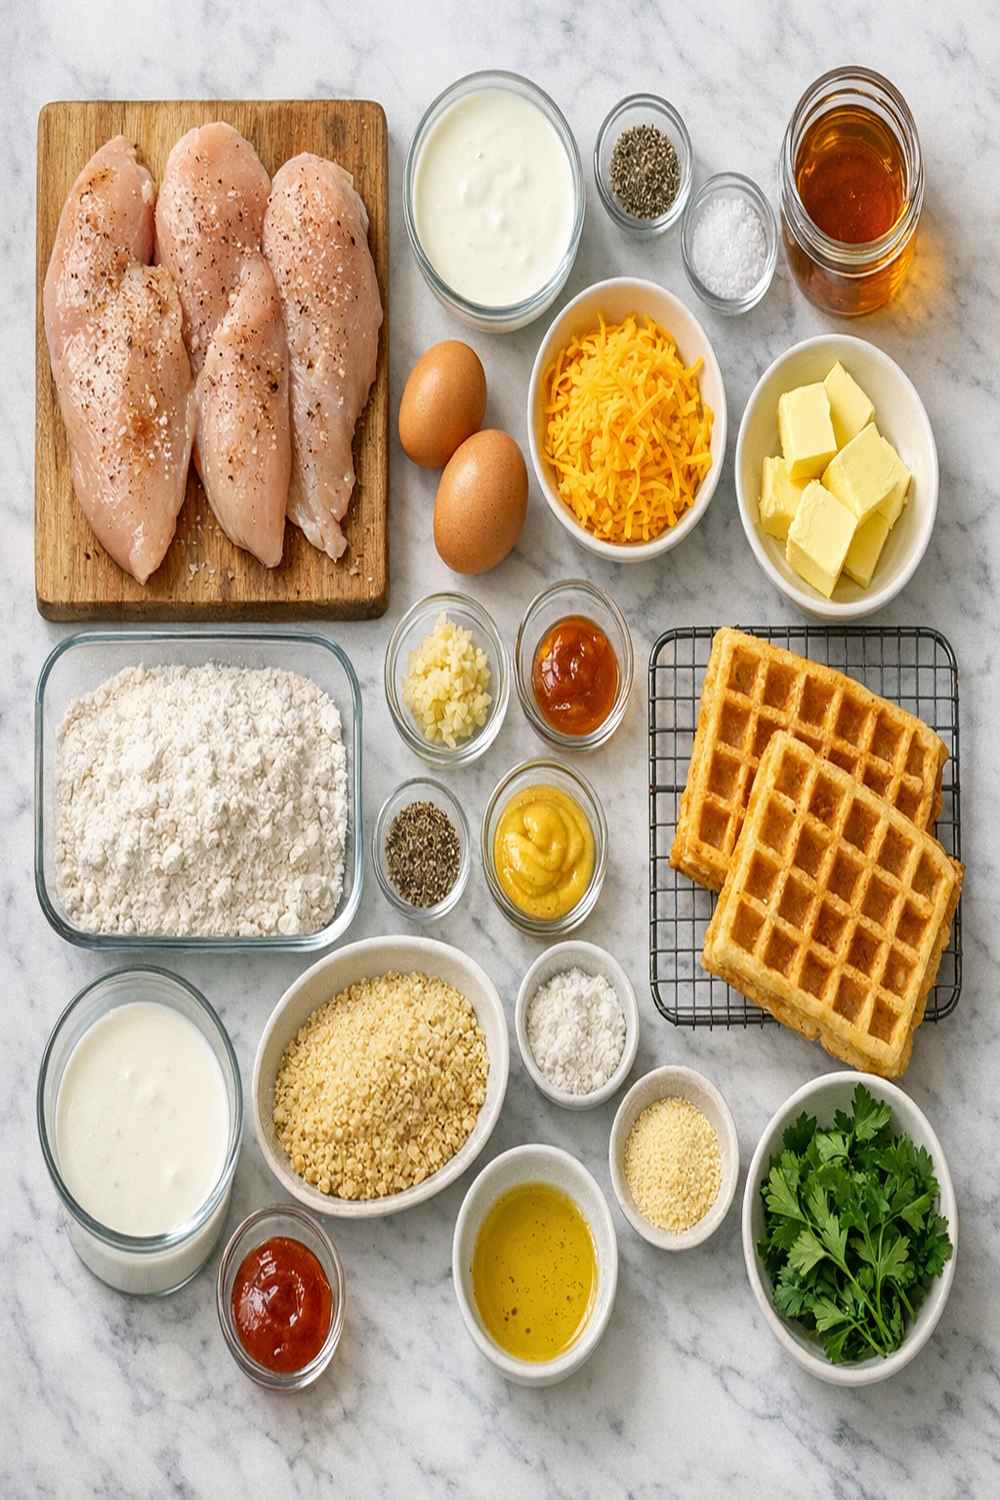
Here’s everything you need to create this showstopping brunch masterpiece. I’ve chosen each ingredient specifically for flavor, texture, and how it contributes to that restaurant-quality result:
- 1 cup all-purpose flour (standard all-purpose works beautifully here)
- 2 teaspoons kosher salt, divided (for seasoning the marinade and the flour coating)
- 1 pound chicken tenderloins (about 6-7 pieces, the most tender part of the bird)
- 1 cup whole buttermilk (full-fat creates the most luxurious marinade and tender chicken)
- 2 teaspoons garlic powder, divided (adds savory depth without being overpowering)
- 1½ teaspoons ground white pepper, divided (white pepper has a cleaner, more refined heat than black)
- Fresh buttermilk waffles (prepare using your favorite waffle recipe or a recipe that ensures tender, fluffy texture like a quality base recipe)
- ½ teaspoon cayenne pepper (optional, for those who like a gentle heat)
- 1½ teaspoons onion powder, divided (creates umami richness in the spice blend)
- 3 cups vegetable oil (for frying, roughly the amount needed for a shallow-fry setup)
- 1½ teaspoons smoked paprika, divided (brings subtle smokiness and gorgeous color)
- Pure maple syrup and softened butter (for serving, the finishing touch that ties everything together)
How to Make Easy Chicken And Waffles Recipe for Your Occasion
I’m going to walk you through this step-by-step in a way that feels achievable and actually enjoyable. The magic isn’t in complicated techniques—it’s in understanding why each step matters and trusting the process. You’ve got this, and I promise your guests will think you’re a culinary genius.
Step 1: Create Your Flavor-Packed Marinade
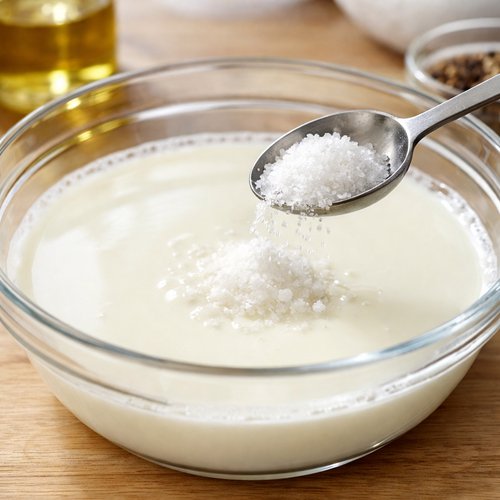
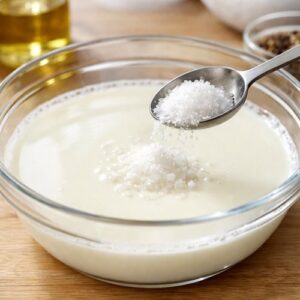
Pour your 1 cup of buttermilk into a shallow bowl or storage container large enough to hold all your chicken pieces. Add 1 teaspoon of kosher salt, 1 teaspoon of garlic powder, ¾ teaspoon of onion powder, ¾ teaspoon of ground white pepper, and ¾ teaspoon of smoked paprika. Stir this together until the spices are evenly distributed—you want no clumps or streaks of unmixed seasoning. This is crucial because every piece of chicken needs to encounter that balanced flavor profile.
This is where I recommend making ahead saves your morning. You can prepare this marinade the night before and store it covered in your refrigerator. When you’re ready to marinate, the flavors are already blooming and waiting for your chicken.
Step 2: Marinate Your Chicken for Maximum Tenderness
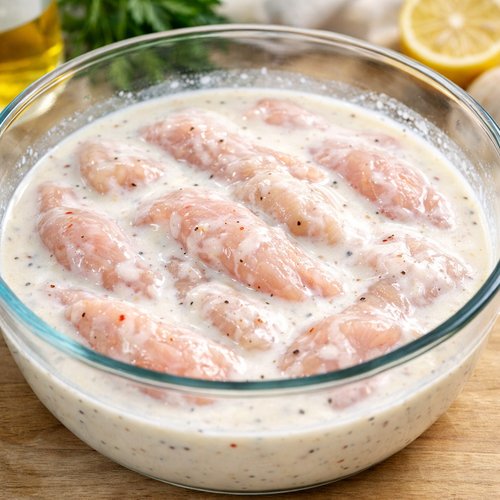
Add your chicken tenderloins to the buttermilk mixture, making sure each piece is submerged and coated. If you’re marinating ahead (which I strongly recommend), cover and refrigerate for at least 4 hours, but ideally overnight. The buttermilk’s natural acidity works its magic, breaking down proteins and creating an incredibly tender interior while the spices penetrate the meat.
If you’re on a tighter timeline, 30 minutes of marinating will work in a pinch, but longer is always better. Think of this step as giving yourself a gift—the more time the chicken spends in that buttermilk bath, the more forgiving it becomes during frying and the more flavorful it tastes.
Step 3: Set Up Your Breading Station
While your chicken marinates (or while you’re preparing to fry), combine your 1 cup of all-purpose flour with the remaining 1 teaspoon of kosher salt, 1 teaspoon of garlic powder, ¾ teaspoon of onion powder, ¾ teaspoon of white pepper, ¾ teaspoon of smoked paprika, and ½ teaspoon of cayenne pepper if you’re using it. Mix this thoroughly with a fork, breaking up any spice clumps so the coating is absolutely even.
Pour this flour mixture into a shallow bowl or plate. This is your breading station, and having everything ready before you start frying makes the actual cooking moment smooth and stress-free. Trust me—you don’t want to be measuring flour while oil is heating.
Step 4: Heat Your Oil to the Perfect Temperature
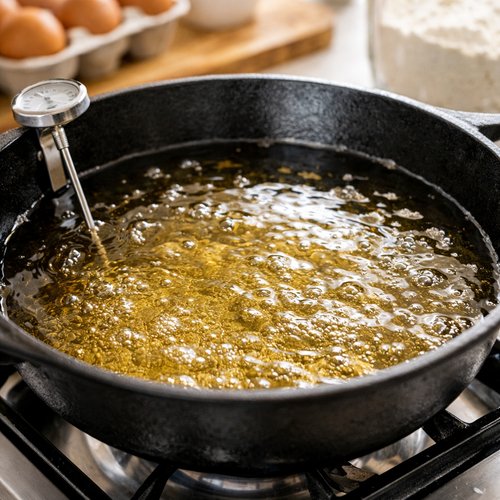
Pour your 3 cups of vegetable oil into a heavy-bottomed skillet or Dutch oven. You want the oil about ½ to ¾ inches deep. Heat it over medium-high heat until it reaches 350°F on an instant-read thermometer. This temperature is critical—too cool and your chicken absorbs oil and becomes greasy; too hot and the coating burns before the inside cooks through.
I always test the oil temperature with a thermometer rather than guessing. It takes 30 seconds and guarantees success. If you don’t have a thermometer, the old-fashioned test is to drop a tiny piece of bread into the oil—if it sizzles immediately and turns golden in about 60 seconds, you’re in the right temperature zone.
Pro tip: while your oil heats, start your waffle maker and get it warming up. You want those waffles hot and ready to receive the chicken.
Step 5: Bread and Fry Your Chicken to Golden Perfection
Working with 2-3 pieces at a time (don’t overcrowd—this drops your oil temperature and creates steaming instead of frying), remove chicken from the buttermilk marinade. Let excess buttermilk drip off for just a second, then immediately dredge each piece in your seasoned flour, coating all sides generously. Press the flour gently into the chicken so it adheres well, creating that beautiful crust.
Carefully place your breaded chicken into the hot oil. You’ll hear a satisfying sizzle—that’s exactly what you want. Don’t move the pieces around; let them sit undisturbed for 3-4 minutes while the bottom side develops that gorgeous golden-brown crust. Then flip and cook another 2-3 minutes until the second side is equally golden and the internal temperature reaches 165°F.
Remove each piece to a paper towel-lined plate. The residual heat continues cooking slightly, and the paper towels wick away excess oil. This is where your chicken becomes that restaurant-quality crispy-outside, juicy-inside masterpiece.
Step 6: Finish Your Waffles and Create the Magic
While your chicken rests, make sure your waffles are golden, crispy on the outside, and fluffy within. Have real maple syrup warming gently and softened butter standing by. Each component should be hot or warm when they come together on the plate—temperature contrast is part of what makes this dish so satisfying.
Make-Ahead Timeline
Planning is how I reduce stress and maximize flavor. Here’s exactly when to do what so you can enjoy the actual cooking experience:
- 2-3 days before – Plan your menu and do your grocery shopping. There’s something psychologically calming about knowing you have everything you need waiting at home.
- 1 day before – Prepare your buttermilk marinade and marinate the chicken overnight in the refrigerator. You can also make your waffle batter if your recipe allows, storing it covered in the fridge (most buttermilk waffle batters actually improve overnight as flavors meld).
- Day of – 2 hours before serving – Remove your marinated chicken from the refrigerator and let it come to room temperature for about 20-30 minutes. This ensures even cooking. Set up your breading station with all dry ingredients mixed and ready.
- 30 minutes before serving – Heat your oil and start your waffle maker. Begin frying your chicken in batches.
- At serving time – Place each piece of crispy chicken on a warm waffle, top with a pat of softened butter and a generous pour of warm maple syrup. Serve immediately while everything is at its peak temperature and texture.
How to Present and Plate Easy Chicken And Waffles Recipe
Presentation matters because we eat with our eyes first. A beautifully plated chicken and waffles dish signals that you’ve put thought and care into this meal, which creates an emotional experience before the first bite even happens. Here’s how I make this look as impressive as it tastes:
- Use warm plates – Warm your serving plates in a 200°F oven for about 5 minutes before plating. This keeps your waffles crispy longer and shows polish and attention to detail that guests absolutely notice.
- Create height and dimension – Place your waffle slightly off-center on the plate, then lean your piece of chicken against it at an angle rather than laying it flat. This creates visual interest and makes the dish look restaurant-quality.
- Drizzle with intention – Instead of pouring syrup directly over everything (which makes it look sloppy), drizzle some in a thin stream across the plate’s white space and over the top of the chicken. It looks intentional and sophisticated.
- Garnish thoughtfully – A small pat of softened butter melting on top of the chicken, maybe a sprinkle of fresh cracked black pepper or a tiny pinch of smoked paprika for color, and you’ve elevated this from “homemade” to “chef-prepared.”
Seasonal Variations
One of my favorite things about this recipe is how it welcomes seasonal creativity. Here’s how I adapt this dish throughout the year:
- Spring and summer version – Add a touch of lemon zest to your breading flour for brightness. Serve with a fresh berry compote alongside your maple syrup (berries are at peak freshness and flavor). Consider adding fresh herbs like thyme or tarragon to your marinade. The lighter spice profile celebrates warm-weather eating while maintaining that perfect chicken-and-waffle balance.
- Fall and winter version – Increase your smoked paprika slightly and add ½ teaspoon of ground cinnamon to your breading mix. This creates a subtle warmth that feels cozy and seasonal. Serve with a maple-bourbon syrup or a spiced apple compote. The deeper, warming spices make this version feel like a harvest celebration on a plate.
What to Serve Alongside Easy Chicken And Waffles Recipe
While chicken and waffles is absolutely complete on its own, building a thoughtful menu around it creates an experience rather than just a meal. As a dietitian, I think about balance—flavors, textures, temperatures, and nutrients—when planning a full spread. Here are my go-to accompaniments:
- Fresh fruit platter – Berries, melon, citrus, and grapes offer brightness and natural sweetness that balances the richness of the fried chicken. The contrast of cool, fresh fruit against warm chicken and waffles is absolutely lovely.
- Smoked salmon and cream cheese spread – If you’re serving brunch, add an unexpected elegant touch with smoked salmon on small toasts. It appeals to guests who want something savory alongside the sweet syrup.
- Crispy bacon or sausage – I know—you’re already serving protein—but the textural contrast and smoky flavors add dimension. These are lighter than the fried chicken and give guests options.
- Fresh herb salad with light vinaigrette – A peppery greens salad with fresh lemon dressing cuts through richness and cleanses the palate. It’s especially welcome if you’re making dishes with rich, concentrated flavors elsewhere on your menu.
- Whipped cream with cinnamon – Offer this as an alternative to butter and syrup or as an addition. A dollop of cinnamon-spiced whipped cream on a waffle is pure indulgence.
- Flavored butters – Make or buy herb butter (garlic-parsley), honey butter, or pecan butter. Let guests customize their plate by choosing their preferred butter. It’s a small touch that makes people feel special.
Can I Store Easy Chicken And Waffles Recipe?
Storage and make-ahead strategies are one of my favorite things to talk about because they’re what make elegant entertaining actually sustainable. Here’s the truth about storing this dish:
Cooked chicken keeps for 3-4 days when stored in an airtight container in the refrigerator. You can reheat it gently in a 325°F oven for about 10 minutes, and it will remain crispy. Don’t use the microwave—that turns the coating soggy no matter how careful you are.
Waffles also keep for 3-4 days refrigerated, or freeze beautifully for up to 3 months. Reheat refrigerated waffles in a toaster or toaster oven rather than a regular oven (it prevents sogginess). Frozen waffles go straight into the toaster without thawing.
The marinade can be prepared up to 2 days ahead, and chicken can marinate in it for up to 24 hours. After that, the buttermilk begins breaking down the proteins excessively, which can make the chicken mushy.
My practical advice: if you’re entertaining, marinate the chicken the day before, fry it the morning of, and keep it warm in a low oven until serving. This gives you flexibility and ensures everything is at peak quality when it hits the table.
Nutrition Information
Based on USDA data, one serving of this recipe (1 piece of chicken plus 1 waffle with 1 tablespoon of butter and 2 tablespoons of maple syrup) contains approximately 520 calories, 24 grams of protein, 18 grams of fat, and 62 grams of carbohydrates. The protein comes primarily from the chicken, which makes this a surprisingly protein-rich breakfast option that keeps you satisfied through midday.
As a registered dietitian, I want you to understand what you’re eating: the buttermilk marinade provides probiotics that support digestive health, the chicken is lean and nutrient-dense, and the whole grain option for waffles (if available) adds fiber. The maple syrup offers minerals like manganese and zinc. This isn’t indulgent “junk food”—it’s whole ingredients treated thoughtfully, which is the foundation of good nutrition in my philosophy. Enjoy it without guilt, understanding that balance across your day is what truly matters.

Easy Chicken And Waffles Recipe
Ingredients
Method
- Pour your 1 cup of buttermilk into a shallow bowl or storage container large enough to hold all your chicken pieces. Add 1 teaspoon of kosher salt, 1 teaspoon of garlic powder, ¾ teaspoon of onion powder, ¾ teaspoon of ground white pepper, and ¾ teaspoon of smoked paprika. Stir this together until the spices are evenly distributed—you want no clumps or streaks of unmixed seasoning. This is crucial because every piece of chicken needs to encounter that balanced flavor profile. This is where I recommend making ahead saves your morning. You can prepare this marinade the night before and store it covered in your refrigerator. When you're ready to marinate, the flavors are already blooming and waiting for your chicken.
- Add your chicken tenderloins to the buttermilk mixture, making sure each piece is submerged and coated. If you're marinating ahead (which I strongly recommend), cover and refrigerate for at least 4 hours, but ideally overnight. The buttermilk's natural acidity works its magic, breaking down proteins and creating an incredibly tender interior while the spices penetrate the meat. If you're on a tighter timeline, 30 minutes of marinating will work in a pinch, but longer is always better. Think of this step as giving yourself a gift—the more time the chicken spends in that buttermilk bath, the more forgiving it becomes during frying and the more flavorful it tastes.
- While your chicken marinates (or while you're preparing to fry), combine your 1 cup of all-purpose flour with the remaining 1 teaspoon of kosher salt, 1 teaspoon of garlic powder, ¾ teaspoon of onion powder, ¾ teaspoon of white pepper, ¾ teaspoon of smoked paprika, and ½ teaspoon of cayenne pepper if you're using it. Mix this thoroughly with a fork, breaking up any spice clumps so the coating is absolutely even. Pour this flour mixture into a shallow bowl or plate. This is your breading station, and having everything ready before you start frying makes the actual cooking moment smooth and stress-free. Trust me—you don't want to be measuring flour while oil is heating.

- Pour your 3 cups of vegetable oil into a heavy-bottomed skillet or Dutch oven. You want the oil about ½ to ¾ inches deep. Heat it over medium-high heat until it reaches 350°F on an instant-read thermometer. This temperature is critical—too cool and your chicken absorbs oil and becomes greasy; too hot and the coating burns before the inside cooks through. I always test the oil temperature with a thermometer rather than guessing. It takes 30 seconds and guarantees success. If you don't have a thermometer, the old-fashioned test is to drop a tiny piece of bread into the oil—if it sizzles immediately and turns golden in about 60 seconds, you're in the right temperature zone. Pro tip: while your oil heats, start your waffle maker and get it warming up. You want those waffles hot and ready to receive the chicken.
- Working with 2-3 pieces at a time (don't overcrowd—this drops your oil temperature and creates steaming instead of frying), remove chicken from the buttermilk marinade. Let excess buttermilk drip off for just a second, then immediately dredge each piece in your seasoned flour, coating all sides generously. Press the flour gently into the chicken so it adheres well, creating that beautiful crust. Carefully place your breaded chicken into the hot oil. You'll hear a satisfying sizzle—that's exactly what you want. Don't move the pieces around; let them sit undisturbed for 3-4 minutes while the bottom side develops that gorgeous golden-brown crust. Then flip and cook another 2-3 minutes until the second side is equally golden and the internal temperature reaches 165°F. Remove each piece to a paper towel-lined plate. The residual heat continues cooking slightly, and the paper towels wick away excess oil. This is where your chicken becomes that restaurant-quality crispy-outside, juicy-inside masterpiece.

- While your chicken rests, make sure your waffles are golden, crispy on the outside, and fluffy within. Have real maple syrup warming gently and softened butter standing by. Each component should be hot or warm when they come together on the plate—temperature contrast is part of what makes this dish so satisfying.
FAQs
Can I make this recipe gluten-free?
Absolutely! Substitute your all-purpose flour with a high-quality gluten-free all-purpose flour blend (I prefer one that includes xanthan gum for better binding). The ratio stays exactly the same—1 cup of gluten-free flour—and the cooking technique doesn’t change. The texture will be equally crispy. For the waffles, use a reliable gluten-free waffle mix or recipe you trust. Your guests won’t notice the difference if you’re confident in your gluten-free products. This is how I accommodate friends with dietary restrictions without making it feel like a special accommodation.
What if I don’t have buttermilk?
You have options! Make homemade buttermilk by mixing 1 cup of regular milk with 1 tablespoon of fresh lemon juice or white vinegar. Let it sit for 5 minutes until it curdles slightly, and you’ve created a marinade that works identically to store-bought buttermilk. Alternatively, use Greek yogurt thinned with a little milk, or even sour cream thinned with milk. The goal is that tangy liquid component that tenderizes the chicken. Any of these options work beautifully.
Can I bake the chicken instead of frying?
I’m going to be honest with you: baking changes the final texture significantly. You lose that coveted crispy, golden exterior that makes this dish special. That said, if frying makes you genuinely uncomfortable, you can bake breaded chicken at 400°F for about 15-18 minutes until golden. It will be cooked through and tasty, but it won’t have that restaurant-quality crunch. My suggestion: try the frying method at least once. You might discover it’s easier and less messy than you expect, and the result is absolutely worth the minimal extra effort.
How do I keep the waffles crispy while I’m cooking the chicken?
This is a classic timing question! Make your waffles last, just before you’re about to plate and serve. Keep finished waffles on a warm plate in a low (200°F) oven, uncovered so steam doesn’t make them soggy. Or make waffles ahead, refrigerate them, and reheat in the toaster right before plating. The toaster method actually crisps them up beautifully. Some people even prefer cold, crispy waffles as a textural contrast to warm chicken, so don’t stress too much about perfect synchronization.
Is there a dairy-free version?
You can absolutely make this with non-dairy buttermilk (coconut milk mixed with lemon juice works well, or use commercially available non-dairy buttermilk). Make your waffles with a non-dairy milk and oil instead of butter. The chicken marinade and frying process remain unchanged. Skip the butter topping or use a non-dairy butter alternative, and you have a beautiful dairy-free meal that tastes equally indulgent and special. Your guests may not even realize it’s dairy-free.
Common Mistakes to Avoid
I’ve made every mistake in this recipe at least once, so let me save you the learning curve. Here are the three things that most commonly go wrong, and how to sidestep them entirely:
Mistake 1: Oil temperature that’s too low – This is the biggest culprit behind greasy, soggy chicken. If your oil isn’t hot enough, the chicken absorbs oil instead of the exterior getting crispy. Use a thermometer. It takes one second and prevents sadness. I promise.
Mistake 2: Overcrowding the pan – Frying too much chicken at once drops your oil temperature and causes the pieces to steam instead of fry. Work in small batches (2-3 pieces), let your oil recover between batches, and you’ll get consistently golden results. This is where patience pays genuine dividends.
Mistake 3: Skipping the buttermilk marinade or shortchanging the time – I’ve seen people rush this step and wonder why their chicken is tough. The buttermilk is doing real work—tenderizing and flavoring simultaneously. Give it at least 4 hours, and genuinely, overnight is better. This is actually where making ahead saves you quality.
Expert’s Nutritional Tip
As a registered dietitian who thinks about nutrition constantly, I want to highlight something beautiful about this recipe: the chicken tenderloins are one of the leanest cuts of poultry available, while still maintaining incredible flavor and texture. When you marinate them in buttermilk, you’re introducing probiotics and calcium that support bone health and digestive function. The spice blend—garlic, onion, paprika—brings antioxidants and flavor without adding sodium or calories. This isn’t health food pretending to be indulgent; it’s genuinely good ingredients that happen to taste magnificent. That’s the philosophy I bring to every meal I plan.
More Recipes for Your Table
- Best Hushpuppy Recipe – Another fried favorite with that satisfying golden exterior and tender interior, perfect for a casual entertaining spread
- this cozy soup – A warming comfort dish that’s perfect for cooler mornings when you want something hearty alongside your waffles
There’s something profoundly beautiful about gathering people around food made with care and intention. Chicken and waffles represents that sentiment perfectly—it’s the kind of dish that says “I see you, I value you, and you’re worth my time.” Whether you’re celebrating a birthday, creating a lazy Sunday ritual, or simply wanting to feel like you’ve accomplished something delicious in your own kitchen, this recipe delivers that magic every single time.
I genuinely hope you’ll make this soon. Invite people you love, let them see you in your kitchen creating something wonderful, and soak in those moments. Food is just one way we show love, but it’s a really good one. Enjoy!