
This post contains affiliate links. As an Amazon Associate I earn from qualifying purchases.
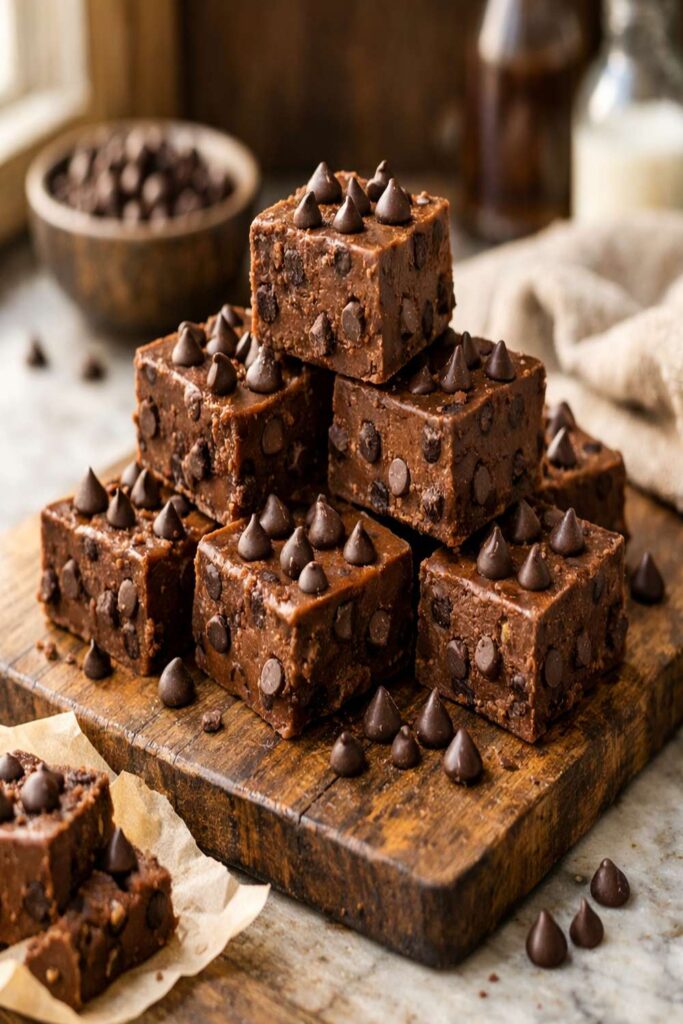
If you’ve always wanted to make homemade fudge but felt intimidated by candy thermometers, precise temperatures, or complicated techniques, this is your starting point. I’m going to show you how to create absolutely silky, rich chocolate fudge without any guesswork—just three simple ingredients and about four hours of patience while it sets. This recipe is so forgiving that it’s become my go-to when I need to feel like I’ve accomplished something magical in the kitchen without stress. If you’ve never made fudge before, trust me: this one’s designed for you.
How to Make Chocolate Chip Fudge for the First Time (You’ve Got This)
I still remember the day my grandmother taught me to make fudge in her Syracuse kitchen. I was maybe nine years old, standing on a stool so I could reach the stove, completely convinced I was going to mess it up. She handed me a wooden spoon and said, “Just watch it change, honey. You’ll know when it’s ready.” That patience—that trust that I’d recognize the signs—changed how I cook.
Years later, when I became a registered dietitian, I realized why that lesson stuck with me. So much of nutrition advice feels like rules handed down from above. But cooking? Cooking is about tuning in, watching, and trusting yourself. This fudge recipe embodies that philosophy completely.
What to Expect Before You Start
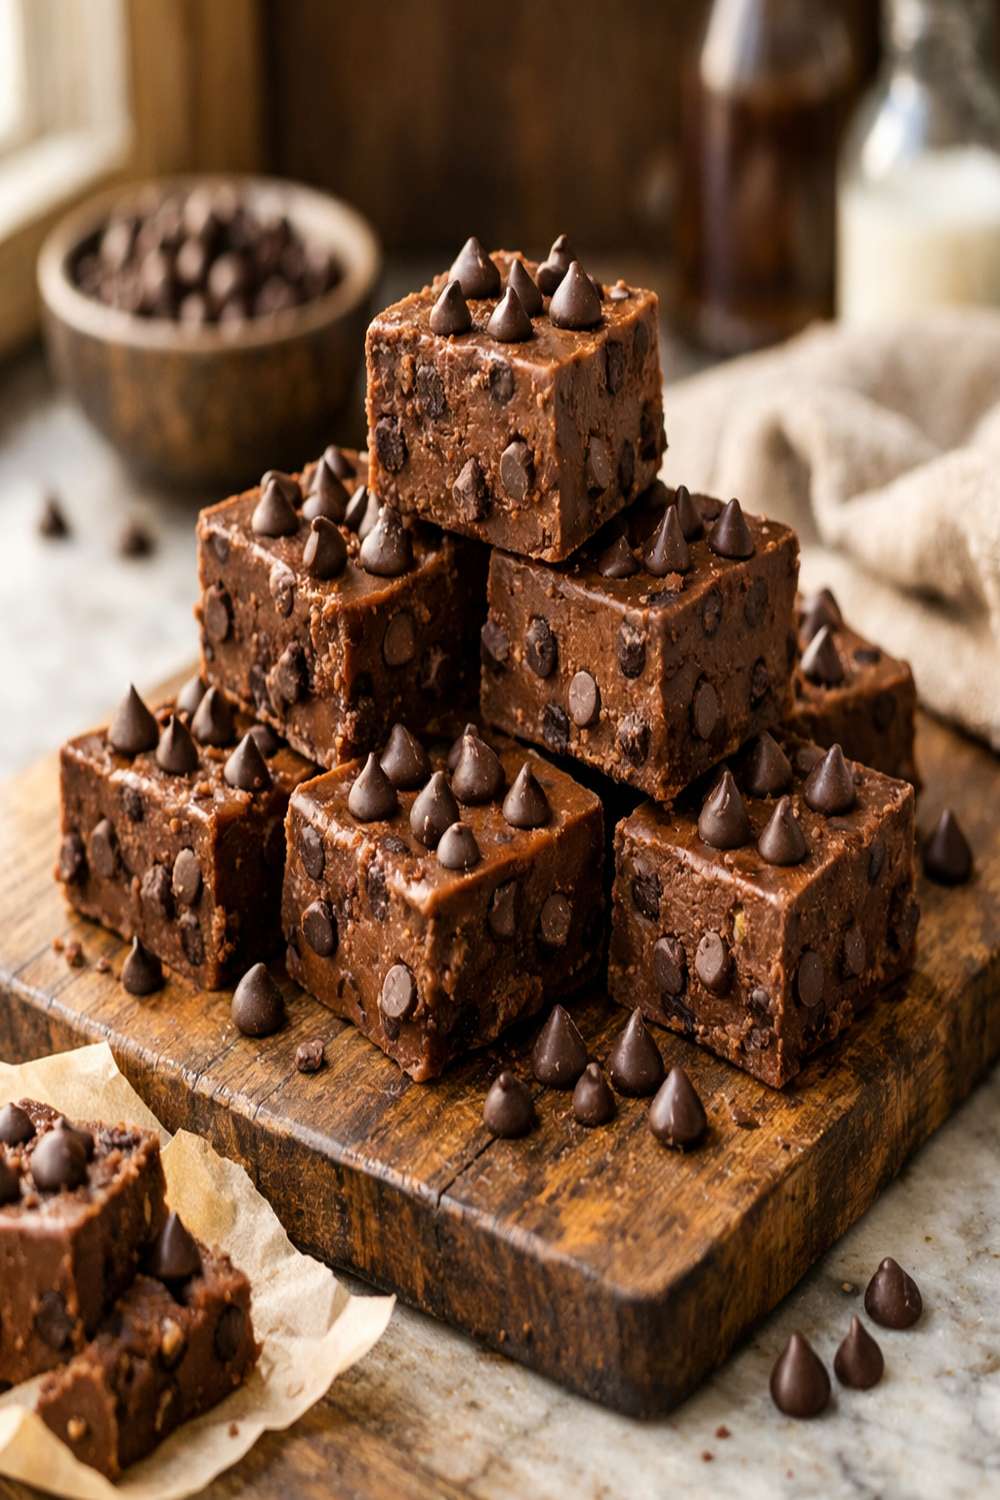
Let me set your expectations straight so there are no surprises. This recipe requires almost no active cooking time—just about five minutes of hands-on work at the stove. The real commitment is patience: your fudge needs approximately four hours to set at room temperature. That’s not babysitting time; that’s time you go live your life while the fudge does its thing.
The difficulty level is genuinely beginner-friendly. You’re not managing temperature with a thermometer, you’re not whipping anything, and there’s no risk of crystallization or separation. You’re simply melting, stirring, and pouring. Success looks like a smooth, glossy mixture that becomes a firm candy you can cut into neat squares.
- Active cooking time is minimal—once you pour it into the pan, you’re basically done cooking. The hardest part is waiting for it to set, which means no stress about timing or temperature precision.
- You won’t over-cook or burn it easily—many people fear making fudge because they think it requires candy thermometer precision. This method doesn’t. As long as you stir gently and keep the heat medium-low, you’ll be perfectly fine.
Equipment You’ll Need (And What You Can Skip)
I’m a big believer in using what you already have. You don’t need special candy-making gear for this recipe. In fact, your regular kitchen tools are perfect.
- Medium saucepan—any size that comfortably holds three cups of chocolate chips works. If you only have a large pot, that’s fine; it’ll just heat slightly differently, but your results will be the same.
- Wooden spoon or silicone spatula—for stirring. Wood is traditional because it doesn’t conduct heat as quickly as metal, which means your hand stays more comfortable. But honestly, any spoon works.
- 8×8-inch baking dish—this is where your fudge sets. A glass dish or metal pan both work beautifully. If you don’t have exactly 8×8, a 9×9 will work too; your pieces will just be slightly smaller.
- Aluminum foil or parchment paper—this is optional but makes cleanup so much easier. I always use it because removing the fudge becomes effortless, and you have a non-stick surface. If you skip it, just grease your pan with a tiny bit of butter.
- Sharp knife for cutting—nothing fancy needed. A regular kitchen knife works perfectly fine for cutting the fudge into pieces.
The Ingredients—A Beginner’s Shopping Guide
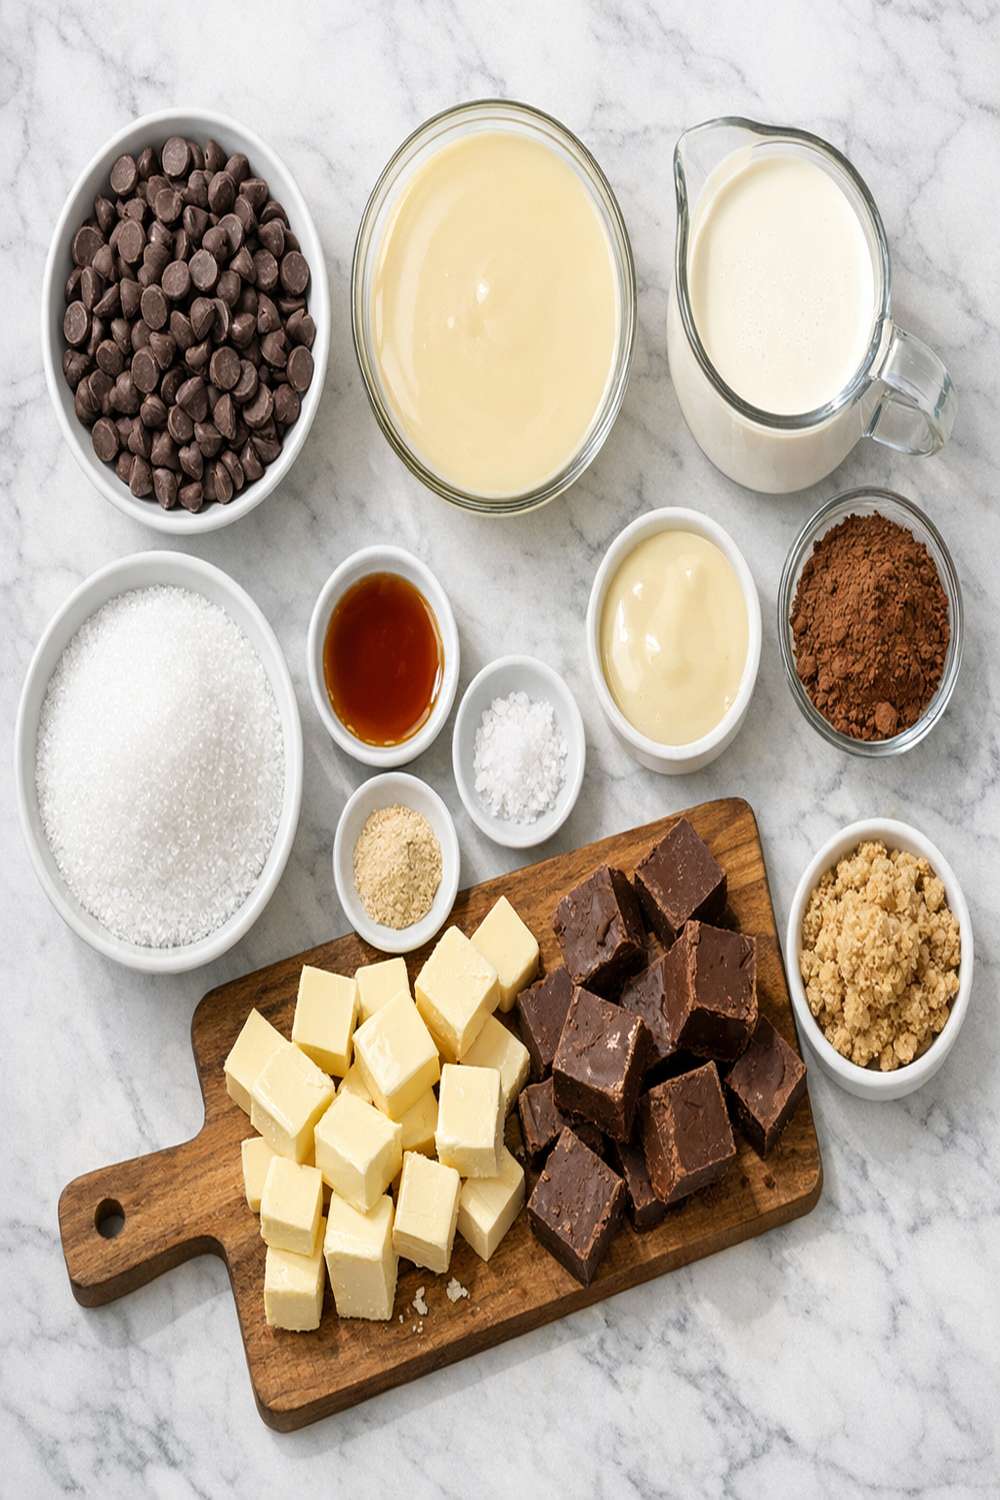
This recipe uses three core ingredients, and I want to help you understand exactly what to look for when you’re shopping. There are no mysterious items here—everything is available in your regular grocery store, and I’ll give you options based on your taste preferences.
- 14 ounces sweetened condensed milk (look for this in the baking aisle, usually near the evaporated milk; it comes in a white or yellow can and is essential for creating that signature fudgy texture without grittiness)
- ¼ teaspoon fine sea salt (optional but recommended; it enhances the chocolate flavor and creates a beautifully balanced sweet-salty profile)
- 1 teaspoon pure vanilla extract (not imitation; real vanilla makes a noticeable difference in the final flavor, though imitation works in a pinch)
- 3 cups semi-sweet or milk chocolate chips (18.6 ounces total; semi-sweet creates a deeper chocolate flavor while milk chocolate is milder and sweeter—pick based on what you love)
About the Chocolate Chips
Here’s something I’ve learned from years of working with chocolate: quality matters, but it doesn’t have to be expensive. A mid-range chocolate chip from your regular grocery store will work beautifully. What matters more is avoiding chocolate chips with added fillers or waxy coatings. Read the ingredient label—you want cocoa butter as one of the first ingredients, not palm oil or vegetable shortening.
Semi-sweet chips have more cocoa solids, giving you that classic, slightly bitter-sweet chocolate flavor. Milk chocolate chips are creamier and sweeter. Dark chocolate chips (if you want to experiment) create a sophisticated, almost bittersweet result. All three work perfectly in this recipe.
About the Sweetened Condensed Milk
This ingredient is non-negotiable, and here’s why: sweetened condensed milk is milk that’s had about half its water removed and had sugar added. This concentration creates a smooth, creamy texture that regular milk or heavy cream simply can’t replicate. It’s what transforms your chocolate mixture from grainy to luxuriously silky. You’ll find it in cans in the baking aisle, and yes, the brand matters less than you’d think. Store brands work just as well as name brands.
Step-by-Step: Your First Chocolate Chip Fudge
Now we’re going to walk through this together, and I’m going to explain everything in detail. By the time you’re done reading, you’ll understand not just the what, but the why behind each step. That’s how you become confident in the kitchen.
Step 1: Prepare Your Pan With Lining
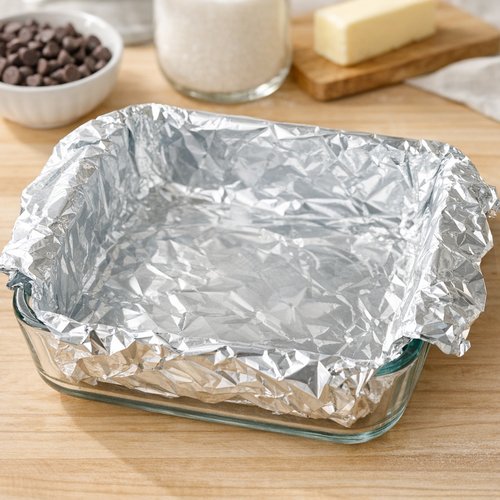
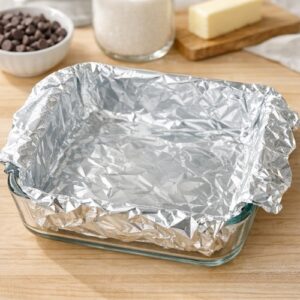
Start by taking your 8×8-inch baking dish and lining it with either aluminum foil or parchment paper. Here’s the easiest method: tear off a piece of foil about 16 inches long, place it in the pan so it covers the bottom and sides, and let the excess hang over the edges. Then tear another piece, rotate it 90 degrees, and create an “X” pattern. This gives you handles to lift the finished fudge out without any sticking.
Alternatively, parchment paper works identically—just overlap two pieces in the same X pattern. The reason we do this is simple: it makes removing your finished fudge from the pan effortless, and cleanup becomes nearly non-existent. If you absolutely prefer not to line your pan, simply butter it lightly instead.
Step 2: Combine Your Chocolate and Sweetened Condensed Milk
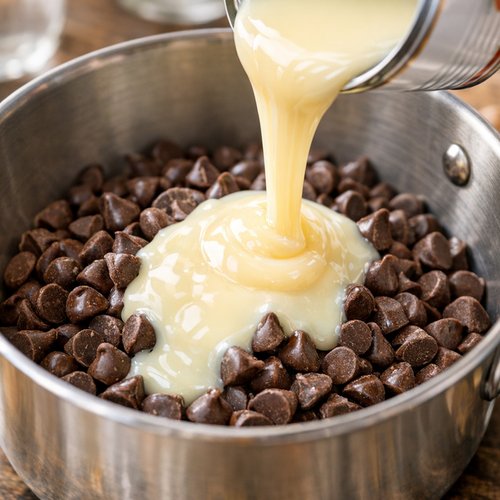
Pour your three cups of chocolate chips into your medium saucepan. Then add your 14-ounce can of sweetened condensed milk directly to the same pan. Don’t worry about measuring the condensed milk into a separate container—just pour it right in. You want everything in one place so it all melts together evenly.
At this point, your mixture will look dry and separated. The chocolate chips will look like they’re just sitting on top of the condensed milk. This is completely normal and exactly what you want to see. Don’t panic—the magic happens when heat is applied.
Step 3: Heat on Medium-Low and Begin Stirring
Place your saucepan over medium-low heat. This is important: do not use high heat. High heat can cause the chocolate to scorch or the mixture to separate. Medium-low gives you time to watch and adjust, which is what we want for a foolproof result.
Begin stirring gently and continuously with your wooden spoon or silicone spatula. You’re looking for the chocolate to slowly begin softening and mixing with the condensed milk. At first, you’ll see chocolate chips gradually losing their shape and beginning to meld with the white sweetened condensed milk, creating a tan-colored mixture.
Keep stirring every 15-20 seconds. You don’t need to stir constantly—you need to stir frequently enough that nothing has a chance to stick to the bottom or scorch. This should take about 3-4 minutes total.
Step 4: Watch for the Glossy Stage and Add Vanilla
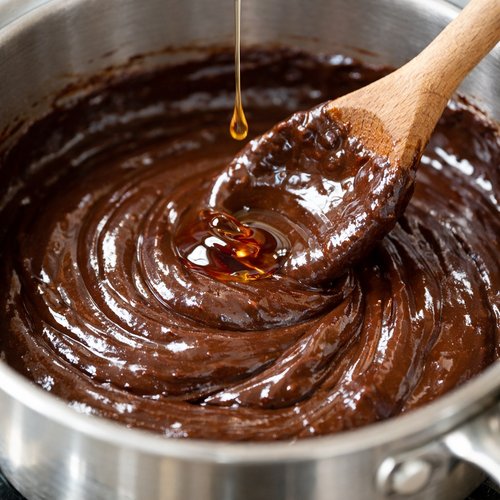
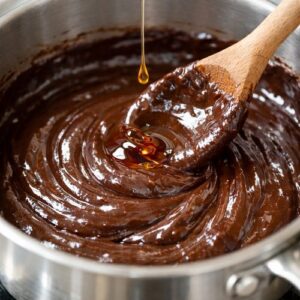
After about 3-4 minutes, you’ll notice a beautiful transformation. The mixture will become increasingly smooth, and here’s the key sign: it will start to look shiny and glossy. This is your cue that the chocolate is almost completely melted. Some tiny flecks of chocolate might still be visible, and that’s perfectly okay.
Once you see that glossy appearance beginning, remove the pan from heat temporarily and add your teaspoon of pure vanilla extract. Stir it in thoroughly—you’ll notice the aroma becomes absolutely divine at this point. If you’re using that optional ¼ teaspoon of sea salt, add it now too.
Return the pan to the stove for just another 30 seconds, stirring gently to ensure everything is completely smooth and the vanilla is fully incorporated.
Step 5: Pour Into Your Prepared Pan
Remove your pan from heat and carefully pour the fudge mixture into your prepared baking dish. Don’t worry if it seems very thick—it should be. This thick consistency is what creates that perfect fudgy texture. If you’re concerned it won’t pour easily, let it cool for about one minute (not longer), and it will become slightly more pourable while still being thick.
Once all the mixture is in the pan, you have two options: you can gently shake the pan back and forth to help the fudge settle and level out, or you can use a rubber spatula to gently spread it into an even layer. Don’t overly manipulate it—you just want it reasonably level so all your finished pieces are roughly the same thickness.
Step 6: Let It Set at Room Temperature
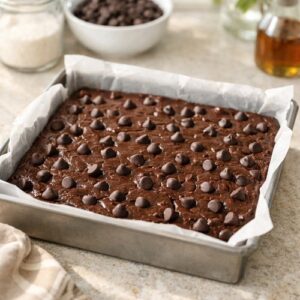
This is the hardest part: patience. Leave your fudge on the countertop at room temperature and allow it to set for approximately four hours. You don’t need to refrigerate it (though you can if your kitchen is very warm). Room temperature setting creates the best texture—firm but still slightly creamy when you bite into it.
After four hours, the fudge will be completely firm and set. You can test it by pressing gently with your finger—it should feel solid, not soft or oily.
Step 7: Remove and Cut Into Pieces
Once fully set, use your foil or parchment handles to lift the fudge out of the pan. Lay it on a cutting board and carefully peel away the foil or parchment paper. You might notice slightly rounded or uneven edges where the fudge met the pan edges—trim these off with your sharp knife and discard them (or eat them as a quality-control bite).
Now cut your fudge into pieces. For uniform squares, cut the slab in half one direction, creating two rectangles. Then cut perpendicular, creating four equal squares. Take each square and cut it into thirds one way, then thirds the other way, giving you nine equal pieces per square. This yields 36 pieces total.
Pro tip: If your knife is sticking to the fudge, wipe it clean and dip it in hot water between cuts. This keeps the blade warm and prevents sticking, giving you clean, pretty pieces.
How to Tell If You Did It Right
Success has very specific signs. Let me walk you through what you should see and feel at each stage.
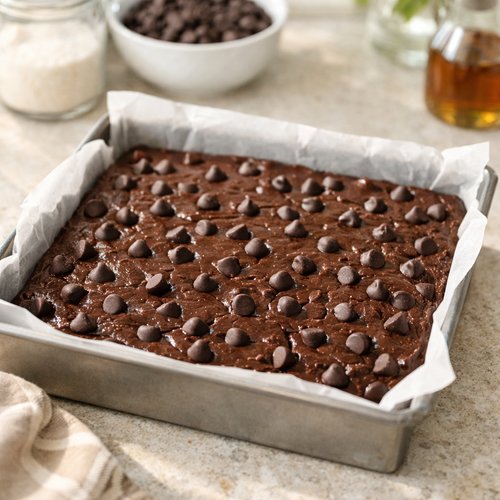
- During melting: You’re looking for a gradual transformation from separated chocolate chips and white condensed milk into a unified, tan-colored mixture. The texture should become increasingly smooth. By the end, it should be glossy and look almost liquid (though it’s quite thick).
- When fully set: The fudge should be completely firm but not rock-hard. When you press it, it should resist without denting. When you bite it, it should be creamy and melt slightly on your tongue, not crack or feel waxy or grainy.
- The flavor: You should taste rich chocolate with a subtle vanilla undertone. If you added salt, you’ll notice a beautiful sweet-salty balance that makes the chocolate flavor pop. It should be sweet but not overwhelming—the condensed milk sweetness is pronounced but pleasant.
What Went Wrong? Beginner Fixes
- Your fudge is grainy or feels sandy—This usually happens from overheating or letting the mixture sit too long while heating. The solution: this batch is still delicious, but next time, use medium-low heat and don’t let the mixture cook more than 4-5 minutes total. The fudge will still taste good; the texture just won’t be as silky.
- Your fudge won’t set after 4 hours—If your kitchen is very warm (above 75°F), fudge takes longer to set. Move it to a cooler room or place it in the refrigerator for one hour instead. Room temperature is ideal, but cold works fine too.
- Your fudge is oily or separated looking—This usually means the mixture overheated. Again, it’s still edible and will taste good, but the texture is different. Next time, use a lower heat setting and remove from heat as soon as it looks glossy, even if some tiny chocolate flecks remain.
- Your pieces are uneven or crumbly when cut—A dull knife or cold fudge can cause this. Let the fudge sit at room temperature (not cold), and use a sharp, clean knife. Wipe between cuts. If pieces still break, they still taste wonderful—serve them in a pretty bowl as “fudge crumbles.”
Your Next Steps After Mastering This
Once you’ve made this fudge successfully, you’ve actually learned a foundational candy-making skill: how to melt chocolate properly and understand texture development through cooling. These exact skills transfer directly to making other chocolate treats.
Next, you might try three-ingredient peanut butter fudge, which uses the same method but substitutes peanut butter for some of the chocolate. Or explore layering—make a batch of this fudge, then a batch of peanut butter fudge on top, creating a swirled effect.
You could also use the texture you’ve learned to understand in baking projects. If you’re interested in chocolate baking, try making my best cookie brownie recipe, which uses similar chocolate-melting techniques in a baking context.
The confidence you build from mastering this simple recipe extends to anything chocolate-based. You’re learning to trust your senses—your eyes watching for gloss, your hands feeling the texture, your instincts about heat and timing. That’s real cooking skill.
Can I Store Chocolate Chip Fudge?
Yes, and this is where homemade fudge becomes even more practical than store-bought. At room temperature in an airtight container, your fudge keeps for up to two weeks. I actually prefer room-temperature storage because the fudge stays at its ideal texture—slightly firm but still creamy.
In the refrigerator, it lasts up to three weeks, though the fudge becomes firmer and loses some of that melt-in-your-mouth quality. Refrigerate only if your kitchen is extremely warm.
Frozen fudge lasts up to three months. Layer pieces between parchment paper in a freezer-safe container. To serve, thaw at room temperature for about 15 minutes—it returns to perfect texture. Frozen fudge is actually wonderful because you can pull out just a few pieces without thawing the whole batch.
The key to any storage method is keeping it in an airtight container away from strong odors. Fudge absorbs flavors, so keep it separate from anything pungent. An old jam jar or glass container with a tight lid works perfectly.
Nutrition Information
Per serving (one piece, or 1/36th of the recipe): approximately 80 calories, 4.5 grams fat, 10 grams carbohydrates, 1 gram protein, and less than 1 gram fiber. This data is based on USDA standards for chocolate chips and sweetened condensed milk.
As a registered dietitian, I want to give you permission to enjoy this treat without guilt. Yes, it’s sweet and calorie-dense—that’s the nature of candy. But a single piece provides genuine satisfaction. The richness means you don’t need a handful; one piece genuinely satisfies a chocolate craving. From a practical nutrition standpoint, homemade fudge with three ingredients is significantly cleaner than commercial alternatives, which often contain emulsifiers, preservatives, and additives.
My expert’s tip: The sweetened condensed milk in this recipe provides a small amount of calcium and protein, unlike many candies that are purely empty carbohydrates. While we’re not making a health food, the base ingredients are genuinely minimal and whole. If you want to reduce sugar slightly, you could use a blend of semi-sweet and dark chocolate chips, which contain slightly more cocoa solids and less added sugar than milk chocolate.
What Can I Serve With Chocolate Chip Fudge?
Fudge is delicious on its own, but here are some beautiful serving ideas:
- With coffee or espresso—one piece of fudge and a strong cup of coffee is an elegant, simple dessert that feels indulgent without being heavy.
- With fresh fruit—arrange pieces on a board with fresh raspberries, strawberries, or dried apricots. The tartness of fruit beautifully balances the rich sweetness of the fudge.
- Alongside my best ever pound cake recipe—a thin slice of cake with a piece of fudge on the side creates a complete dessert experience.
- As a gift in a pretty box—homemade fudge is genuinely one of the most appreciated handmade gifts. Layer pieces in a box lined with parchment, tie with twine, and you have something special to give.
- After a light meal—instead of a heavy dessert, serve one or two pieces of fudge after dinner with herbal tea. It’s satisfying without making you feel overstuffed.
Make-Ahead Guide
One of the best things about this fudge is how make-ahead friendly it is. You can make the fudge up to two weeks in advance if you’re planning ahead for a party, gift-giving, or just want something on hand for when cravings hit.
Here’s my professional make-ahead strategy: Make a double or triple batch when you have time, cut it all into pieces, and layer it in airtight containers separated by parchment paper. Label the container with the date. You now have chocolate fudge available for snacking, gifting, or serving guests for the next two weeks without any additional effort.
For entertaining specifically: make your fudge two days ahead. It will be completely set and ready to serve, and you’ll have eliminated last-minute dessert stress from your event planning.
Seasonal Variations
While the classic version is perfect year-round, here are ways to adapt this recipe by season:
Summer: Add ¼ teaspoon peppermint extract along with the vanilla for a cool, refreshing fudge. Mint and chocolate is the perfect combination when the weather is warm.
Fall: Reduce vanilla to ½ teaspoon and add ¼ teaspoon each of cinnamon and espresso powder. The warmth of spice transforms this into an autumn treat.
Winter: Stir in ¼ teaspoon of orange extract alongside the vanilla. Chocolate-orange is classic and feels festive and special during the holidays.
Spring: Keep it simple but use fresh vanilla extract from a new bottle—the freshness of quality vanilla feels bright and appropriate for spring. Alternatively, add ¼ teaspoon of almond extract for a subtle, delicate flavor shift.

Chocolate Chip Fudge Recipe
Ingredients
Method
- Start by taking your 8x8-inch baking dish and lining it with either aluminum foil or parchment paper. Here's the easiest method: tear off a piece of foil about 16 inches long, place it in the pan so it covers the bottom and sides, and let the excess hang over the edges. Then tear another piece, rotate it 90 degrees, and create an "X" pattern. This gives you handles to lift the finished fudge out without any sticking. Alternatively, parchment paper works identically—just overlap two pieces in the same X pattern. The reason we do this is simple: it makes removing your finished fudge from the pan effortless, and cleanup becomes nearly non-existent. If you absolutely prefer not to line your pan, simply butter it lightly instead.
- Pour your three cups of chocolate chips into your medium saucepan. Then add your 14-ounce can of sweetened condensed milk directly to the same pan. Don't worry about measuring the condensed milk into a separate container—just pour it right in. You want everything in one place so it all melts together evenly. At this point, your mixture will look dry and separated. The chocolate chips will look like they're just sitting on top of the condensed milk. This is completely normal and exactly what you want to see. Don't panic—the magic happens when heat is applied.
- Place your saucepan over medium-low heat. This is important: do not use high heat. High heat can cause the chocolate to scorch or the mixture to separate. Medium-low gives you time to watch and adjust, which is what we want for a foolproof result. Begin stirring gently and continuously with your wooden spoon or silicone spatula. You're looking for the chocolate to slowly begin softening and mixing with the condensed milk. At first, you'll see chocolate chips gradually losing their shape and beginning to meld with the white sweetened condensed milk, creating a tan-colored mixture. Keep stirring every 15-20 seconds. You don't need to stir constantly—you need to stir frequently enough that nothing has a chance to stick to the bottom or scorch. This should take about 3-4 minutes total.

- After about 3-4 minutes, you'll notice a beautiful transformation. The mixture will become increasingly smooth, and here's the key sign: it will start to look shiny and glossy. This is your cue that the chocolate is almost completely melted. Some tiny flecks of chocolate might still be visible, and that's perfectly okay. Once you see that glossy appearance beginning, remove the pan from heat temporarily and add your teaspoon of pure vanilla extract. Stir it in thoroughly—you'll notice the aroma becomes absolutely divine at this point. If you're using that optional ¼ teaspoon of sea salt, add it now too. Return the pan to the stove for just another 30 seconds, stirring gently to ensure everything is completely smooth and the vanilla is fully incorporated.
- Remove your pan from heat and carefully pour the fudge mixture into your prepared baking dish. Don't worry if it seems very thick—it should be. This thick consistency is what creates that perfect fudgy texture. If you're concerned it won't pour easily, let it cool for about one minute (not longer), and it will become slightly more pourable while still being thick. Once all the mixture is in the pan, you have two options: you can gently shake the pan back and forth to help the fudge settle and level out, or you can use a rubber spatula to gently spread it into an even layer. Don't overly manipulate it—you just want it reasonably level so all your finished pieces are roughly the same thickness.
- This is the hardest part: patience. Leave your fudge on the countertop at room temperature and allow it to set for approximately four hours. You don't need to refrigerate it (though you can if your kitchen is very warm). Room temperature setting creates the best texture—firm but still slightly creamy when you bite into it. After four hours, the fudge will be completely firm and set. You can test it by pressing gently with your finger—it should feel solid, not soft or oily.
- Once fully set, use your foil or parchment handles to lift the fudge out of the pan. Lay it on a cutting board and carefully peel away the foil or parchment paper. You might notice slightly rounded or uneven edges where the fudge met the pan edges—trim these off with your sharp knife and discard them (or eat them as a quality-control bite). Now cut your fudge into pieces. For uniform squares, cut the slab in half one direction, creating two rectangles. Then cut perpendicular, creating four equal squares. Take each square and cut it into thirds one way, then thirds the other way, giving you nine equal pieces per square. This yields 36 pieces total. Pro tip: If your knife is sticking to the fudge, wipe it clean and dip it in hot water between cuts. This keeps the blade warm and prevents sticking, giving you clean, pretty pieces.
Notes
FAQs
Do I Really Need Sweetened Condensed Milk, or Can I Use Something Else?
Sweetened condensed milk is genuinely non-negotiable for this specific recipe because of what it does chemically. It’s concentrated milk with added sugar, and that combination creates a smooth, silky texture that nothing else replicates exactly. Regular milk is too thin and watery—it would make grainy fudge. Heavy cream is too fatty—it would create a greasy, separated result. Evaporated milk (which has no added sugar) won’t provide the same sweetness and texture.
If you absolutely cannot access sweetened condensed milk, your best alternative is to use a 1:1 combination of heavy cream and light corn syrup, but I’ll be honest—the texture won’t be quite the same, and the results are less reliable.
Why Is My Fudge Soft Instead of Firm?
Soft fudge usually means one of two things: either your kitchen temperature is unusually warm, or the mixture didn’t cook long enough to lose enough moisture. If your kitchen is above 75°F, move the fudge to the coolest room in your home or refrigerate it for firmness. If you think underheating is the issue, your next batch should cook for a full 4-5 minutes until it looks glossy and slightly reduced.
Can I Use Chocolate Bars Instead of Chocolate Chips?
Technically yes, but it’s not ideal. Chocolate chips have additives (stabilizers) that help them melt smoothly. Chocolate bars, especially high-quality ones, are more temperamental when melting because they contain more cocoa butter. If you only have chocolate bars, chop them into small, uniform pieces and expect the melting process to take slightly longer and require more patience. The flavor will be excellent, but the texture might be slightly different.
Is This Recipe Safe for People With Dairy Allergies?
No, this recipe contains milk (in both the chocolate chips and the sweetened condensed milk) and therefore is not suitable for dairy-free diets. You could theoretically make a dairy-free version using dairy-free chocolate chips and coconut cream, but the texture would be noticeably different, and I can’t guarantee the same results. The sweetened condensed milk specifically is what creates the signature texture, and no dairy-free substitute performs identically.
Why Does Some Fudge Taste Better Than Other Fudge?
This comes down to ingredient quality and technique. Fudge made with quality chocolate (not waxy, not overly cheap) tastes noticeably better. The technique matters less with this recipe since we’re not managing temperature precision, but fudge that’s slightly overheated can taste slightly burnt, while properly heated fudge tastes clean and pure. Also, using real vanilla extract versus imitation vanilla creates a flavor difference you’ll definitely notice. None of these things are expensive upgrades—they’re just mindful choices when shopping.
Expert’s Nutritional Tip
As a registered dietitian, I’ve noticed that people often feel guilty about eating candy, which is unnecessary. Fudge, especially homemade fudge, is genuinely a small indulgence. One piece is 80 calories and provides real satisfaction. The reason homemade is nutritionally superior to commercial fudge is the ingredient list: you know exactly what’s in it. Commercial fudge often contains five or six additional ingredients for shelf stability and appearance. Your homemade version contains chocolate, sweetened condensed milk, and vanilla—that’s it. From a “recognizing what you eat” standpoint, that’s genuinely better nutrition, even though the calorie count is similar. Whole-food-based treats are worth the small extra effort.
Common Mistakes to Avoid
- Using high heat—This is the number-one reason homemade fudge fails. High heat causes the chocolate to scorch and the mixture to separate. Medium-low heat takes slightly longer but gives you control and prevents accidents. Patience here is your greatest tool.
- Skipping the foil or parchment lining—While you can make fudge without lining your pan, you’re making removal and cleanup infinitely harder. Two minutes of setup time saves you fifteen minutes of cleanup frustration.
- Cutting before it’s fully set—If you cut fudge that’s only been setting for two hours, it will crumble and fall apart. The full four hours really matters. If you’re impatient, refrigerate for one hour instead of waiting at room temperature.
- Using imitation vanilla when you have real vanilla available—This is a small ingredient that makes a measurable difference. Keep real vanilla in your pantry; it’s worth it.
More Beginner-Friendly Recipes
- this simple cake—Another three-ingredient-ish dessert that feels fancy but requires minimal skill. Perfect if you enjoyed the simplicity of this fudge recipe.
- 3 Ingredient Peanut Butter Fudge Recipe—Once you’ve mastered chocolate fudge, this variation using the exact same method teaches you how small ingredient swaps create completely different flavors.
I’m so proud of you for trying this recipe. Truly. There’s something magical about making fudge for the first time—that moment when you pour the glossy chocolate mixture into the pan and realize you just created something beautiful with your own hands. That’s the feeling that kept me cooking through culinary school, through my dietetics degree, and into my kitchen every single day.
This simple fudge teaches you that you’re capable of creating things that feel indulgent and special without needing fancy equipment or complicated techniques. You’re also learning to trust your senses, to watch for visual cues (that glossy appearance), and to understand that cooking is as much about patience as it is about following directions.
So make this fudge. Make it this week. Share it with someone you love, or keep it all for yourself—I won’t judge. Take a picture, celebrate your success, and know that you’ve just added a real kitchen skill to your repertoire. Enjoy!