

This post contains affiliate links. As an Amazon Associate I earn from qualifying purchases.

You’ve probably tried the slow cooker method that takes all day, the canned version that tastes metallic, and maybe even that complicated layered approach from a restaurant copycat website. Here’s what I’ve learned after years of feeding hungry families in Syracuse: the simplest stovetop method—the one my grandmother taught me—wins every single time. This hot dog chili recipe comes together in under thirty minutes, uses real ingredients you can pronounce, and creates that perfect balance of savory depth without tasting like it came from a can.
I’m sharing my tried-and-true approach today because life gets busy, and game day shouldn’t mean spending hours in the kitchen. Whether you’re prepping for a backyard gathering or a weeknight family dinner, this recipe delivers restaurant-quality results with home-cooked warmth.
Hot Dog Chili Recipe: Which Method Actually Works Best?
I’ve tested every approach you can imagine—literally. As a registered dietitian working with busy families, I’ve made this recipe using slow cookers, pressure cookers, canned ingredients, and homemade from-scratch versions. What surprised me most wasn’t just which method tasted best, but which one actually worked for real life. The slow cooker version tastes wonderful but requires planning ahead. The pressure cooker version is fast but the flavors feel rushed. And those restaurant copycat recipes? They often include ingredients that don’t add real nutrition or depth.
The stovetop method I’m sharing today hits the sweet spot between convenience, flavor complexity, and actual nutrition. You’re building depth layer by layer—sautéing the aromatics first, browning the meat properly, then letting the sauce develop slowly enough to thicken without burning. That’s chemistry, not magic, but it feels magical when you taste the result.
The Methods Compared: An Honest Breakdown
Let me walk you through the three most common approaches and why each has its place:
- The Slow Cooker Method – Pros: set it and forget it, great for entertaining, minimal cleanup. Cons: requires 4-6 hours, flavors can taste muddled rather than layered, you can’t adjust seasoning until the last moment. Best for: meal prep Sunday or when you know your schedule a day ahead.
- The Pressure Cooker Method – Pros: incredibly fast (15 minutes total), modern kitchen appeal, sealed flavors. Cons: less control over texture, harder to taste and adjust during cooking, feels more “engineered” than homemade. Best for: truly urgent situations, though I rarely recommend it.
- The Stovetop Method (This Recipe) – Pros: full flavor control, perfect texture every time, done in 30 minutes, lets you taste and adjust, builds depth naturally, easier cleanup than you’d think. Cons: requires attention (though minimal), can’t walk away completely. Best for: most home cooks, weeknight dinners, game day gatherings, anyone who wants results they can be proud of.
Why This Version Beats the Rest
This stovetop approach wins because it respects both your time and your ingredients. The magic happens in the first five minutes when you sauté the diced onions in olive oil. That’s where the foundation of flavor begins—those onions develop sweetness and depth you simply cannot rush. Then you add the ground beef and break it into fine crumbles while it browns, which creates more surface area for browning and better texture in the final chili.
What really sets this version apart is the layering of flavors. You’re not dumping everything in at once. The beef broth goes in after the meat is browned, which means the meat seasons the liquid rather than steaming in it. Then the ketchup, Worcestershire sauce, and spices have time to meld together over 25-30 minutes of gentle simmering. The result is a chili that tastes complex and intentional—not like something from a can masquerading as homemade.
The texture matters too. This method creates a thick, clingy sauce that clings to your hot dog rather than sliding off into a puddle on your plate. That’s the difference between a good topping and one that actually works.
The Ingredients
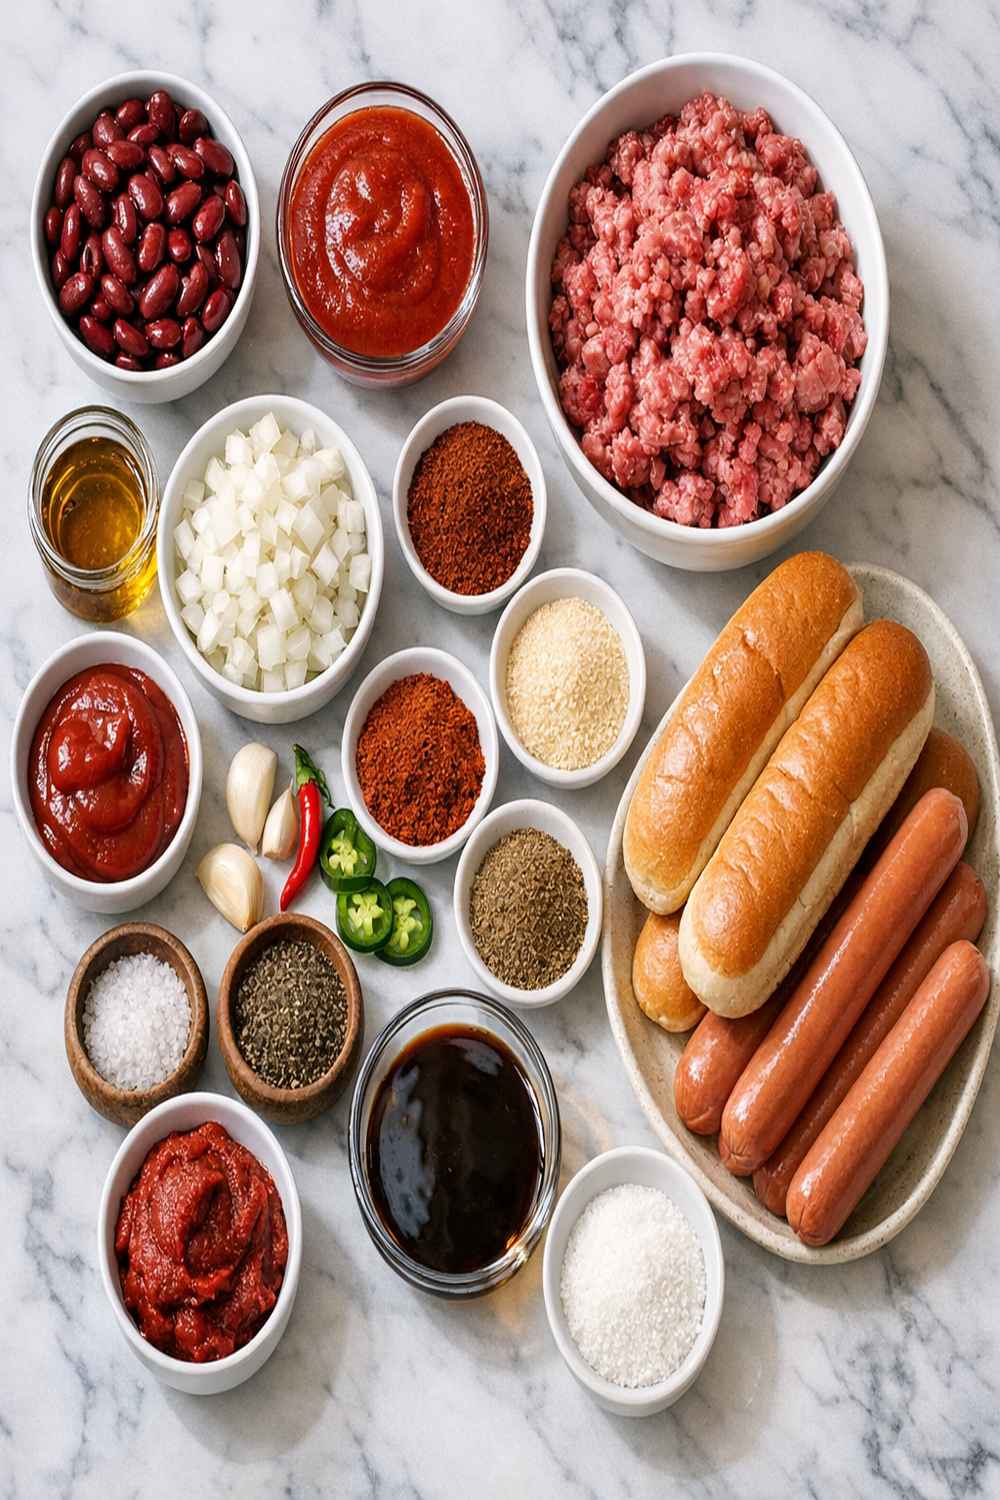
I’ve simplified this ingredient list compared to more complicated versions, because honest-to-goodness flavor comes from quality basics, not from a long shopping list. The choices I’ve made here are strategic. I’m using olive oil instead of butter because it won’t burn during the sautéing process. The beef broth (rather than water) adds body and umami from the start. And I’ve included specific spices rather than a generic chili powder blend because you deserve to know exactly what you’re eating.
- 1 tablespoon olive oil (helps build flavor foundation without burning)
- ½ teaspoon garlic powder (fresh garlic can overpower at this stage—powder distributes evenly)
- ½ cup ketchup (adds tanginess and natural sweetness, not just sugar)
- 1 teaspoon fine sea salt (adjust at the end based on your taste)
- 1 teaspoon brown sugar (balances heat and acidity naturally)
- ½ cup yellow onion, diced small (creates sweet depth when sautéed properly)
- 1 pound ground beef, 85/15 blend (lean enough to be healthy, fatty enough for flavor)
- 1 tablespoon Worcestershire sauce (umami depth that makes people say “what’s in this?”)
- ½ teaspoon dry ground mustard (adds subtle heat and complexity)
- ½ teaspoon ground black pepper (freshly ground if you have it)
- 2 tablespoons chili powder (the spice backbone, not a pre-mixed blend)
- 1 cup beef broth, unsalted or low-sodium (lets you control the salt level)
Makes approximately 2 cups of chili (enough for 6-8 hot dogs with generous topping)
How to Make the Best Version of Hot Dog Chili Recipe
I’m going to walk you through each step the way I teach it to families in my nutrition practice. These aren’t just instructions—they’re the specific techniques that separate good chili from great chili.
Step 1: Build Your Flavor Foundation with the Aromatics
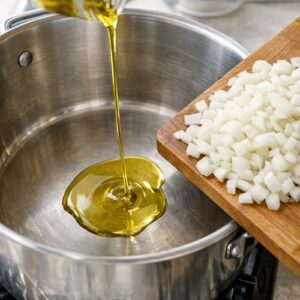
Pour your olive oil into a large, heavy-bottomed pot and place it over medium heat. While the oil is warming (about 30 seconds), dice your onion into small, uniform pieces. This matters more than you’d think—uniform size means even cooking. Once the oil shimmers, add your diced onions and let them cook undisturbed for the first two minutes. This creates caramelization on the cut surfaces. Then stir and continue cooking for three more minutes until the onions are translucent and smell sweet rather than raw.
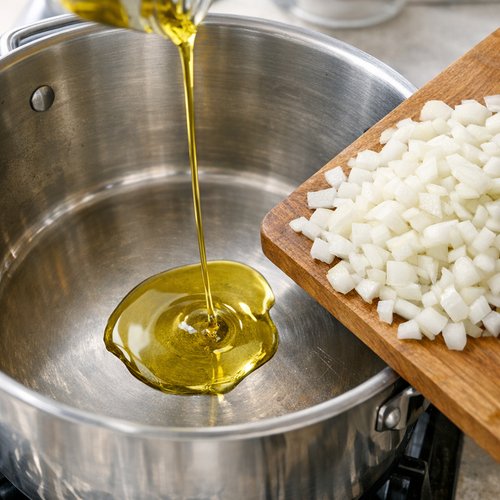
Why does this matter? So many people skip this step or rush it, which means they miss the foundation of flavor. Those caramelized onions are contributing natural sweetness and depth that you literally cannot add later. This is where your chili starts tasting “homemade” instead of “from a jar.”
Step 2: Brown the Meat with Intention
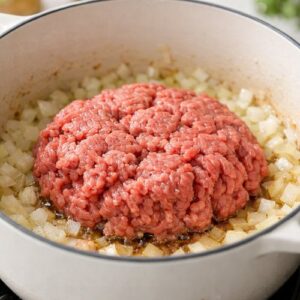
Add your ground beef to the pot with the softened onions. Don’t stir immediately. Let it sit for about two minutes so the bottom makes contact with the hot pot and starts browning. Then, using a wooden spoon or silicone spatula, break the beef into small, fine crumbles—we’re aiming for pieces about the size of peas, not clumps.
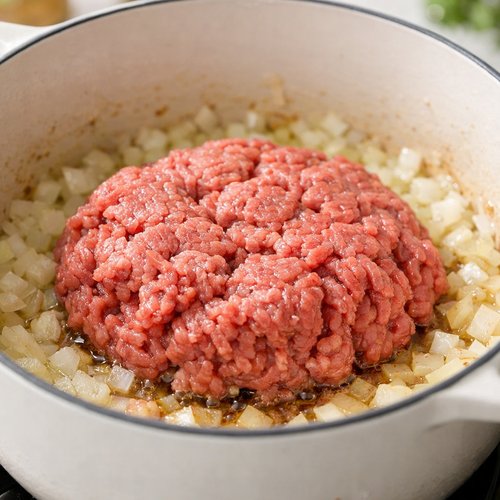
As you’re breaking apart the beef, pour in your beef broth slowly. This accomplishes two things: it prevents the meat from sticking together in large clumps, and it lets you control how fast the meat cooks. Keep stirring and breaking up the beef for about five minutes until most of it has changed from pink to brown. You want to see some browning on the meat particles—that’s flavor development happening through the Maillard reaction.
Step 3: Layer In Your Flavor Components
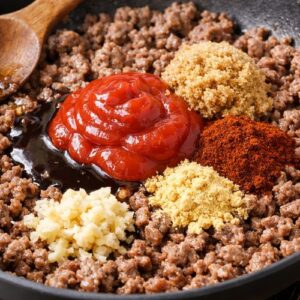
Once the meat is mostly browned, reduce your heat to medium-low. Add the ketchup, Worcestershire sauce, brown sugar, chili powder, dry mustard, garlic powder, salt, and pepper. Stir everything together thoroughly so the spices distribute evenly and the ketchup mixes in completely.
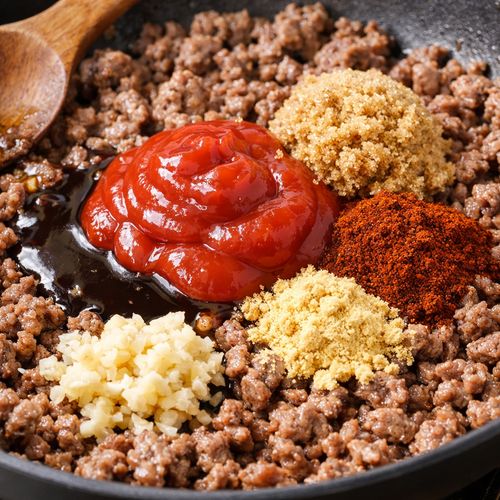
This is the moment where you might smell something that seems “off”—that’s the chili powder hitting the heat. That’s normal and good. The spices are blooming and releasing their oils into the sauce. This is what creates depth instead of flatness.
Step 4: Simmer and Thicken with Patience
Let your chili simmer gently over medium-low heat for 25 to 30 minutes. Stir occasionally—I aim for every 5 minutes or so—to ensure nothing is sticking to the bottom of the pot. You’re not looking for a rolling boil. You want gentle bubbles breaking the surface, which means the flavors are melding and the sauce is thickening through reduction.
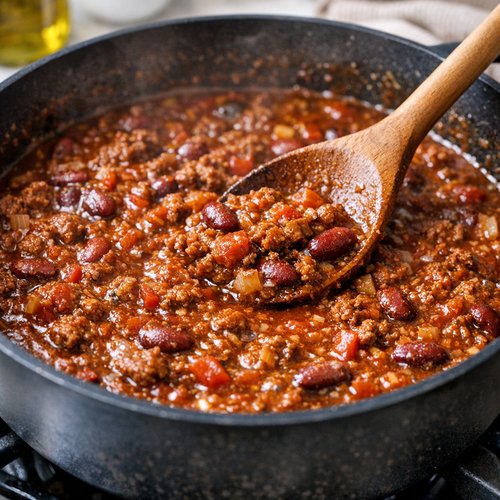
Around the 20-minute mark, taste your chili. This is your chance to adjust seasonings. Does it need more salt? A touch more brown sugar to balance the heat? This is impossible to do if you’re using a slow cooker, which is one reason I love this method. The chili should go from looking soupy to noticeably thicker and darker. You’ll see the oil starting to separate slightly at the edges—that’s a sign you’re done.
Step 5: Final Check and Serving
After 30 minutes, your chili should coat the back of a spoon and be noticeably thicker than when you started. Take a moment to taste it one final time. Adjust salt and pepper if needed. If it seems too thin, let it cook another 5 minutes. If it’s too thick (which rarely happens), you can thin it with a splash of beef broth.
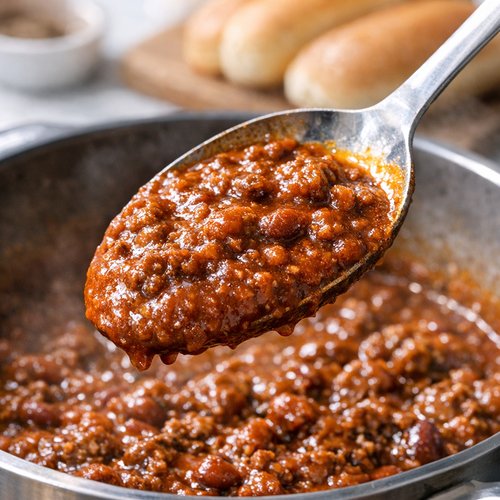
Let the chili rest off the heat for 2-3 minutes before serving. This allows the flavors to settle and makes the consistency even more clingy and perfect for topping hot dogs.
Side-by-Side Results: What to Expect
When you make this recipe, here’s exactly what you’ll get compared to other methods: The sauce will be deep reddish-brown, not bright red like canned chili. It will smell complex—you’ll detect the onion, the beef, the spices, not just one dominant note. The texture will be thick and clingy, almost paste-like in the best way, rather than soupy. When you spoon it onto a hot dog, it will stay put and coat the entire surface.
Flavor-wise, you’ll taste the beef first, then savory depth from the Worcestershire and broth, followed by gentle heat from the chili powder and mustard, with just enough sweetness from the brown sugar and ketchup to balance everything. There’s no bitter aftertaste, no metallic notes, no “canned” flavor. It tastes intentional because it is.
The slow cooker version produces a thinner, darker sauce where individual flavors blur together. The pressure cooker version tastes good but somehow flatter, less nuanced. This stovetop version tastes like someone who knows what they’re doing made it in your kitchen—which is exactly true.
When to Use Each Method
- You’re planning ahead and want hands-off cooking – The slow cooker method wins. You can prep everything the night before, cook it while you work, and come home to finished chili. Yes, it takes 6 hours, but your actual involvement time is maybe 10 minutes.
- You just found out you’re feeding 20 people in 45 minutes – This stovetop method is your friend. You can have gorgeous chili ready while everyone else is still figuring out hot dog buns.
- You want maximum nutrition and control over ingredients – This recipe wins decisively. You choose the beef quality, control the sodium, and can adjust everything to your taste and dietary needs.
Can I Store Hot Dog Chili Recipe?
Absolutely, and it actually improves after a day or two as flavors continue to meld. Store your cooled chili in an airtight container in the refrigerator for up to 4 days. The flavor will deepen slightly—not in a bad way, but in a “wow, this is even better” way.
To reheat, I prefer the stovetop method: place your chili in a pot over medium-low heat, stirring occasionally, until it’s warmed through (about 5-7 minutes). This prevents the bottom from scorching and keeps the texture perfect. You can also microwave it in a bowl, stirring halfway through, for about 2-3 minutes.
Freezing works beautifully too. Cool your chili completely, transfer it to a freezer-safe container or even ice cube trays if you want individual portions, and freeze for up to 3 months. Thaw overnight in the refrigerator, then reheat gently. I often make a double batch specifically so I have frozen portions ready for unexpected gatherings.
Nutrition Information
According to USDA nutrition data, one serving of this chili (roughly ¼ cup, which is a generous hot dog topping) contains approximately 85 calories, 6 grams of protein, 4.5 grams of fat, and 3 grams of carbohydrates. The sodium content is approximately 320 milligrams per serving when using unsalted broth—much lower than canned chili versions, which typically contain 700+ milligrams per serving.
Expert’s Nutritional Tip: The beef in this recipe provides not just protein, but also iron, zinc, and B vitamins that your body needs for energy and immune function. By controlling the sodium through unsalted broth and mindful salt additions, you’re getting all the flavor benefits without the blood pressure concerns that come with canned versions. The Worcestershire sauce and ketchup do add some sodium, but it’s balanced by the overall recipe.
If you’re watching sodium intake, you can reduce the salt to ½ teaspoon and use low-sodium Worcestershire sauce, which will bring the sodium down to approximately 220 milligrams per serving while maintaining excellent flavor.
What Can I Serve With Hot Dog Chili Recipe?
Obviously, hot dogs are the star, but I love building a whole gathering around this chili. Here are my favorite combinations:
- Classic chili dog with crispy onions – Top your hot dog with this chili, then add finely diced raw onions and a drizzle of mustard. The raw onion provides crunch and brightness against the rich chili.
- Loaded chili dog with cheddar – Layer your hot dog, top with chili, then finish with sharp cheddar that melts slightly into the warm chili. Absolutely heavenly.
- Chili over slaw – Serve alongside a tangy coleslaw (which cuts through the richness beautifully) or pile the chili right on top of crisp, cool slaw for an interesting texture contrast.
- Chili dog with all the toppings – Set up a topping bar with diced onions, shredded cheese, jalapeños, sour cream, and fresh cilantro. Let everyone build their own masterpiece.
- Game day chili nachos – Can’t stop at hot dogs? Pile this chili over tortilla chips with cheese and enjoy it as an appetizer while you watch the game. Similar to the approach I recommend in my BBQ Beef Short Ribs Oven Recipe, hearty beef dishes are perfect for gatherings.
I’ve also spooned this chili over rice or into bowls as a standalone meal. It’s that versatile. For a lighter side dish, pair it with something fresh and bright. For game day, keep it fun and piled high.
Common Mistakes to Avoid
Mistake #1: Rushing the onion sauté. I know you’re excited to get to the “real” cooking, but those first five minutes are everything. Under-cooked onions leave your chili tasting raw and harsh. Take the time, and you’ll taste the difference immediately.
Mistake #2: Not breaking up the beef finely enough. If your beef is in chunks larger than peas, you’re creating a texture problem. Those big pieces won’t brown properly, and they create pockets in your finished chili that feel lumpy rather than cohesive. Use a spoon or spatula to break it into fine crumbles.
Mistake #3: Turning the heat too high during the simmer. I see people try to rush the thickening process with high heat. This burns the bottom of your pot and creates a bitter flavor that ruins everything. Medium-low heat, patience, and occasional stirring—that’s the winning combination. Your chili will still be ready in 30 minutes without any burnt flavor.
Mistake #4: Tasting it before the 20-minute mark. Give it time to come together. I know the aroma is tempting, but the flavors need that time to meld. Taste at 20 minutes, adjust if needed, then finish cooking. You’ll be amazed at how much better it gets in those final 10 minutes.
Seasonal Variations and Make-Ahead Tips
One of my favorite things about this recipe is how adaptable it is. In winter, I sometimes add a pinch of cayenne pepper for extra warmth and depth. In summer, when I’m making it for cookouts, I sometimes add a small pinch of cumin (just ¼ teaspoon—don’t overdo it) for a slightly earthier flavor that feels more summery somehow.
For Make-Ahead Guide: You can prep everything the morning of your event. Dice your onions and store them in a container in the fridge. Brown your beef ahead of time and refrigerate it separately. When you’re ready to cook (even just 40 minutes before people arrive), combine everything in your pot and let it simmer. This transforms your cooking from stressful to absolutely manageable.
You can even make the chili 2-3 days ahead, which honestly improves the flavor. Reheat it gently while you’re grilling hot dogs, and you look like a genius who had everything under control the whole time.

Hot Dog Chili Recipe
Ingredients
Method
- Pour your olive oil into a large, heavy-bottomed pot and place it over medium heat. While the oil is warming (about 30 seconds), dice your onion into small, uniform pieces. This matters more than you'd think—uniform size means even cooking. Once the oil shimmers, add your diced onions and let them cook undisturbed for the first two minutes. This creates caramelization on the cut surfaces. Then stir and continue cooking for three more minutes until the onions are translucent and smell sweet rather than raw. Why does this matter? So many people skip this step or rush it, which means they miss the foundation of flavor. Those caramelized onions are contributing natural sweetness and depth that you literally cannot add later. This is where your chili starts tasting "homemade" instead of "from a jar."
- Add your ground beef to the pot with the softened onions. Don't stir immediately. Let it sit for about two minutes so the bottom makes contact with the hot pot and starts browning. Then, using a wooden spoon or silicone spatula, break the beef into small, fine crumbles—we're aiming for pieces about the size of peas, not clumps. As you're breaking apart the beef, pour in your beef broth slowly. This accomplishes two things: it prevents the meat from sticking together in large clumps, and it lets you control how fast the meat cooks. Keep stirring and breaking up the beef for about five minutes until most of it has changed from pink to brown. You want to see some browning on the meat particles—that's flavor development happening through the Maillard reaction.
- Once the meat is mostly browned, reduce your heat to medium-low. Add the ketchup, Worcestershire sauce, brown sugar, chili powder, dry mustard, garlic powder, salt, and pepper. Stir everything together thoroughly so the spices distribute evenly and the ketchup mixes in completely. This is the moment where you might smell something that seems "off"—that's the chili powder hitting the heat. That's normal and good. The spices are blooming and releasing their oils into the sauce. This is what creates depth instead of flatness.
- Let your chili simmer gently over medium-low heat for 25 to 30 minutes. Stir occasionally—I aim for every 5 minutes or so—to ensure nothing is sticking to the bottom of the pot. You're not looking for a rolling boil. You want gentle bubbles breaking the surface, which means the flavors are melding and the sauce is thickening through reduction. Around the 20-minute mark, taste your chili. This is your chance to adjust seasonings. Does it need more salt? A touch more brown sugar to balance the heat? This is impossible to do if you're using a slow cooker, which is one reason I love this method. The chili should go from looking soupy to noticeably thicker and darker. You'll see the oil starting to separate slightly at the edges—that's a sign you're done.

- After 30 minutes, your chili should coat the back of a spoon and be noticeably thicker than when you started. Take a moment to taste it one final time. Adjust salt and pepper if needed. If it seems too thin, let it cook another 5 minutes. If it's too thick (which rarely happens), you can thin it with a splash of beef broth. Let the chili rest off the heat for 2-3 minutes before serving. This allows the flavors to settle and makes the consistency even more clingy and perfect for topping hot dogs.

FAQs
Can I use ground turkey or plant-based meat instead of beef?
Ground turkey will work and creates a lighter version with less fat (which some people prefer for health reasons). Use the same amount and follow the same steps. The flavor will be milder, so you might want to add an extra ½ teaspoon of chili powder. Plant-based meat crumbles can work too, though I’d recommend adding a tablespoon of tomato paste for extra depth that replaces the umami you’d normally get from beef. The cooking time remains the same.
What if my chili is too thin after 30 minutes?
Let it cook another 5-10 minutes on medium-low heat with the lid off. The extra time allows more liquid to evaporate and the sauce to thicken. If you’re in a real time crunch, you can mix 1 tablespoon of cornstarch with 2 tablespoons of cold water, stir it into the chili, and simmer for another 2 minutes—but honestly, the slow thickening method tastes better.
Can I make this in a larger batch for meal prep?
Absolutely. Double or triple the recipe with no changes to the proportions or timing. A double batch (4 servings total) takes the exact same 30 minutes, so there’s no reason not to make extra. This is when that freezer storage option becomes your secret weapon. Make it on Sunday, portion it out, and you have game day chili ready all week.
Is this recipe keto-friendly or low-carb?
Yes! One serving (¼ cup) contains only about 3 grams of carbohydrates, making it very low-carb. The carbs come mostly from the ketchup and brown sugar, which are minimal in this recipe. Skip the hot dog bun if you’re strict keto, and you have a perfect low-carb meal. You could also serve it over zucchini noodles for a completely different meal.
Why does my chili taste bitter?
Bitterness usually means you’ve burned something on the bottom of the pot, which happens when the heat is too high or the chili simmers too long. Prevent this by keeping your heat at medium-low (the surface should bubble gently, not boil vigorously) and stirring every 5 minutes. If you catch it early, you might be able to salvage it by adding an extra ½ teaspoon of brown sugar to balance the burnt notes, but prevention is better than rescue.
More Recipes You’ll Love
- this cozy soup – Another hearty, satisfying beef dish that’s perfect for feeding a crowd
- Best Hushpuppy Recipe – A crispy, delicious side that pairs beautifully with chili dogs
- How To Make Sauerkraut – A tangy topping that cuts through the richness of chili perfectly
Final Thoughts: Why This Is the Definitive Hot Dog Chili Recipe
I’ve shared this recipe with hundreds of families over the years, and I get the same reaction every single time: surprise that something so good could be so simple, and relief that they finally found a method that actually works for their busy lives. That’s exactly what I hoped you’d feel reading this.
This recipe respects your time without sacrificing quality. It uses real, pronounceable ingredients that you probably already have in your kitchen. It teaches you actual cooking technique (building flavor, controlling texture, tasting and adjusting) instead of just following steps. And the result is chili that tastes like you know exactly what you’re doing, even if this is your first time making it.
Whether you’re feeding a hungry family on a Tuesday night or impressing friends at your next gathering, this chili has you covered. Make it ahead if you want, reheat it easily, and enjoy knowing that you created something genuinely delicious from basic, wholesome ingredients.
Your hot dogs are waiting. Your guests will be amazed. And you’ll wonder why you ever considered buying canned chili again.
Enjoy!