

Ingredients
Method
Step 1: Build Your Flavor Foundation with the Aromatics
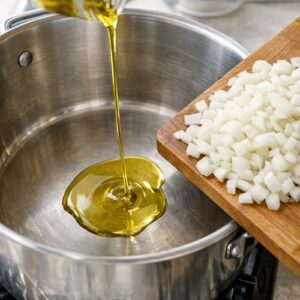
- Pour your olive oil into a large, heavy-bottomed pot and place it over medium heat. While the oil is warming (about 30 seconds), dice your onion into small, uniform pieces. This matters more than you'd think—uniform size means even cooking. Once the oil shimmers, add your diced onions and let them cook undisturbed for the first two minutes. This creates caramelization on the cut surfaces. Then stir and continue cooking for three more minutes until the onions are translucent and smell sweet rather than raw. Why does this matter? So many people skip this step or rush it, which means they miss the foundation of flavor. Those caramelized onions are contributing natural sweetness and depth that you literally cannot add later. This is where your chili starts tasting "homemade" instead of "from a jar."
Step 2: Brown the Meat with Intention
- Add your ground beef to the pot with the softened onions. Don't stir immediately. Let it sit for about two minutes so the bottom makes contact with the hot pot and starts browning. Then, using a wooden spoon or silicone spatula, break the beef into small, fine crumbles—we're aiming for pieces about the size of peas, not clumps. As you're breaking apart the beef, pour in your beef broth slowly. This accomplishes two things: it prevents the meat from sticking together in large clumps, and it lets you control how fast the meat cooks. Keep stirring and breaking up the beef for about five minutes until most of it has changed from pink to brown. You want to see some browning on the meat particles—that's flavor development happening through the Maillard reaction.

Step 3: Layer In Your Flavor Components
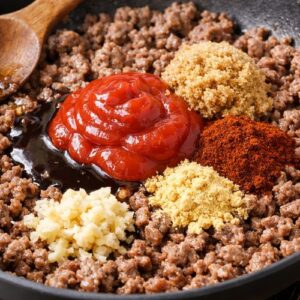
- Once the meat is mostly browned, reduce your heat to medium-low. Add the ketchup, Worcestershire sauce, brown sugar, chili powder, dry mustard, garlic powder, salt, and pepper. Stir everything together thoroughly so the spices distribute evenly and the ketchup mixes in completely. This is the moment where you might smell something that seems "off"—that's the chili powder hitting the heat. That's normal and good. The spices are blooming and releasing their oils into the sauce. This is what creates depth instead of flatness.
Step 4: Simmer and Thicken with Patience
- Let your chili simmer gently over medium-low heat for 25 to 30 minutes. Stir occasionally—I aim for every 5 minutes or so—to ensure nothing is sticking to the bottom of the pot. You're not looking for a rolling boil. You want gentle bubbles breaking the surface, which means the flavors are melding and the sauce is thickening through reduction. Around the 20-minute mark, taste your chili. This is your chance to adjust seasonings. Does it need more salt? A touch more brown sugar to balance the heat? This is impossible to do if you're using a slow cooker, which is one reason I love this method. The chili should go from looking soupy to noticeably thicker and darker. You'll see the oil starting to separate slightly at the edges—that's a sign you're done.

Step 5: Final Check and Serving
- After 30 minutes, your chili should coat the back of a spoon and be noticeably thicker than when you started. Take a moment to taste it one final time. Adjust salt and pepper if needed. If it seems too thin, let it cook another 5 minutes. If it's too thick (which rarely happens), you can thin it with a splash of beef broth. Let the chili rest off the heat for 2-3 minutes before serving. This allows the flavors to settle and makes the consistency even more clingy and perfect for topping hot dogs.