
Ingredients
Method
Step 1: Prep Your Cabbage Like a Pro
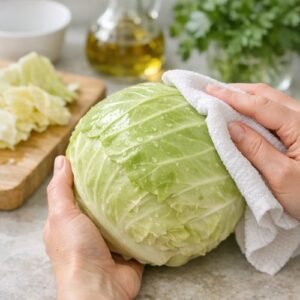
- Start by removing any yellowed or damaged outer leaves from your cabbage head and discarding them. Rinse the whole head under cool water and pat it completely dry with a clean kitchen towel—moisture affects how evenly it cooks. Now comes the part that looks intimidating but is actually quite simple: slice your head into quarters, cutting from top to root. You'll see a dense, pale core in the center; that hard stem is what we're removing. For each quarter, make a angled cut along the inner edge to remove the woody stem completely, leaving the tender leaves intact. This takes about five minutes total for a full head, and this single step determines whether your cabbage will be silky or have tough, stringy bits. Once your quarters are stemmed, lay each one flat on your cutting board and slice across into roughly one-inch strips. Don't worry about perfect uniformity—cabbage is forgiving. You're aiming for pieces large enough that they'll hold their shape during the 12-15 minute simmer, but thin enough that heat penetrates completely. Set all your sliced cabbage into a large colander and let it sit there while you prep your aromatics. If there's any excess moisture, a gentle pat with paper towels helps.
Step 2: Aromatics Create the Foundation
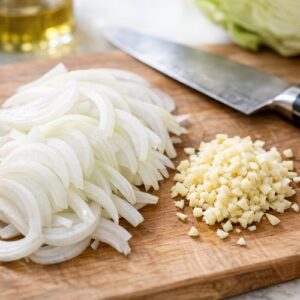
- While your cabbage sits, slice your half onion into thin half-moons—think of them as delicate slivers rather than chunky pieces. Mince your garlic finely. These aromatics are non-negotiable in meal prep cooking because they become more flavorful and aromatic as they sit. By Wednesday, that garlic will have mellowed and infused every bite with savory depth. Have everything prepped and arranged before you start cooking—this is called mise en place, and it's the difference between cooking smoothly and feeling frantic.
Step 3: Build Flavor With Fat
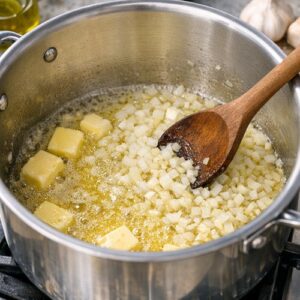
- Choose your largest pot or Dutch oven—something with at least five-quart capacity. You want room for all that cabbage to fit comfortably without crowding. Place it over medium-high heat and add two tablespoons of your butter along with one and a half tablespoons of your olive oil. Let them heat together for about one minute until the butter is foaming gently and starting to smell nutty. This combination of butter and oil gives you two things: the richness of butter and the higher smoke point of olive oil, so nothing burns while you're getting everything into the pot. Once your fat is hot, add your sliced onion and cook, stirring occasionally, for about three minutes. You're not trying to caramelize it—that takes too long for meal prep—just soften it slightly and let it start releasing its sugars. Then add your minced garlic and cook for exactly one minute more. One minute is the sweet spot—enough time for the garlic to become fragrant, not so long that it browns and becomes bitter. This whole aromatics step should take no more than five minutes total.
Step 4: Add the Cabbage and Broth
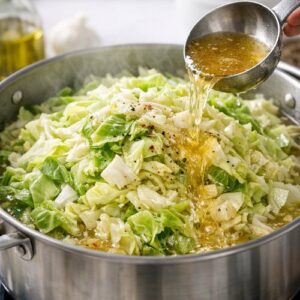
- This is where the transformation happens. Pour in all your prepped cabbage—yes, it looks like an enormous amount, but trust the process. Sprinkle with ½ teaspoon of your salt and a generous pinch of black pepper. Now pour in your chicken broth. The liquid should come about three-quarters of the way up through the cabbage; you're not making soup, just providing enough moisture for braising. Add your bay leaf and smoked paprika if using. Give everything a generous stir with a wooden spoon, making sure the cabbage is submerged as much as possible and the broth is mixed throughout. Increase your heat to high and bring the mixture to a boil—this usually takes four to five minutes. You'll know it's boiling when you see large bubbles breaking the surface and steam rising steadily.
Step 5: The Gentle Simmer—This Is Where Magic Happens
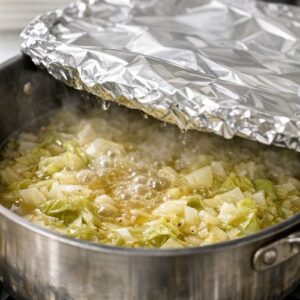
- The moment you see a boil, immediately reduce your heat to low. Place a lid on your pot—if you don't have one that fits, aluminum foil works in a pinch. Now here's the crucial part: you're going to simmer this, covered, for exactly 12 to 15 minutes. I know the temptation is to peek constantly, but resist it. Every time you lift that lid, heat escapes and you're extending your cooking time. Set a timer and step away. Use those minutes to clean your cutting board, wash your knife, or simply breathe. At the 12-minute mark, carefully lift the lid away from you (the steam will be hot) and test a piece of cabbage. It should be completely tender when you bite into it, with no crunch or resistance, but it should not be slimy or falling apart. If it still has any firmness, give it another two to three minutes. This is where experience helps—every stove is different, every head of cabbage has different water content, and knowing when to stop cooking is more important than following a timer religiously.
Step 6: Taste, Adjust, and Cool
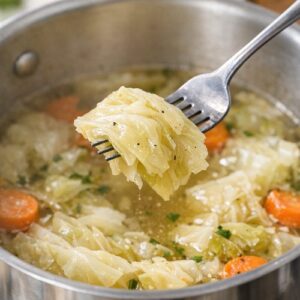
- Turn off the heat and let your pot sit uncovered for five minutes. This cooling window is when you taste. Fishing out a piece of cabbage with a fork, taste it carefully. Does it need more salt? Most people's meal prep batches do—add a pinch and stir. Want more pepper? A little more garlic depth? This is your moment to make it exactly right, because what tastes good warm should taste even better cold or reheated. Once you're satisfied with the flavor, you have two choices: cool the entire pot in an ice bath if you're eating it within a day or two, or divide it into your storage containers right away so it cools faster and more evenly in the refrigerator. I prefer the second option for meal prep because it speeds up the process and immediately portions your week out for you.