
This post contains affiliate links. As an Amazon Associate I earn from qualifying purchases.
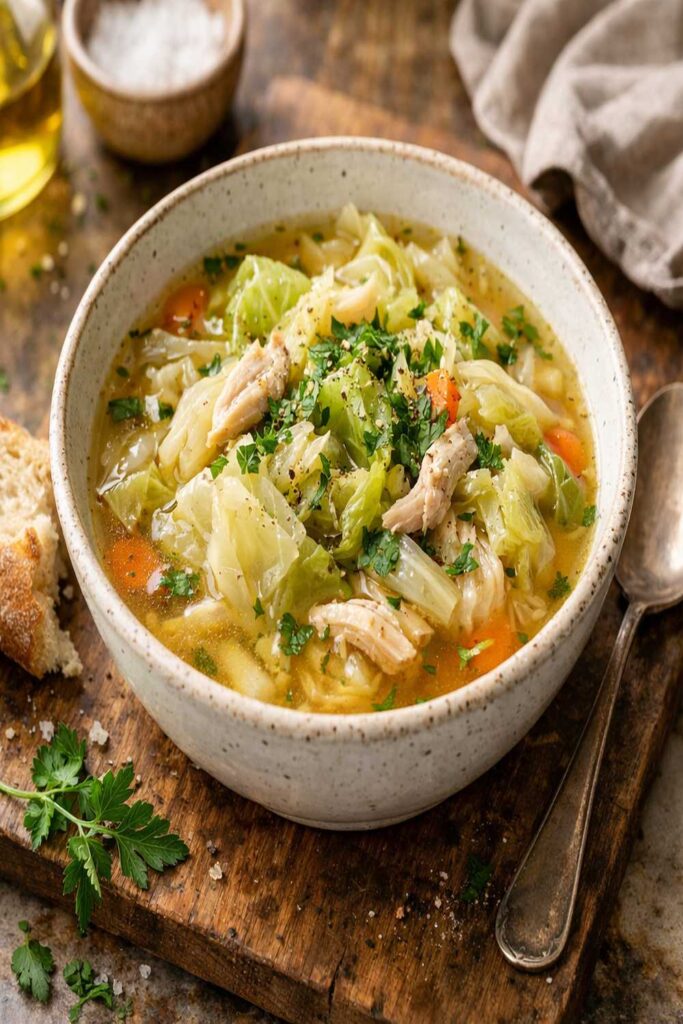
Let me be honest with you—when life gets hectic, the first thing to crumble is your eating schedule. You’re grabbing whatever’s convenient, skipping meals, or ordering takeout again. What if I told you that one simple pot of cabbage simmered in chicken broth could transform your entire week? Make this once on Sunday and you’ll have a nourishing foundation that works for Monday lunches, Wednesday dinners, and Friday comfort bowls. This is exactly the kind of recipe that changed everything for my clients when they learned to cook once and eat well all week. I’ve paired this with other easy weeknight solutions like my this cozy soup to show you how simple, seasonal eating can become your secret weapon against chaos.
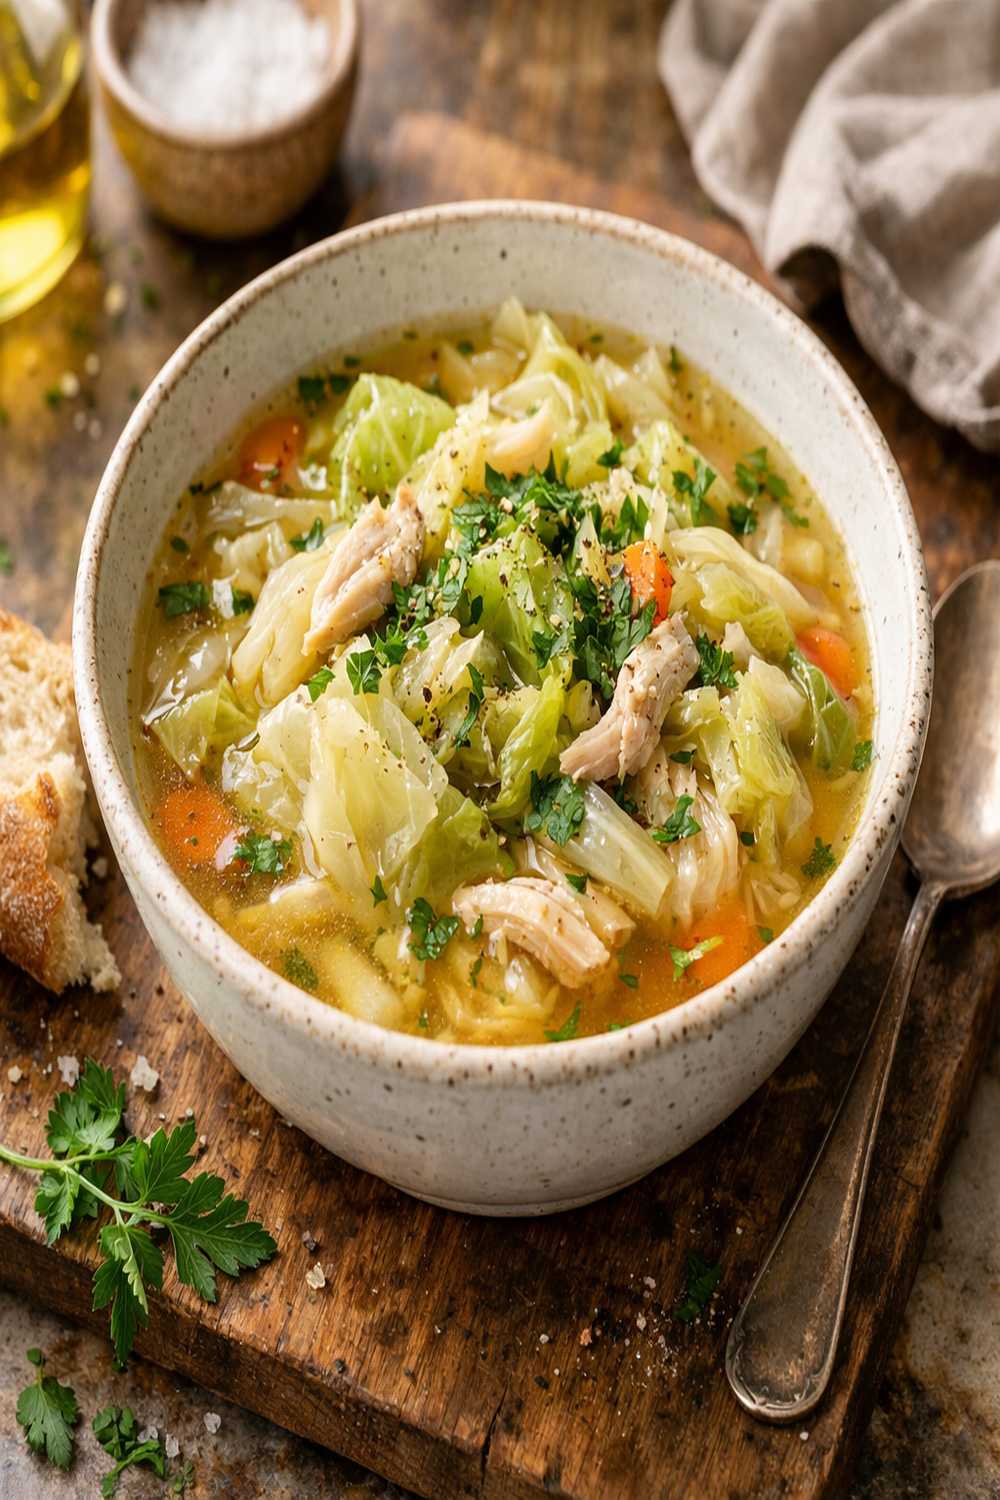
Cabbage With Chicken Broth Recipe Meal Prep: Cook Once, Eat All Week
I discovered the power of this exact approach during my first year working as a dietitian in Syracuse. One of my clients, a single mother juggling two jobs, came to me exhausted. She was relying on processed convenience foods because she simply didn’t have time to cook every single day. I sat with her in my office and we mapped out a Sunday meal prep strategy. That next week, she made a massive batch of braised cabbage in broth—nothing fancy, just butter, aromatics, and patience. By Thursday, she texted me a photo of herself eating a real meal at her desk, one she’d made herself. She’d saved money, felt more energized, and suddenly had time back in her week. That moment crystallized everything I believe about food: it’s not about perfection or complicated techniques. It’s about smart planning that gives you freedom.
Why This Recipe Is Perfect for Meal Prep
- Saves 35-40 minutes across your week – Instead of cooking fresh vegetables four separate times, you’re done in one 20-minute session. That’s nearly an hour of your life back.
- Improves with time and stores beautifully for 5-6 days – Unlike delicate greens that wilt, cabbage actually becomes more tender and flavorful as it sits. The chicken broth creates a light pan sauce that coats every bite.
- Transforms into completely different meals without repetition – Serve it as a side, toss it into grain bowls, layer it into sandwiches, or simmer it with proteins. Your palate never gets bored because the applications keep changing.
Your Weekly Meal Plan With This Recipe
This is where the real magic happens. I’m going to show you exactly how one batch becomes four entirely different eating experiences. The beauty of prepped cabbage is its chameleon quality—it plays the supporting role beautifully, but it’s also substantial enough to anchor a meal.
- Monday Lunch: Cabbage Bowl Foundation – Serve your warm cabbage over a bed of quinoa or brown rice, top with a poached egg and crumbled feta. The broth soaks into the grains and creates a complete, satisfying lunch that takes two minutes to assemble.
- Wednesday Dinner: Chicken & Cabbage Skillet – Reheat your batch, add shredded rotisserie chicken (store-bought, no judgment), a splash of apple cider vinegar, and serve alongside 7-Up Biscuit Recipe for a cozy, complete dinner that feels homemade but took minimal effort.
- Friday Comfort Meal: Cabbage & Sausage One-Pan – Warm your prepped cabbage and fold in cooked Italian sausage, a sprinkle of Parmesan, and fresh herbs. Serve it as is or nestle it into crusty bread for a sandwich that’ll satisfy your end-of-week cravings.
The Ingredients – Scaled for a Full Week
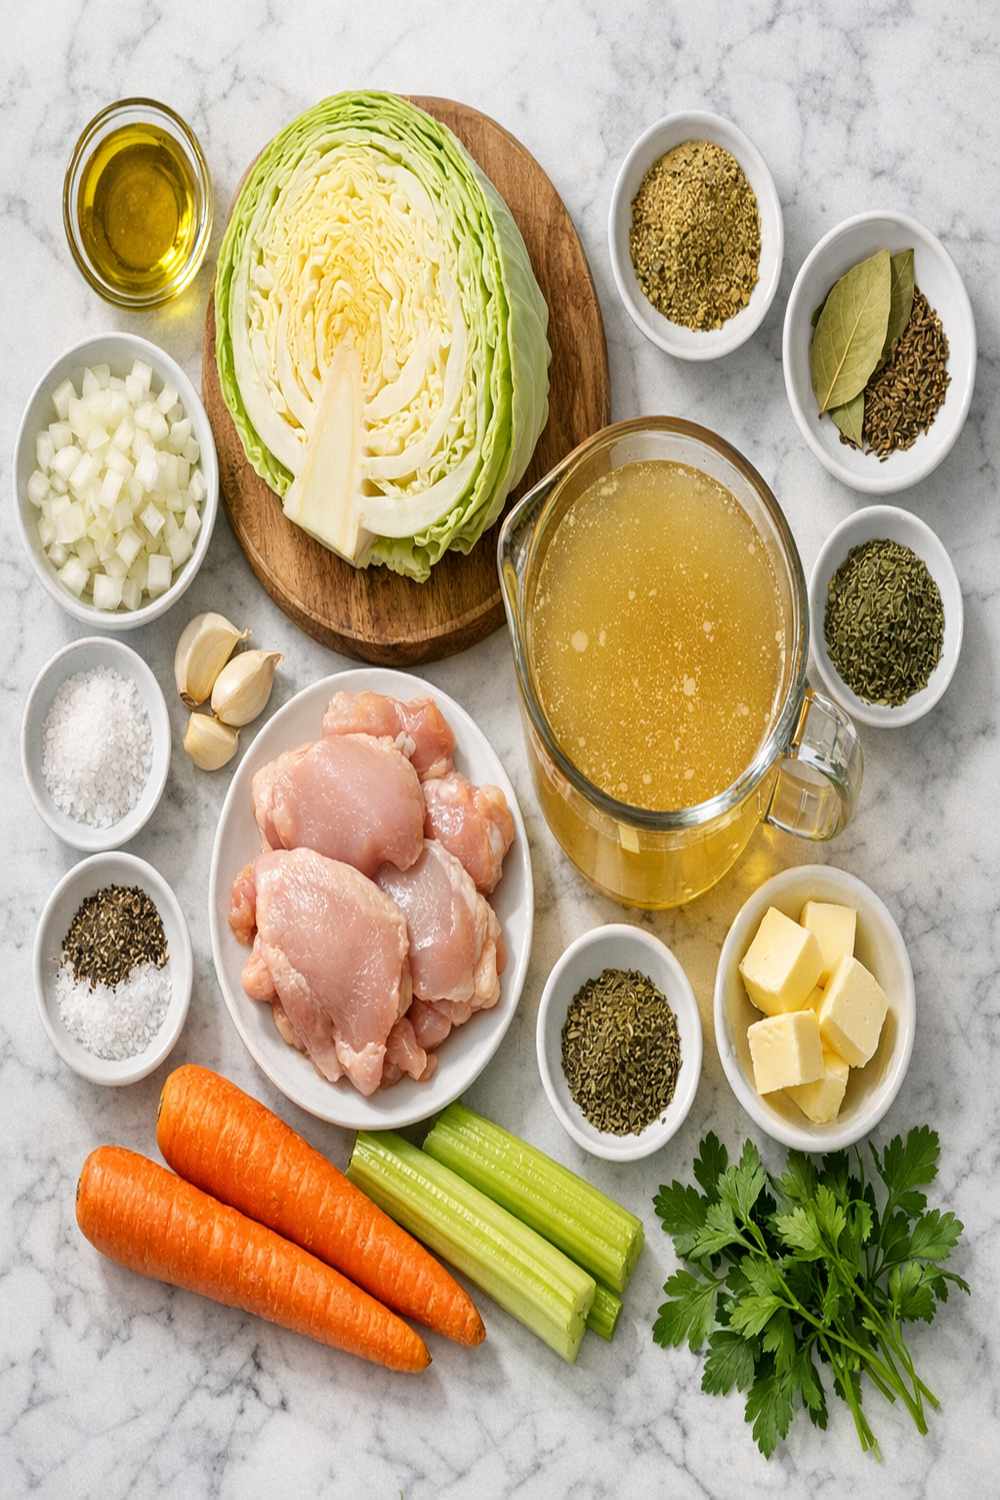
I’m scaling this recipe to make about eight generous servings—enough for side portions all week, with some flexibility for leftovers. Each ingredient is chosen because it stores well and actually improves the dish’s flavor profile over several days.
- 3½ to 4 cups low-sodium chicken broth (room temperature prevents shocking the pot and keeps cooking time consistent)
- ¾ teaspoon sea salt (divided; this allows you to taste and adjust rather than oversalting in one go)
- ½ medium yellow onion, sliced thinly (adds natural sweetness as it braises and creates more body in the liquid)
- 1 bay leaf (removes easily during storage and subtly enhances the savory profile throughout the week)
- 1 large head of green or purple cabbage (about 2.5 pounds; choose one that feels heavy and dense, a sign of freshness and better texture when braised)
- 4 tablespoons unsalted butter (divided into two portions for even browning and richer mouthfeel)
- ½ teaspoon freshly cracked black pepper (to taste; grind just before cooking for maximum aromatic oils)
- ¼ teaspoon smoked paprika (optional but recommended; adds warmth and complexity that makes leftovers taste fresher)
- 3 tablespoons extra-virgin olive oil (adds complexity and helps prevent the cabbage from sticking)
- 2 cloves garlic, minced (provides subtle depth without overpowering the delicate cabbage flavor)
The Meal Prep Process: How to Make Cabbage With Chicken Broth Recipe in Bulk
I’m going to walk you through this like we’re cooking together in my kitchen—with efficiency built in at every step. The goal isn’t speed for speed’s sake, but working smarter so your week runs smoother. Think of this as a meditation with vegetables; there’s a rhythm to it that becomes almost soothing.
Step 1: Prep Your Cabbage Like a Pro
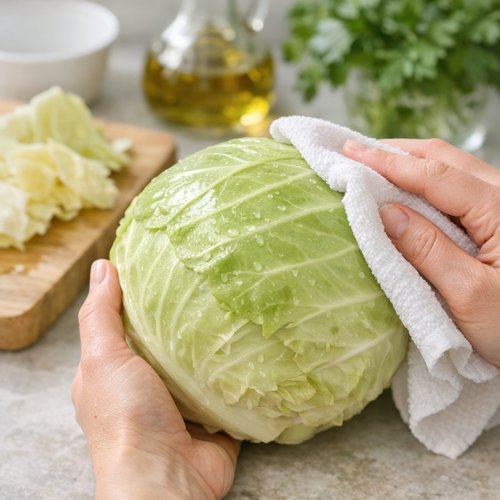
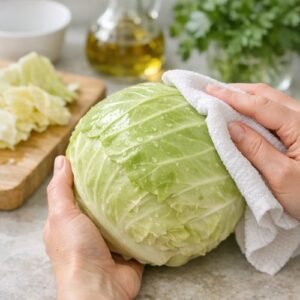
Start by removing any yellowed or damaged outer leaves from your cabbage head and discarding them. Rinse the whole head under cool water and pat it completely dry with a clean kitchen towel—moisture affects how evenly it cooks. Now comes the part that looks intimidating but is actually quite simple: slice your head into quarters, cutting from top to root. You’ll see a dense, pale core in the center; that hard stem is what we’re removing. For each quarter, make a angled cut along the inner edge to remove the woody stem completely, leaving the tender leaves intact. This takes about five minutes total for a full head, and this single step determines whether your cabbage will be silky or have tough, stringy bits.
Once your quarters are stemmed, lay each one flat on your cutting board and slice across into roughly one-inch strips. Don’t worry about perfect uniformity—cabbage is forgiving. You’re aiming for pieces large enough that they’ll hold their shape during the 12-15 minute simmer, but thin enough that heat penetrates completely. Set all your sliced cabbage into a large colander and let it sit there while you prep your aromatics. If there’s any excess moisture, a gentle pat with paper towels helps.
Step 2: Aromatics Create the Foundation
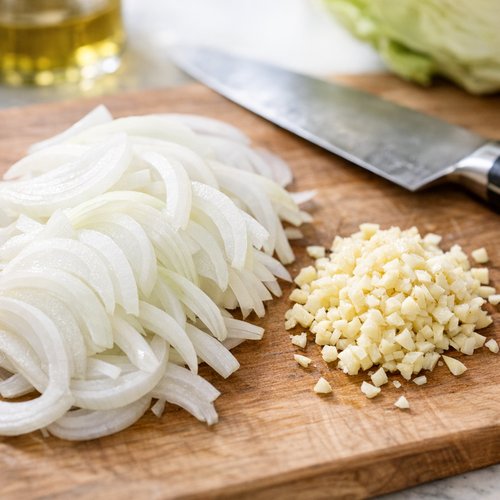
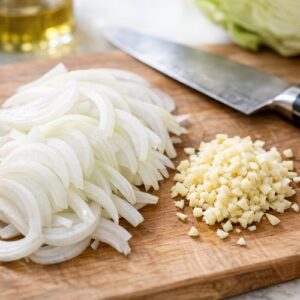
While your cabbage sits, slice your half onion into thin half-moons—think of them as delicate slivers rather than chunky pieces. Mince your garlic finely. These aromatics are non-negotiable in meal prep cooking because they become more flavorful and aromatic as they sit. By Wednesday, that garlic will have mellowed and infused every bite with savory depth. Have everything prepped and arranged before you start cooking—this is called mise en place, and it’s the difference between cooking smoothly and feeling frantic.
Step 3: Build Flavor With Fat
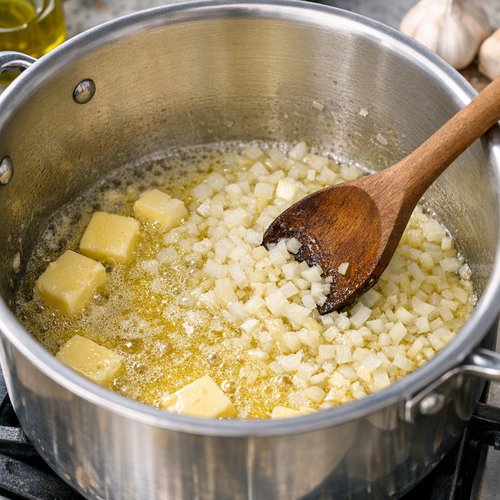
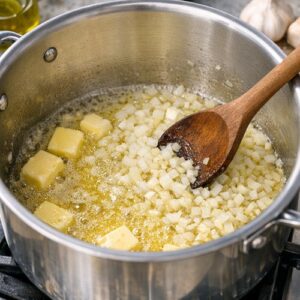
Choose your largest pot or Dutch oven—something with at least five-quart capacity. You want room for all that cabbage to fit comfortably without crowding. Place it over medium-high heat and add two tablespoons of your butter along with one and a half tablespoons of your olive oil. Let them heat together for about one minute until the butter is foaming gently and starting to smell nutty. This combination of butter and oil gives you two things: the richness of butter and the higher smoke point of olive oil, so nothing burns while you’re getting everything into the pot.
Once your fat is hot, add your sliced onion and cook, stirring occasionally, for about three minutes. You’re not trying to caramelize it—that takes too long for meal prep—just soften it slightly and let it start releasing its sugars. Then add your minced garlic and cook for exactly one minute more. One minute is the sweet spot—enough time for the garlic to become fragrant, not so long that it browns and becomes bitter. This whole aromatics step should take no more than five minutes total.
Step 4: Add the Cabbage and Broth
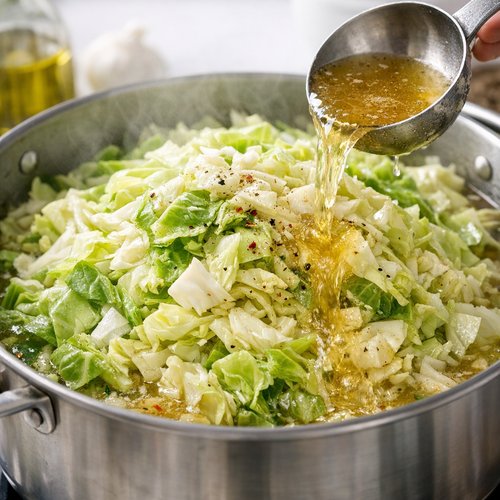
This is where the transformation happens. Pour in all your prepped cabbage—yes, it looks like an enormous amount, but trust the process. Sprinkle with ½ teaspoon of your salt and a generous pinch of black pepper. Now pour in your chicken broth. The liquid should come about three-quarters of the way up through the cabbage; you’re not making soup, just providing enough moisture for braising. Add your bay leaf and smoked paprika if using.
Give everything a generous stir with a wooden spoon, making sure the cabbage is submerged as much as possible and the broth is mixed throughout. Increase your heat to high and bring the mixture to a boil—this usually takes four to five minutes. You’ll know it’s boiling when you see large bubbles breaking the surface and steam rising steadily.
Step 5: The Gentle Simmer—This Is Where Magic Happens
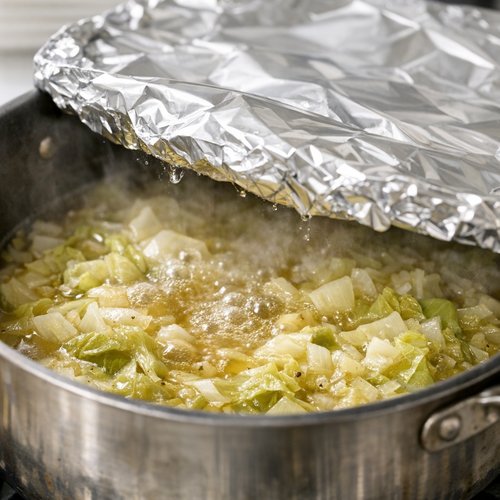
The moment you see a boil, immediately reduce your heat to low. Place a lid on your pot—if you don’t have one that fits, aluminum foil works in a pinch. Now here’s the crucial part: you’re going to simmer this, covered, for exactly 12 to 15 minutes. I know the temptation is to peek constantly, but resist it. Every time you lift that lid, heat escapes and you’re extending your cooking time. Set a timer and step away. Use those minutes to clean your cutting board, wash your knife, or simply breathe.
At the 12-minute mark, carefully lift the lid away from you (the steam will be hot) and test a piece of cabbage. It should be completely tender when you bite into it, with no crunch or resistance, but it should not be slimy or falling apart. If it still has any firmness, give it another two to three minutes. This is where experience helps—every stove is different, every head of cabbage has different water content, and knowing when to stop cooking is more important than following a timer religiously.
Step 6: Taste, Adjust, and Cool
Turn off the heat and let your pot sit uncovered for five minutes. This cooling window is when you taste. Fishing out a piece of cabbage with a fork, taste it carefully. Does it need more salt? Most people’s meal prep batches do—add a pinch and stir. Want more pepper? A little more garlic depth? This is your moment to make it exactly right, because what tastes good warm should taste even better cold or reheated.
Once you’re satisfied with the flavor, you have two choices: cool the entire pot in an ice bath if you’re eating it within a day or two, or divide it into your storage containers right away so it cools faster and more evenly in the refrigerator. I prefer the second option for meal prep because it speeds up the process and immediately portions your week out for you.
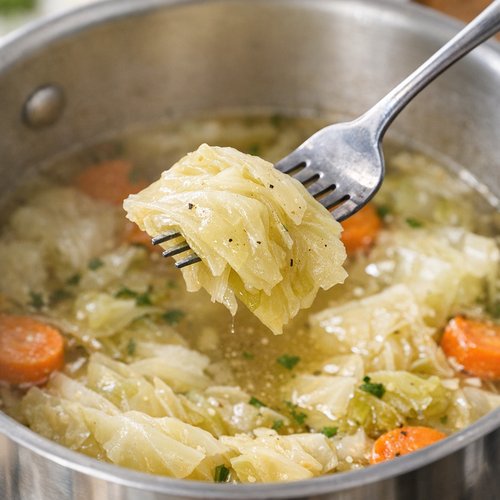
Storage and Organization System
- Glass containers with locking lids – Glass doesn’t absorb flavors or odors, doesn’t leach chemicals, and you can see exactly what’s inside at a glance. I use three to four quart-sized containers, dividing the batch evenly. Glass also transitions beautifully from refrigerator to microwave to table.
- Portioning strategy: half-cup to three-quarter-cup portions – This amount works as a side dish for most people, or as a base for building a bowl meal. If you’re planning to use it as the main component of a meal, you might do one-cup portions instead. Think about how you actually eat, not how you think you should eat.
- Waterproof label system with date and contents – Use a permanent marker on masking tape, or invest in waterproof labels. Write the date you made it and “Braised Cabbage in Broth.” On Friday when you’re tired and hungry, you’ll be grateful to see exactly what’s in that container without having to open it and smell it.
How to Reheat Without Losing Quality
Stovetop method (my recommendation for best texture): Place your container of cabbage into a small saucepan over medium heat. Don’t cover it—let some of the liquid evaporate slightly and concentrate. This takes about five to seven minutes and actually makes the broth taste richer. Stir occasionally and taste as you go. The cabbage will become tender throughout without becoming mushy, and you’ll have time to think about what you’re adding to it.
Microwave method (when you’re in a hurry): Transfer your portion to a microwave-safe bowl, cover loosely with a paper towel, and heat for two to three minutes at 50% power. The lower power setting prevents the liquid from boiling aggressively and keeps the cabbage from becoming slimy. Give it a stir halfway through. This is faster but requires more attention to achieve the same quality as stovetop.
Cold method (yes, really): Sometimes the best way to eat this is straight from the container, at room temperature or slightly chilled, especially when you’re pairing it with something warm like grilled chicken or stirred into a grain bowl. The cabbage has already released its flavors and the cool temperature provides a refreshing contrast.
Can I Freeze Cabbage With Chicken Broth Recipe?
Absolutely, and this is where meal prep becomes truly powerful. Here’s exactly how: let your batch cool completely to room temperature—this usually takes about an hour on the counter, or 30 minutes in an ice bath. Divide it into your freezer containers, leaving about half an inch of headspace at the top because the liquid will expand as it freezes. Label with the date and contents. Your braised cabbage will keep in the freezer for up to three months without any loss of quality.
To thaw, transfer a container to the refrigerator the night before you want to eat it—overnight thawing prevents any texture breakdown. The next day, reheat using the stovetop method I described above. Alternatively, you can reheat straight from frozen in a saucepan over medium-low heat, which takes about eight to ten minutes, stirring occasionally. Never microwave frozen cabbage in broth—the uneven heating can create mushy spots. Stovetop reheating, whether from frozen or thawed, gives you the most control and the best final texture.
Nutrition Information
Per serving (approximately ¾ cup): 95 calories, 7 grams total fat, 2 grams saturated fat, 0 milligrams cholesterol, 285 milligrams sodium, 8 grams carbohydrates, 2 grams dietary fiber, 4 grams sugar, 2 grams protein. This data reflects USDA nutritional standards for braised cabbage with broth.
What I love about this recipe from a clinical nutrition perspective is what it gives you beyond these numbers. Cabbage is a cruciferous vegetable, meaning it contains compounds called glucosinolates that your body converts into cancer-fighting substances during digestion. You’re getting vitamin C for immune function, vitamin K for bone health, and folate for cellular function. The chicken broth contributes collagen and amino acids that support joint health and gut integrity. When you eat this four times a week across your meal prep week, you’re not just filling your stomach—you’re actively nourishing your body. That’s the difference between eating and nourishing yourself.
What to Pair With Cabbage With Chicken Broth Recipe Throughout the Week
The key to not getting bored with meal prep is pairing your base differently each time. Your braised cabbage should anchor the meal, but surrounding ingredients should shift based on what sounds good and what you have available. Here are my favorite combinations throughout the week:
- Monday: Grain Bowl with Soft Egg – Serve your warm cabbage over cooked farro or wild rice, top with a soft-boiled egg and crumbled goat cheese. Drizzle with a tiny bit of red wine vinegar.
- Tuesday: Cabbage & Bean Simmer – Reheat your cabbage and stir in a can of white beans (cannellini or great northern) that you’ve drained and rinsed. The starchy beans add substance and transform this into a light, plant-forward meal.
- Wednesday: Side to Roasted Protein – Keep your cabbage simple and serve it alongside a piece of baked salmon or a grilled pork chop. The broth acts like a light sauce, and the vegetable-forward portion keeps the meal balanced.
- Thursday: Sandwich Foundation – This might sound unusual, but warm cabbage is incredible layered into a sturdy whole-grain bread with thinly sliced roast turkey, mustard, and a slice of Swiss cheese. The broth-soaked cabbage adds moisture and flavor.
- Friday: Creamy Pasta Mix-In – Cook whole wheat pasta, drain it (don’t rinse), and toss it with your reheated cabbage, a splash of cream, and grated Parmesan. Finish with fresh dill or parsley. This feels indulgent but is actually quite light.
To prevent meal fatigue, vary your proteins and add fresh herbs or bright acids (vinegar, lemon juice) to each iteration. The cabbage foundation stays consistent, but everything else shifts.
Expert’s Nutritional Tip
As a registered dietitian, I want to share something I’ve noticed in my practice: when people regularly eat cruciferous vegetables like cabbage, their digestion actually improves over time. Initially, some people experience a little bloating—that’s because cabbage contains oligosaccharides, carbohydrates that require specific gut bacteria to digest fully. But here’s the magic: within two to three weeks of regular consumption, your microbiome adapts and that bloating disappears completely. You’re actually feeding your beneficial gut bacteria and strengthening your digestive system. This is why I encourage people to eat the vegetables they think don’t agree with them—persistence, not avoidance, is how we optimize our health. Your body is smarter than you think.
Make-Ahead Guide: The Week-Long Strategy
Sunday is your cooking day. I recommend doing this right after you’ve returned from your farmer’s market or grocery store, while your vegetables are at peak freshness and your motivation is highest. Set aside 45 minutes total—20 minutes for prep, 20 minutes for cooking and cooling, 5 minutes for portioning and labeling.
Make this batch once on Sunday, and you’ve accomplished something significant. You’ve removed the decision-making fatigue from most of your week. No more standing at the refrigerator Tuesday night wondering what to make. No more falling back on takeout because cooking feels overwhelming. You’ve literally bought yourself peace of mind and nutritional security.
If you’re cooking for a family of four, double this recipe and you’ve got side portions for eight days. You can freeze half and rotate it in the second week. If you’re single and cooking just for yourself, this batch gives you multiple meals across the week plus flexibility for unexpected guests or schedule changes.
Common Mistakes to Avoid
Mistake 1: Not removing the core stem completely. I see this constantly. People think they can leave little bits of that woody stem in there—it’s still there, it’s still tough, and it ruins the eating experience. Take the extra 30 seconds to angle-cut along the entire inner edge of each quarter. Your future self will thank you.
Mistake 2: Overcooking the cabbage even slightly. The line between “perfectly tender” and “slimy and mushy” is genuinely narrow—about two minutes. Once cabbage crosses that line, you can’t uncross it. That’s why I emphasize checking at the 12-minute mark and tasting before adding more time. Better to be slightly underdone (you can eat it cold or soften it more in reheating) than overdone.
Mistake 3: Skipping the seasoning adjustment at the end. Many home cooks think seasoning is a one-time thing, done at the beginning. Professional cooks know that tasting and adjusting at the end is where dishes come alive. Your cabbage needs that final check because flavors concentrate as the liquid reduces slightly. This step takes 90 seconds and transforms your dish from “fine” to “delicious.”
Mistake 4: Storing without proper labeling. I know it seems obvious, but you’d be surprised how many people open containers Wednesday night and think “Is this from Sunday or Tuesday?” and eat it anyway. Then Friday rolls around and something smells off. Labeling takes 15 seconds and prevents food waste plus potential foodborne illness. Just do it.
Seasonal Variations: Adapt Throughout the Year
Spring variation: Use green cabbage and add fresh herbs at the end—lots of dill, chives, and tarragon. The brighter flavors match spring eating. You can also use spring onions instead of regular onions for a lighter profile.
Summer variation: Add a splash of apple cider vinegar and a pinch of caraway seeds. Serve it chilled with fresh herbs, almost like a slaw. It becomes a completely different dish that’s refreshing on hot days.
Fall variation: Switch to red/purple cabbage, add a whole cinnamon stick and star anise to your broth. The earthier spices and deeper color make this feel more autumnal. It pairs beautifully with roasted root vegetables and pork.
Winter variation: This is when I add a splash of cream to the final broth and increase the smoked paprika. Serve it over mashed potatoes or alongside roasted meats. The dish becomes richer and more comforting.

Cabbage With Chicken Broth Recipe
Ingredients
Method
- Start by removing any yellowed or damaged outer leaves from your cabbage head and discarding them. Rinse the whole head under cool water and pat it completely dry with a clean kitchen towel—moisture affects how evenly it cooks. Now comes the part that looks intimidating but is actually quite simple: slice your head into quarters, cutting from top to root. You'll see a dense, pale core in the center; that hard stem is what we're removing. For each quarter, make a angled cut along the inner edge to remove the woody stem completely, leaving the tender leaves intact. This takes about five minutes total for a full head, and this single step determines whether your cabbage will be silky or have tough, stringy bits. Once your quarters are stemmed, lay each one flat on your cutting board and slice across into roughly one-inch strips. Don't worry about perfect uniformity—cabbage is forgiving. You're aiming for pieces large enough that they'll hold their shape during the 12-15 minute simmer, but thin enough that heat penetrates completely. Set all your sliced cabbage into a large colander and let it sit there while you prep your aromatics. If there's any excess moisture, a gentle pat with paper towels helps.
- While your cabbage sits, slice your half onion into thin half-moons—think of them as delicate slivers rather than chunky pieces. Mince your garlic finely. These aromatics are non-negotiable in meal prep cooking because they become more flavorful and aromatic as they sit. By Wednesday, that garlic will have mellowed and infused every bite with savory depth. Have everything prepped and arranged before you start cooking—this is called mise en place, and it's the difference between cooking smoothly and feeling frantic.
- Choose your largest pot or Dutch oven—something with at least five-quart capacity. You want room for all that cabbage to fit comfortably without crowding. Place it over medium-high heat and add two tablespoons of your butter along with one and a half tablespoons of your olive oil. Let them heat together for about one minute until the butter is foaming gently and starting to smell nutty. This combination of butter and oil gives you two things: the richness of butter and the higher smoke point of olive oil, so nothing burns while you're getting everything into the pot. Once your fat is hot, add your sliced onion and cook, stirring occasionally, for about three minutes. You're not trying to caramelize it—that takes too long for meal prep—just soften it slightly and let it start releasing its sugars. Then add your minced garlic and cook for exactly one minute more. One minute is the sweet spot—enough time for the garlic to become fragrant, not so long that it browns and becomes bitter. This whole aromatics step should take no more than five minutes total.
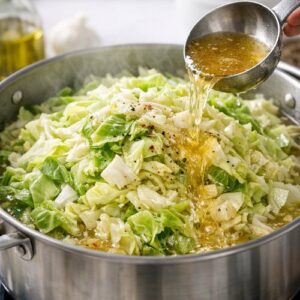
- This is where the transformation happens. Pour in all your prepped cabbage—yes, it looks like an enormous amount, but trust the process. Sprinkle with ½ teaspoon of your salt and a generous pinch of black pepper. Now pour in your chicken broth. The liquid should come about three-quarters of the way up through the cabbage; you're not making soup, just providing enough moisture for braising. Add your bay leaf and smoked paprika if using. Give everything a generous stir with a wooden spoon, making sure the cabbage is submerged as much as possible and the broth is mixed throughout. Increase your heat to high and bring the mixture to a boil—this usually takes four to five minutes. You'll know it's boiling when you see large bubbles breaking the surface and steam rising steadily.
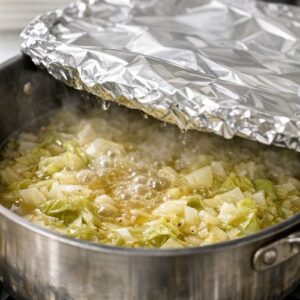
- The moment you see a boil, immediately reduce your heat to low. Place a lid on your pot—if you don't have one that fits, aluminum foil works in a pinch. Now here's the crucial part: you're going to simmer this, covered, for exactly 12 to 15 minutes. I know the temptation is to peek constantly, but resist it. Every time you lift that lid, heat escapes and you're extending your cooking time. Set a timer and step away. Use those minutes to clean your cutting board, wash your knife, or simply breathe. At the 12-minute mark, carefully lift the lid away from you (the steam will be hot) and test a piece of cabbage. It should be completely tender when you bite into it, with no crunch or resistance, but it should not be slimy or falling apart. If it still has any firmness, give it another two to three minutes. This is where experience helps—every stove is different, every head of cabbage has different water content, and knowing when to stop cooking is more important than following a timer religiously.
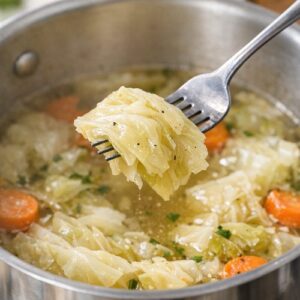
- Turn off the heat and let your pot sit uncovered for five minutes. This cooling window is when you taste. Fishing out a piece of cabbage with a fork, taste it carefully. Does it need more salt? Most people's meal prep batches do—add a pinch and stir. Want more pepper? A little more garlic depth? This is your moment to make it exactly right, because what tastes good warm should taste even better cold or reheated. Once you're satisfied with the flavor, you have two choices: cool the entire pot in an ice bath if you're eating it within a day or two, or divide it into your storage containers right away so it cools faster and more evenly in the refrigerator. I prefer the second option for meal prep because it speeds up the process and immediately portions your week out for you.
FAQs
How long does this cabbage last in the refrigerator?
Properly stored in glass containers with lids, your braised cabbage will keep for five to six days in the refrigerator. By day five, the flavor actually becomes more concentrated and the color might deepen slightly—this is totally normal and doesn’t indicate spoilage. If you smell anything off or see any mold, discard it. When in doubt, throw it out.
Can I make this in my Instant Pot or pressure cooker?
You can, but I don’t recommend it for meal prep specifically. The high pressure can break down the cabbage too much and create a mushier texture than you want across several days of eating. The traditional stovetop simmer gives you more control and a better final texture. Stick with the method I’ve outlined—it works beautifully.
My cabbage tastes too watery. What’s happening?
This usually means you used too much broth or cooked it too long. Fresh cabbage releases quite a bit of water as it braises, so that liquid combines with your broth. Next time, start with 3 cups of broth instead of 4, and taste at 12 minutes rather than cooking longer. You can also let your finished batch cool uncovered for 15 minutes before storing—some of that excess liquid will evaporate and the flavors will concentrate.
Is this recipe appropriate for people with digestive issues?
Cabbage is actually incredibly soothing for the digestive system—it’s been used in traditional medicine for centuries to calm inflammation. However, if you have issues with raw cruciferous vegetables specifically, thoroughly cooked cabbage (which you’re doing with the simmer method) is much gentler. The cooking breaks down the fibrous structure and the broth makes it easier for your digestive system to process. Start with smaller portions if you’re new to eating cruciferous vegetables regularly.
Can I use a different type of cabbage—like Napa or red cabbage?
Absolutely. Napa cabbage will cook slightly faster and be more delicate—reduce your simmer time to 10 minutes. Red/purple cabbage takes about the same time but will turn everything slightly purple, which looks dramatic but tastes the same. Green cabbage, which is what I recommend for beginners, is the most forgiving and takes the full 12-15 minutes. All types work beautifully in this recipe.
More Meal Prep Recipes You’ll Love
- Beef And Macaroni Soup Recipe – Another hearty make-ahead meal that transforms throughout your week
- this cozy soup – A cabbage-forward option if you want more variety using this versatile vegetable
This braised cabbage in broth recipe represents something deeper than just a weeknight side dish. It’s proof that you don’t need complicated techniques or exotic ingredients to nourish yourself well. You need planning, intention, and about 20 minutes of focused cooking time on a Sunday. That’s the barrier between chaos and calm eating. That’s the difference between wondering what you’ll eat and knowing exactly what nourishing food is waiting for you. I encourage you to make this recipe this weekend. Get a beautiful head of cabbage, gather your simple ingredients, and spend those 20 minutes being present with the process. Let the steam rise, let the kitchen smell like home, and feel the power of taking control of your own nutrition. Your week will be better for it. Enjoy!